Setup Pihole To Work With Pfsense


Overview#
- I'm assuming you already setup Pihole in either:
- I'm assuming you already setup Pfsense in either:
- Bare Hardware Instructions
- Netgate appliance (it's preconfigured for Pfsense from the start)
How to configure Pihole, to send traffic to Pfsense#
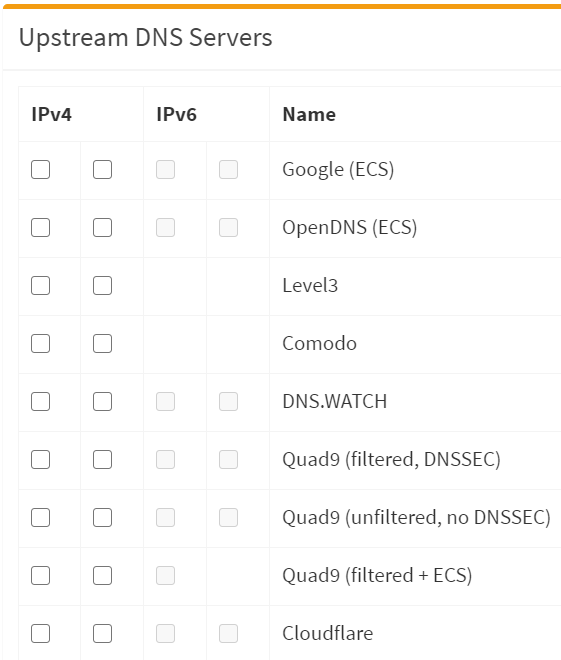
- Pihole, Dashboard, Settings, DNS tab
First setting#
- In Upstream DNS, disable all
- Reason for disabling is because Pfsense will be doing this job now
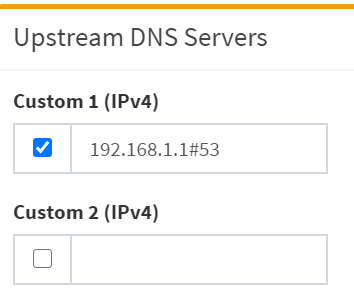
Second setting#
- Enable Custom 1 (IPv4)
- Type:
192.168.1.1 (IP of my pfsense)
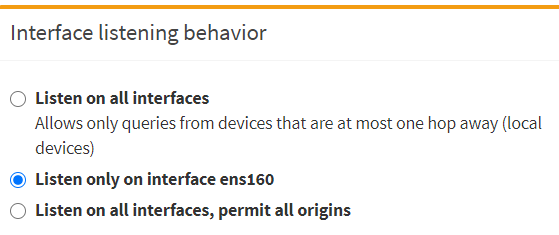
Third setting#
- Under Interface listening behavior
- Select: Listen only on interface ens160
- Caution: If you set Listen on all interfaces, your Pihole won't work.
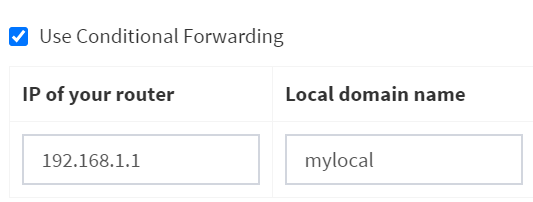
Fourth setting#
- Enable Use Conditional Forwarding
- IP of your Router:
192.168.1.1 (which is the IP of pfsense)- This helps Pihole to show hostnames instead of IPs.
- Local Domain Name:
mylocal (which we setup in pfsense earlier)- This helps Pihole to show hostnames instead of IPs.
How to configure Pfsense, to accept traffic from Pihole#
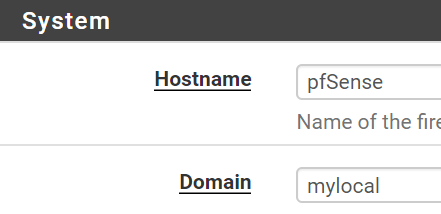
- Pfsense, Dashboard, System, General Setup
- Under System:
- Hostname:
pfsense (in my case) - Domain:
mylocal (you can use anything else, it's up to you)
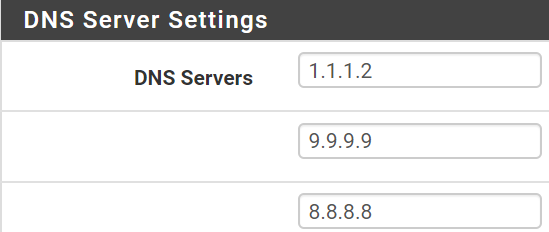
- Under DNS Servers
- Make sure you see only Public DNS servers like:
1.1.1.1 (for Cloudflare)9.9.9.9 (for Quad9)8.8.8.8 (for Google)- The order doesnt matter, as Pfsense will send requests to multiple servers and whoever is fastest will respond.
- DNS Server Overrride make sure this is disabled
- since your ISP's DNS servers most likely won't have DNS-over-TLS.
- also, do you really want to use your ISP DNS servers? not me!
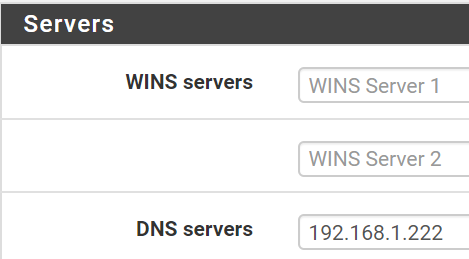
- Pfsense, Dashboard, Services, DHCP Server, LAN
- Under Servers, subsection DNS Servers, type in
192.168.222 (IP of my Pihole) - Leave all other DNS servers blank.
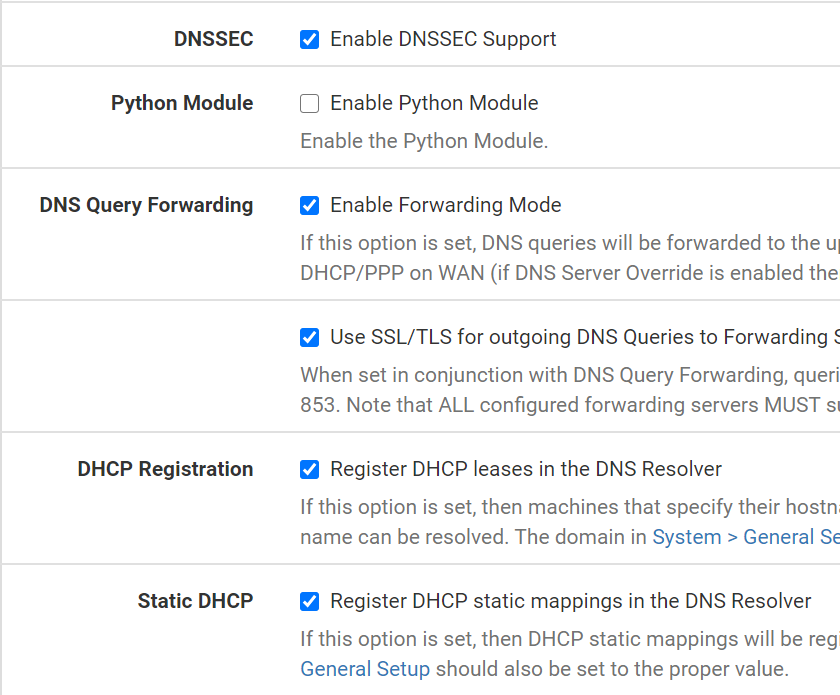
- Pfsense, Dashboard, Services, DNS Resolver, DNS Settings, under General DNS Resolver Options:
- Enable: DNSSEC
- DNSSEC creates a secure domain name system by adding cryptographic signatures to existing DNS records.
- If you care about security and privacy, enable it.
- Enable: Enable Forwarding Mode
- Will change from port 53 (default non-secure DNS queries) to port 853 (secure DNS-over-TLS queries)
- Enable: Use SSL/TLS for outgoing DNS Queries to forwarding servers
- Will change from port 53 (default non-secure DNS queries) to port 853 (secure DNS-over-TLS queries)
- Enable: Register DHCP leases in the DNS Resolver
- This helps Pihole to show hostnames instead of IPs.
- Enable: Register DHCP static mappings in the DNS Resolver
- This helps Pihole to show hostnames instead of IPs.
Conclusion#