Setup Pfsense In Virtual Machine (Hyper-V)

Download Pfsense
- Go to Pfsense.org
- For Architecture: AMD64 (64-bit)
- For Installer: CD Image (ISO) Installer
- For Mirror: Any location
- Select Download button
- This will download pfSense-CE-x.x.x-RELEASE-amd64.iso.gz (approx. 400mb in size).
- Extract pfSense-CE-x.x.x-RELEASE-amd64.iso.gz and you'll see pfSense-CE-x.x.x-RELEASE-amd64.iso
Pfsense minimum requirements
- CPU 600 MHz or faster
- RAM 512 MB or more
- 4 GB or larger disk drive (SSD recommended over HD)
Network Diagram
This is the network diagram of the setup I'm using.
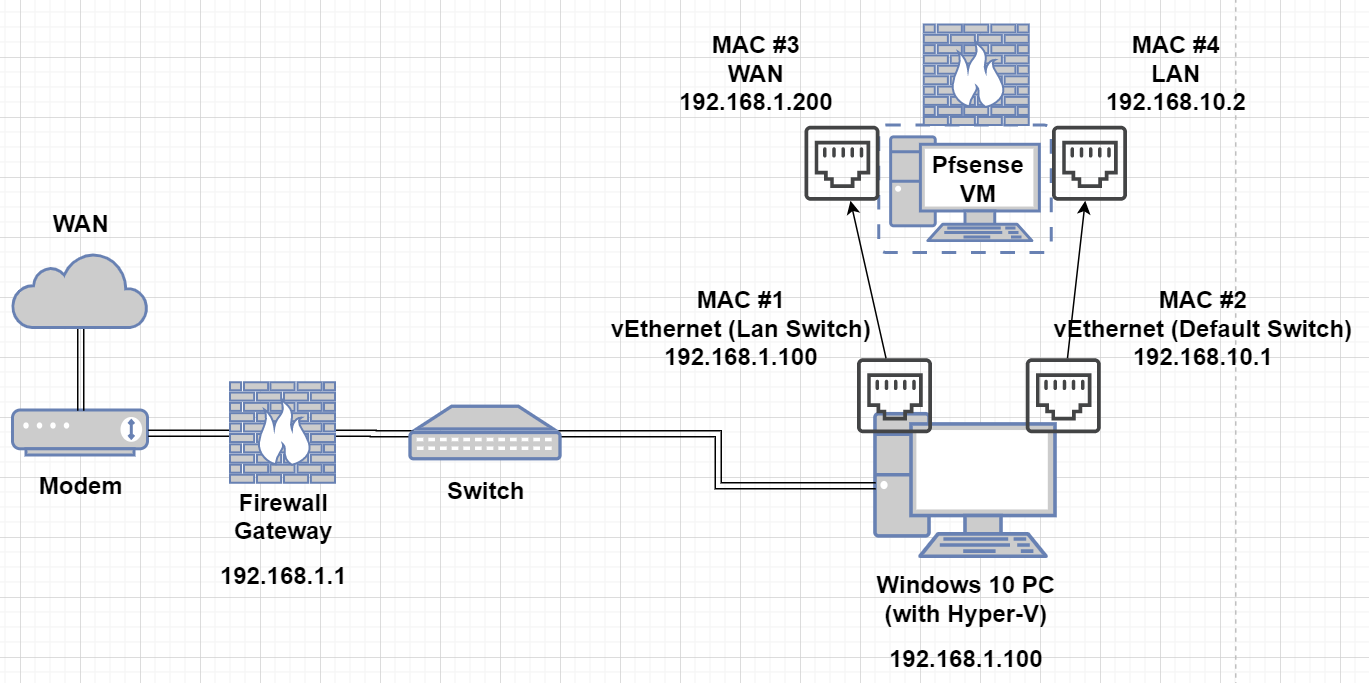
- Firewall/Gateway: 192.168.1.1
- Windows 10 (with Hyper-V) pc on network, IP: 192.168.1.100
- MAC No.1 is the MAC address of the vEthernet (LAN Switch) on Win10PC
- Will be on 192.168.1.0/24 network
- 04:D9:F5:XX:XX:XX = the MAC of my Realtek Gbps NIC
- MAC No.2 is the MAC address of the vEthernet (Default Switch) on Win10PC
- Will be on 192.168.10.0/24 network
- I will be setting static IP of 192.168.10.1 (later on)
- 00:15:5D:30:CB:6C = assigned by Hyper-V
- MAC No.3 is the MAC address of the Pfsense WAN interface
- Will be on 192.168.1.0/24 network
- I will be setting static IP of 192.168.1.200 (later on)
- 00:15:5D:01:7B:0B = assigned by Hyper-V
- MAC No.4 is the MAC address of the Pfsense LAN interface
- Will be on 192.168.10.0/24 network
- I will be setting static IP of 192.168.10.2 (later on)
- 00:15:5D:01:7B:0A = assigned by Hyper-V
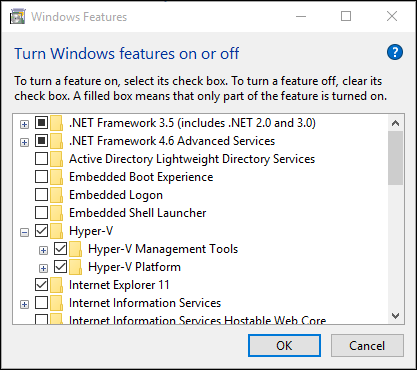
Enable the Hyper-V in Windows 10
- Right click on the Windows button and select Apps and Features.
- Select Programs and Features on the right under related settings.
- Select Turn Windows Features on or off.
- Select Hyper-V and click OK.
Configure Networks in Hyper-V
- Open Hyper-V Manager
- Select Virtual Switch Manager
- By default, there is already a Default Switch (which is linked to an internal network).
- Internal Network is behind a NAT (in my case it will be on 192.168.10.1/24 network)

- We need to add a new virtual switch, so we can use our default LAN network (192.168.1.0/24).
- Virtual Switch Manager, Select New virtual network switch, choose external, select create virtual switch
- I called it LAN switch
- Select External Network (and you'll see the NIC adapter name for your machine)
- This will be on the 192.168.1.0/24 network

In summary:
- Default Switch = behind the NAT = 192.168.10.1/24 network
- LAN Switch = connected to your LAN network = 192.168.1.0/24 network
Change your network adapter's IP, to suit your case
- Control Panel > Network and Internet > Network Connections
- You'll see the 3 items:
- Ethernet
- your default adapter
- which gets disabled due to Hyper-V
- vEthernet (LAN switch)
- on your LAN network (192.168.1.0/24) already
- vEthernet (Default Switch)
- Behind NAT
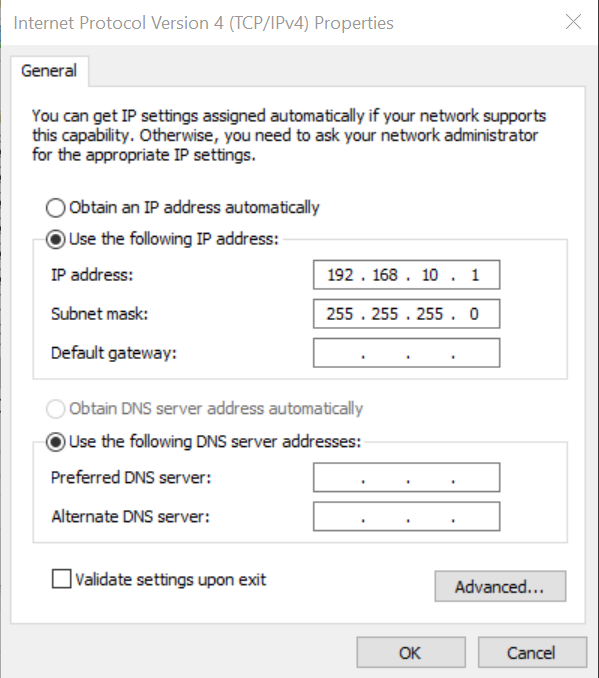
- Select Properties, Select IPv4, Select Properties, change IP to
192.168.10.1, change subnet255.255.255.0(this is /24 subnet). Leave other options blank.
- Ethernet
Create a new virtual machine in Hyper-V Manager
- Select New Virtual Machine
- Name it:
pfsensevm(or similar) - Select Generation 1 (Gen2 won't work on Pfsense)
- Startup Memory: 1024mb (default)(leave as is)
- Connection: Select Default Switch (we'll add the second one later)
- Select Create virtual hard disk
- Select Install an operating system from a bootable CD/DVD-ROM
- Select Image file (.iso)
- Select Browse
- Look for the ISO file you got earlier
- Select Finish
- Before powering up, right-click on that VM, select settings
- On the right-hand side, choose option Network Adapter and hit Add button.
- Choose option LAN Switch and hit OK button.
Start Pfsense virtual machine
- Power on the pfsense virtual machine
- Start the installation and wait for it to get to the main screen
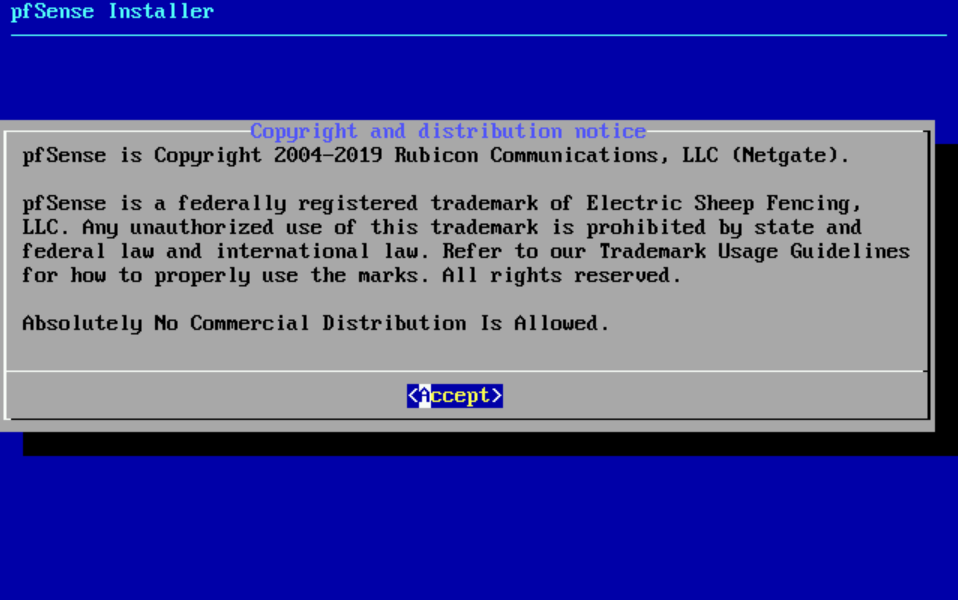
- Select Accept the license

- Select Install option
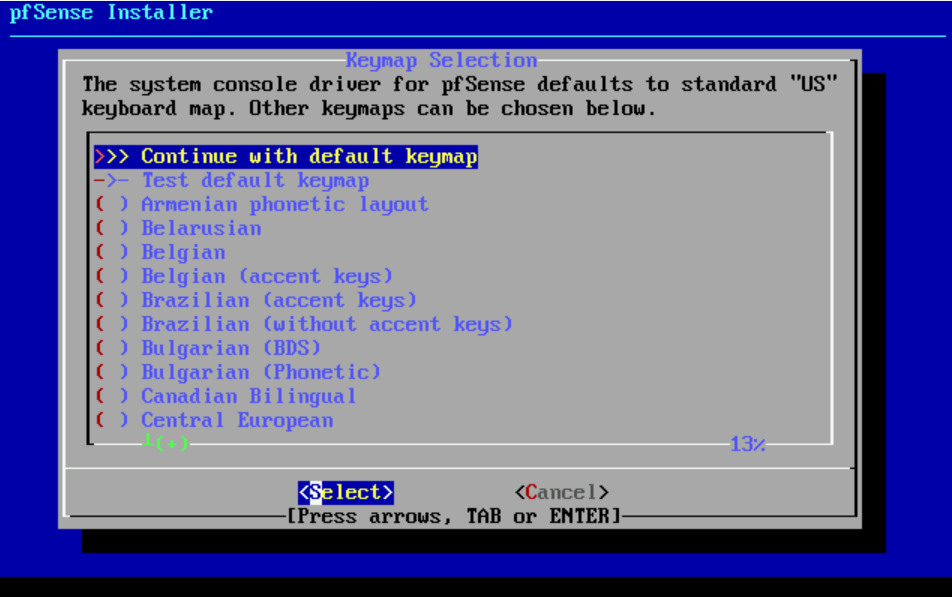
- Select Continue with default keymap
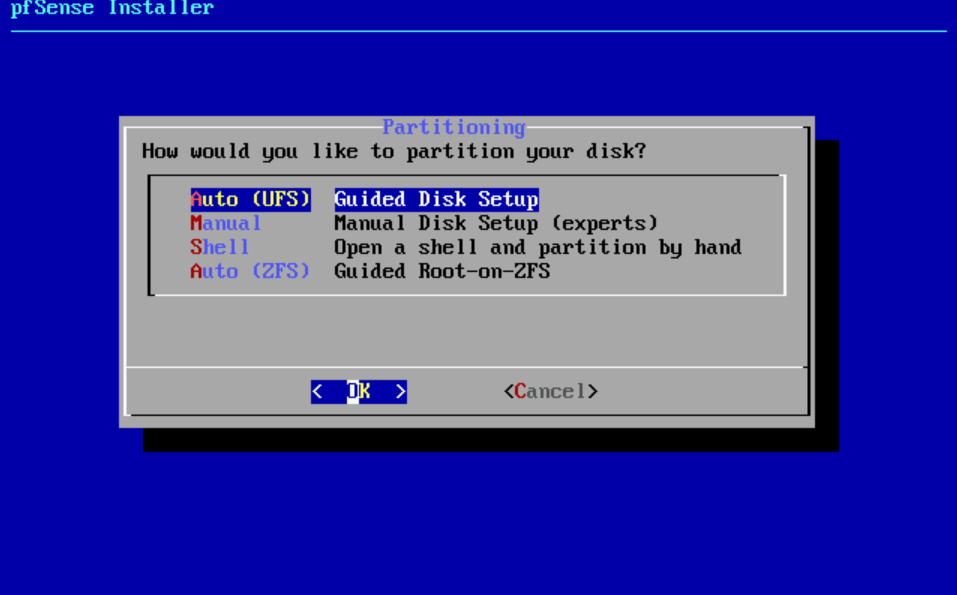
- Select Auto (ZFS)

- Select Install
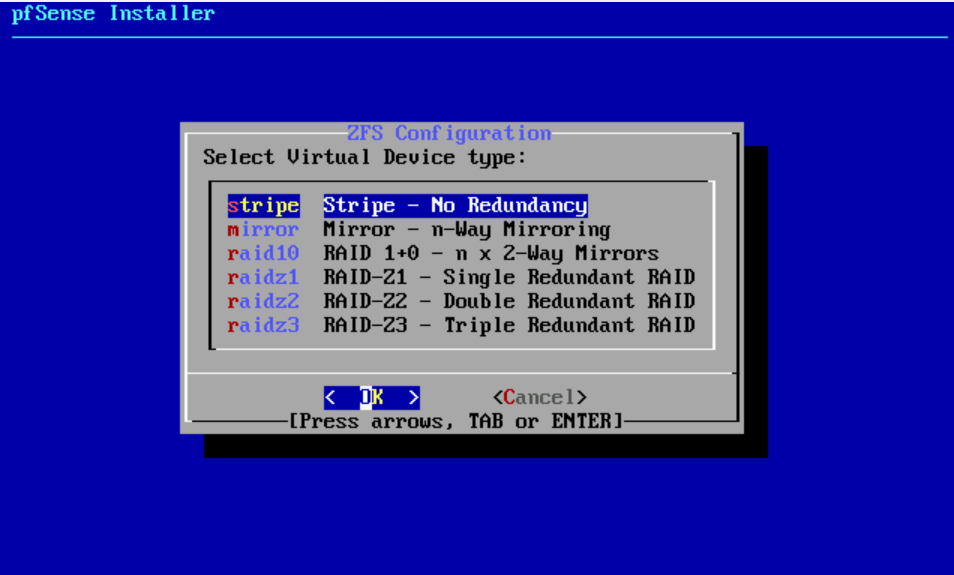
- Select stripe no redundancy

- Select spacebar to select that hard disk, enter to OK
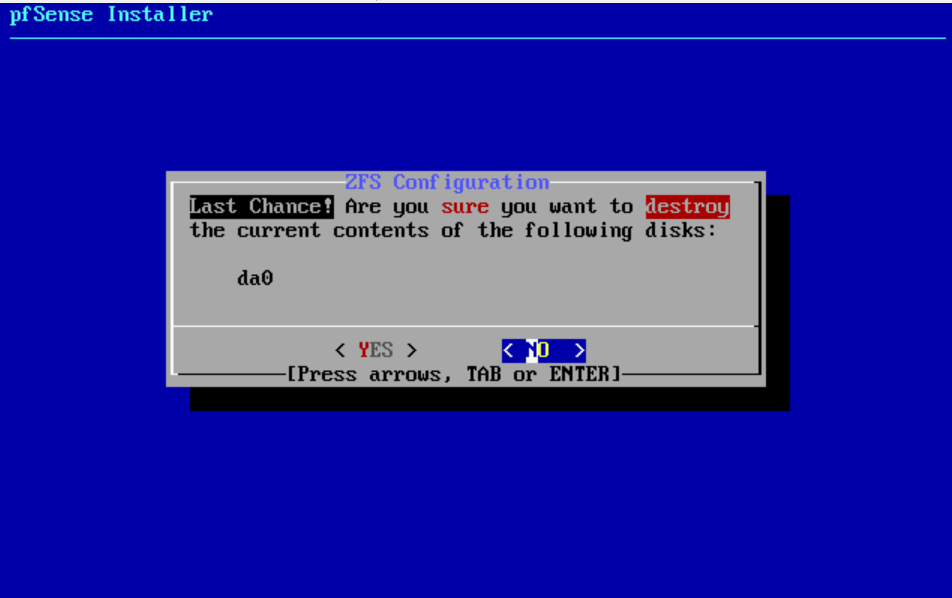
- Are you sure you want to destroy the current contents of the following disks: da0? yes
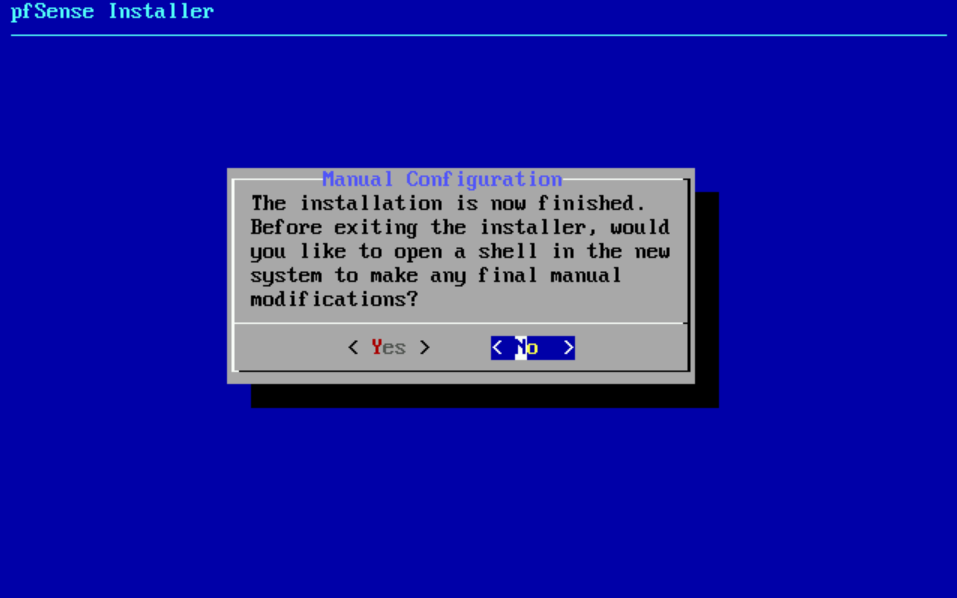
- Select No to do manual configuration.
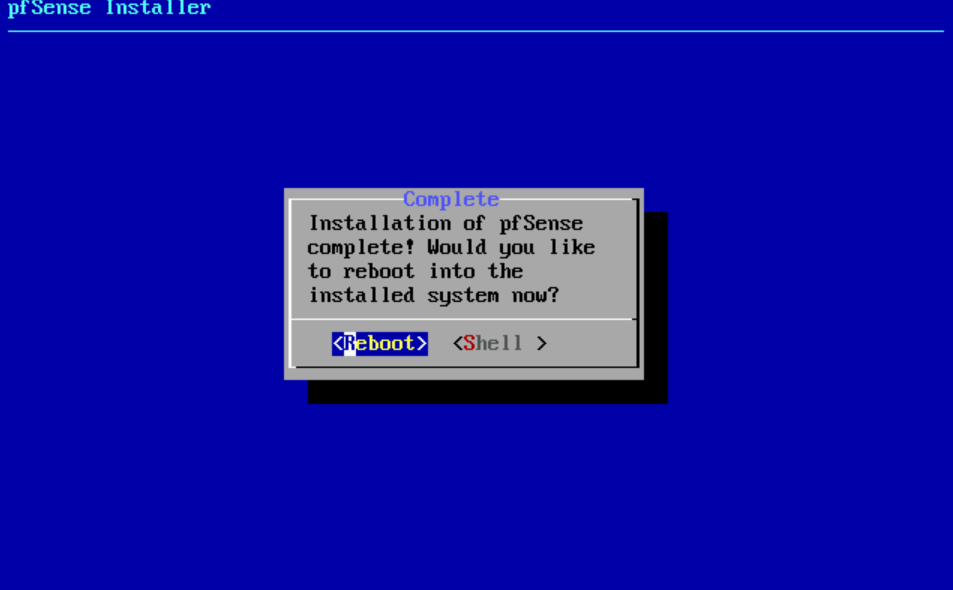
- Select Reboot
Once it reboots, you'll see:
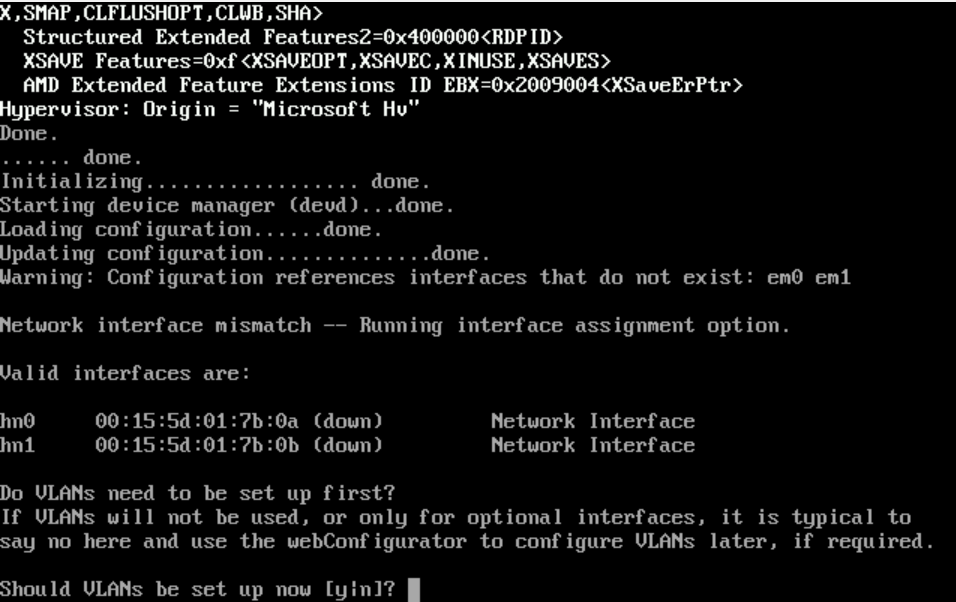
- Type
n(if you're not using VLANs, just type 'n' for no)
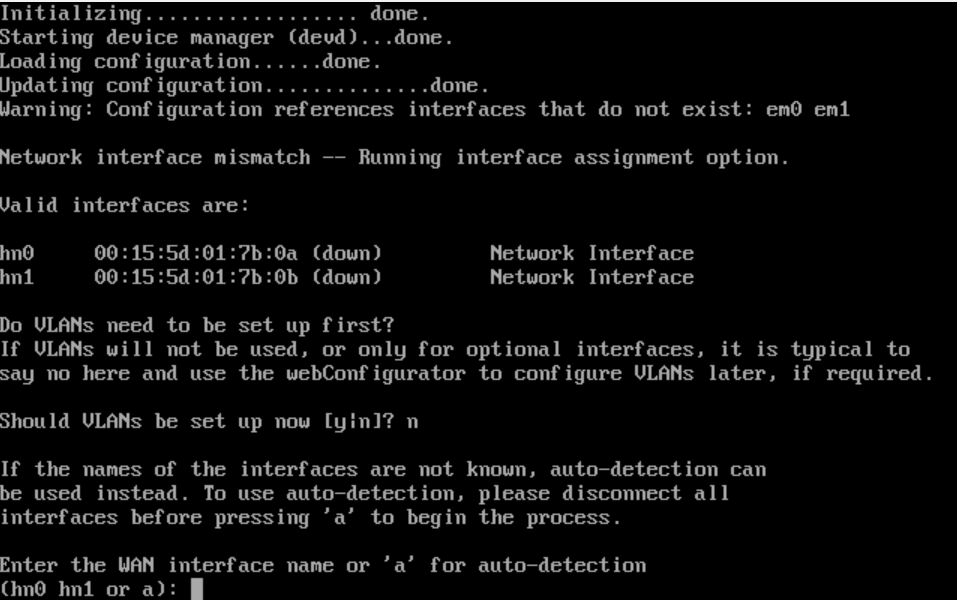
- Figuring out MAC addresses:
- As you can see, pfsense calls the MAC address 00:15:5d:01:7b:0a => hn0
- As you can see, pfsense calls the MAC address 00:15:5d:01:7b:0b => hn1
- Now, match the MAC No.3 and MAC No.4 you saw to either hn0 or hn1 (in pfsense)
- Enter either
hn0orhn1for the WAN address

- Figuring out MAC addresses:
- Enter either
hn0orhn1for the LAN address
- Enter either

- Do you want to proceed?
y
Once it's complete, you'll see:
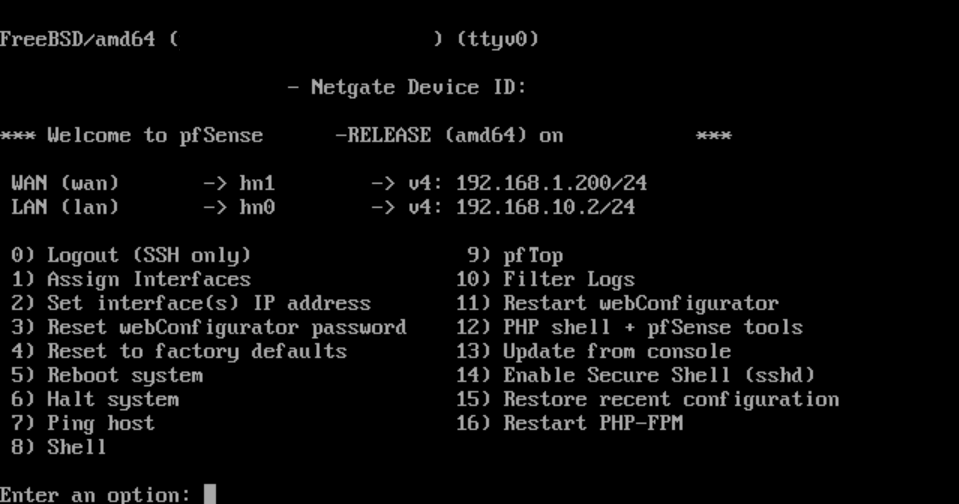 Your Pfsense should be configured like this:
- WAN IP: 192.168.1.200 (static IP)(wont be pingable since its blocked by pfsense by default) (you won't be able to get to this dashboard by typing in this IP)
- LAN IP: 192.168.10.2/24 (static IP) (this is the LAN IP that you need to go access the dashboard)
note
If you mixed up the WAN/LAN, you can re-assign using option 1) on prompt or later on in dashboard!
caution
In our case, the firewall (not pfsense) was 192.168.1.1, so by creating the pfsense (in Hyper-V), Pfsense MAY assign it's LAN IP address as 192.168.1.1. If this happens, this WILL cause a temporary problem (where your devices on the LAN network won't reach the internet), which is due to this Pfsense becoming the firewall (with IP 192.168.1.1). To fix, adjust the Pfsense IP static IP (I set it to 192.168.10.2), such that it doesnt interfere with your normal network. As a quick fix, you can just turn off the VM.
Log into Pfsense Dashboard
- Type in the Pfsense WAN IP, from your local network, in my case, it was
192.168.10.2 - You get a certificate error, proceed
- Default username / password:
-
admin/pfsense
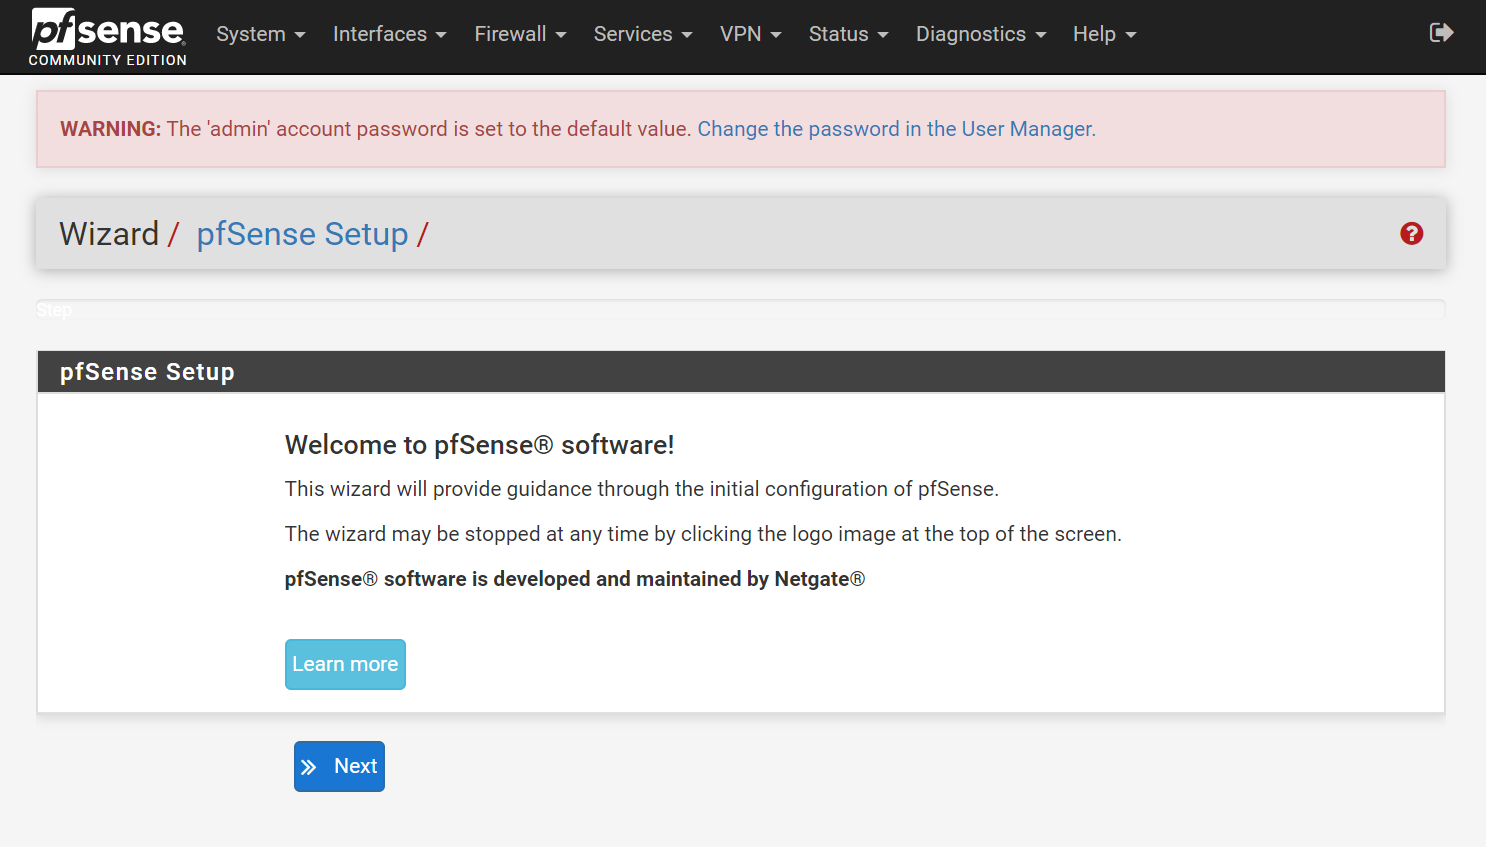
- Select Next
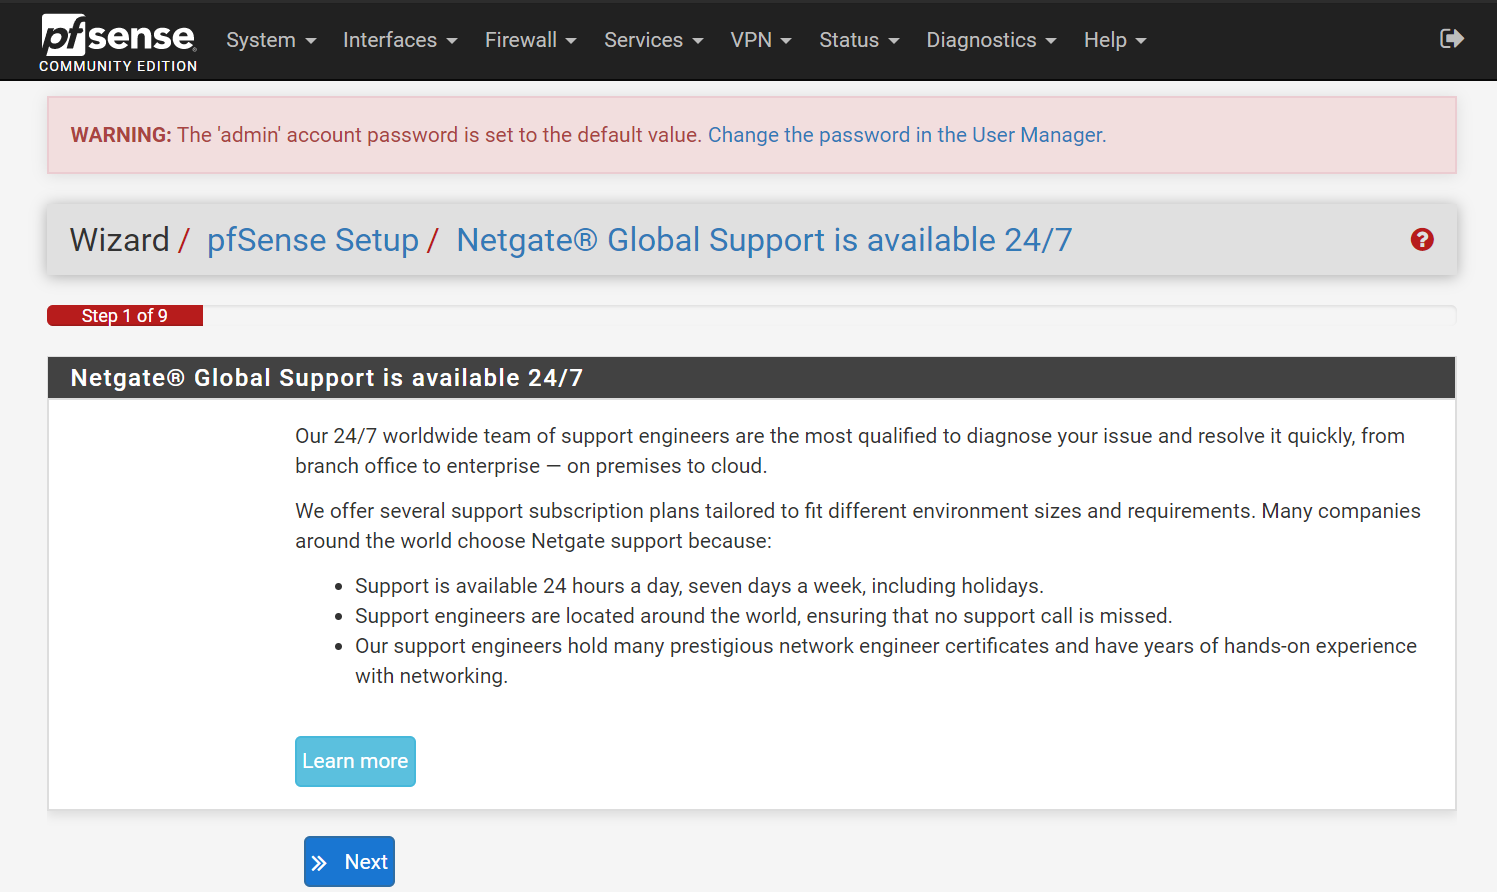
- Step 1 (Netgate support):
- Select Next
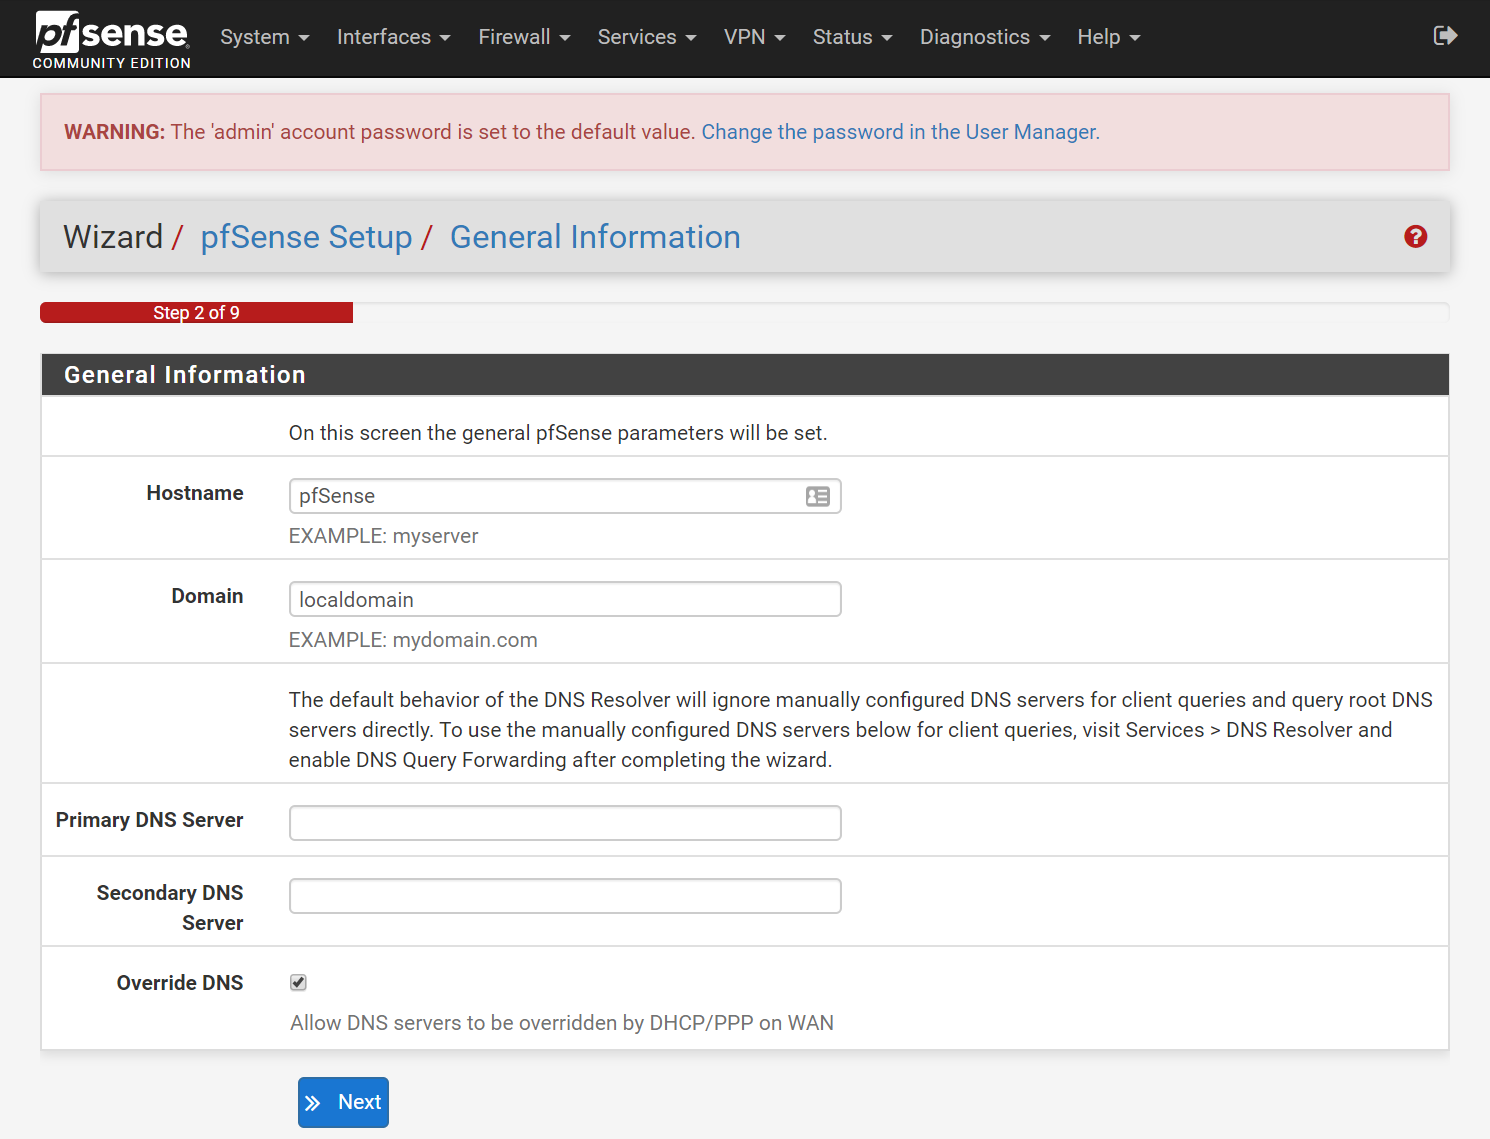
- Step 2 (General Information):
- Hostname:
pfsense(default) - Domain:
localdomain(default) - Primary DNS:
1.1.1.1(My recommendation for Cloudflare's Public DNS server) - Secondary DNS:
8.8.8.8(My recommendation for Google's Public DNS server) - Disable Override DNS (My recommendation as your ISP's DNS server is ALWAYS slower than either Cloudflare or Google. Plus, do you really want to send your DNS traffic to your ISP? Not me!)
- Hostname:
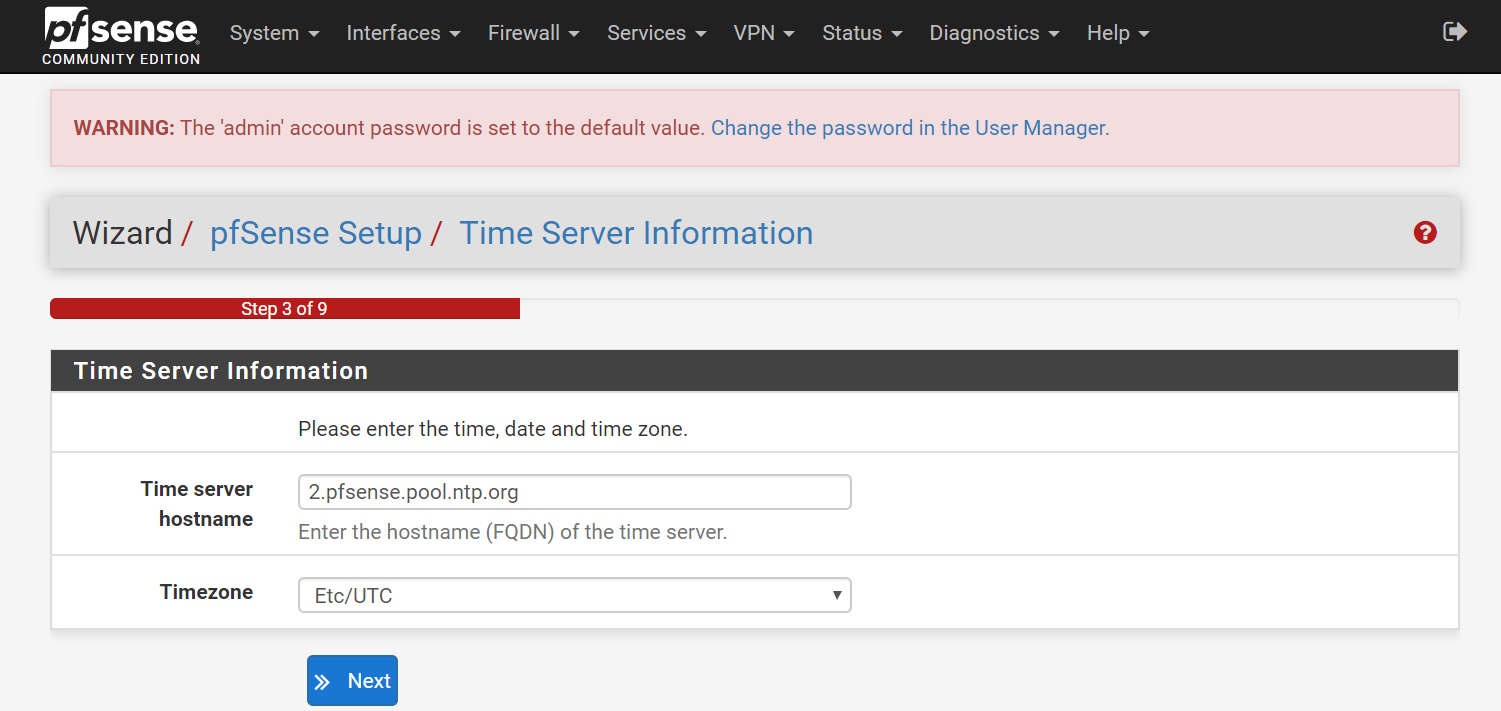
- Step 3 (Time Server Information):
- Time server hostname: ___ (My recommendation is to leave this NTP server as default, unless you trust some other NTP server more)
- Timezone: ___ (My recommendation is to change to your timezone, otherwise, your logs will be confusing!)

- Step 4 (Configure Wan Interface):
- In other configurations I recommended leaving WAN on DHCP, but in this case, I recommend you change to Static IP
192.168.1.200to make things easier.
- In other configurations I recommended leaving WAN on DHCP, but in this case, I recommend you change to Static IP
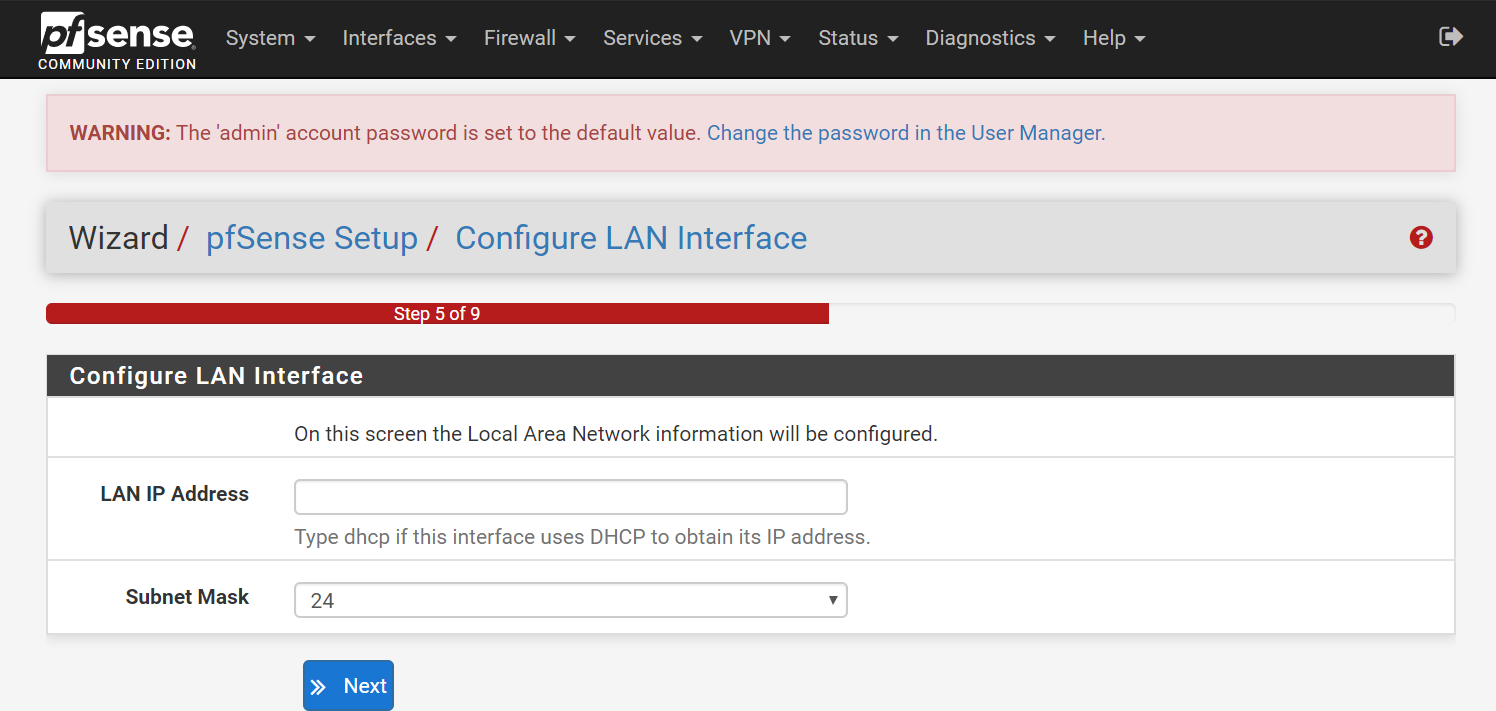
- Step 5 (Configure LAN Interface):
- LAN IP:
192.168.10.2 - Subnet:
24
- LAN IP:
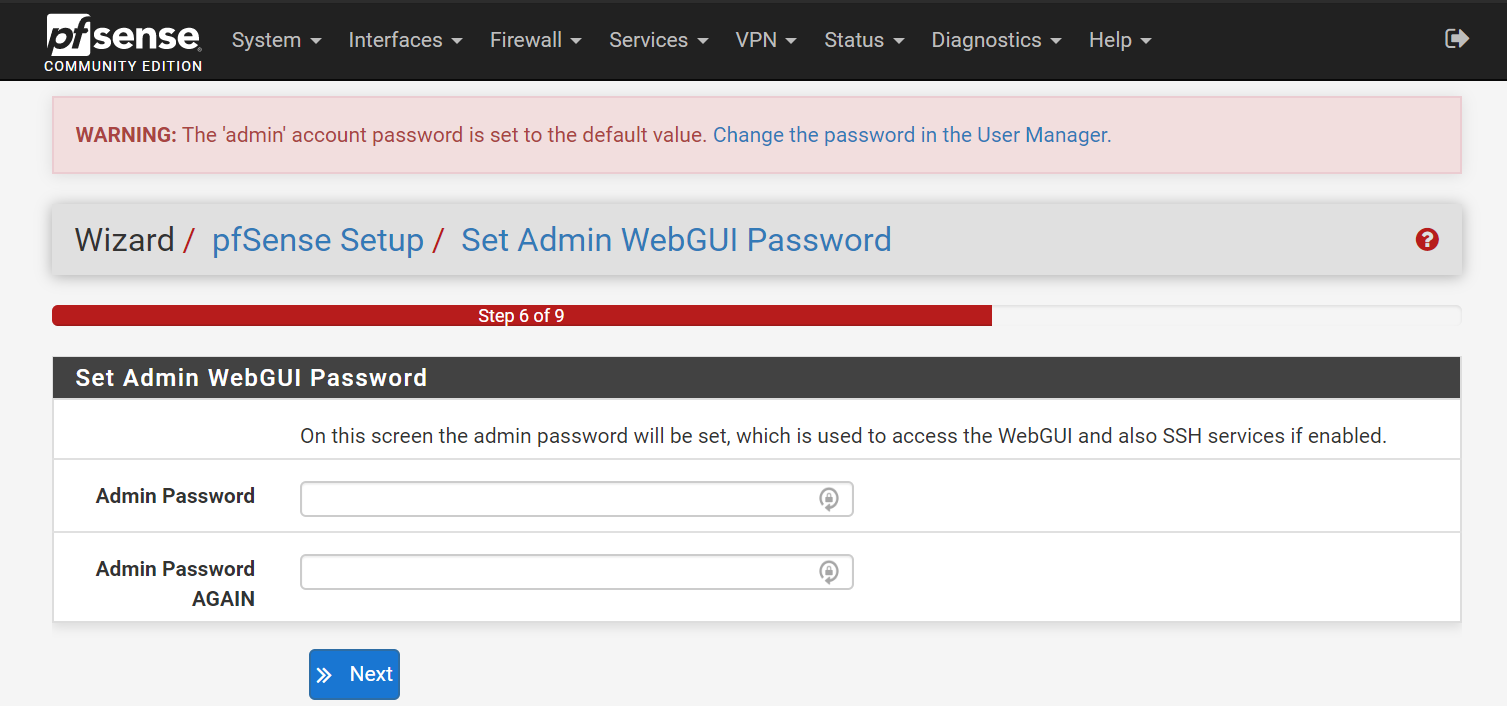
- Step 6 (Set admin webui password):
- Change the Default Password

- Step 7 (Reload configuration):
- Select Reload
note
If you changed the LAN IP, you might need to input the new IP in the browser URL, in order to get back into dashboard.
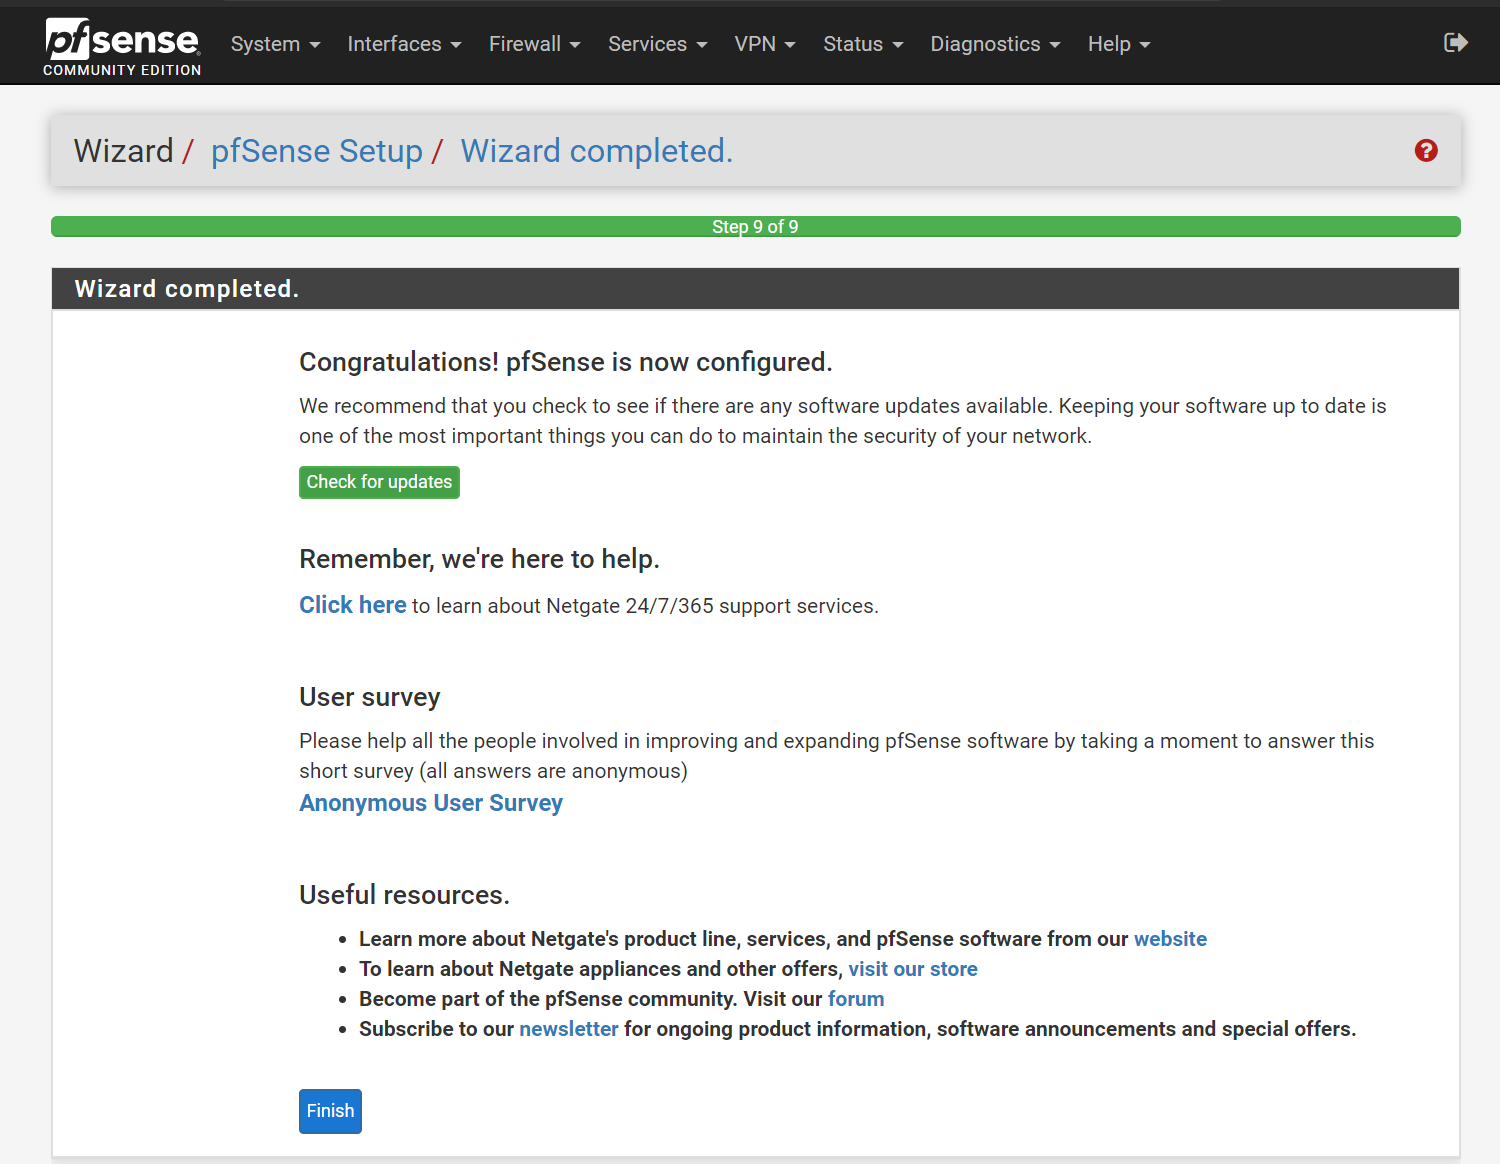
- Step 9 (Wizard Complete):
- Select Finish
- Select Accept (the user agreement)
You've successfully finished the installation of pfsense. Now you can configure any settings you want.
Tweak 1: Reconfigure the look of your dashboard
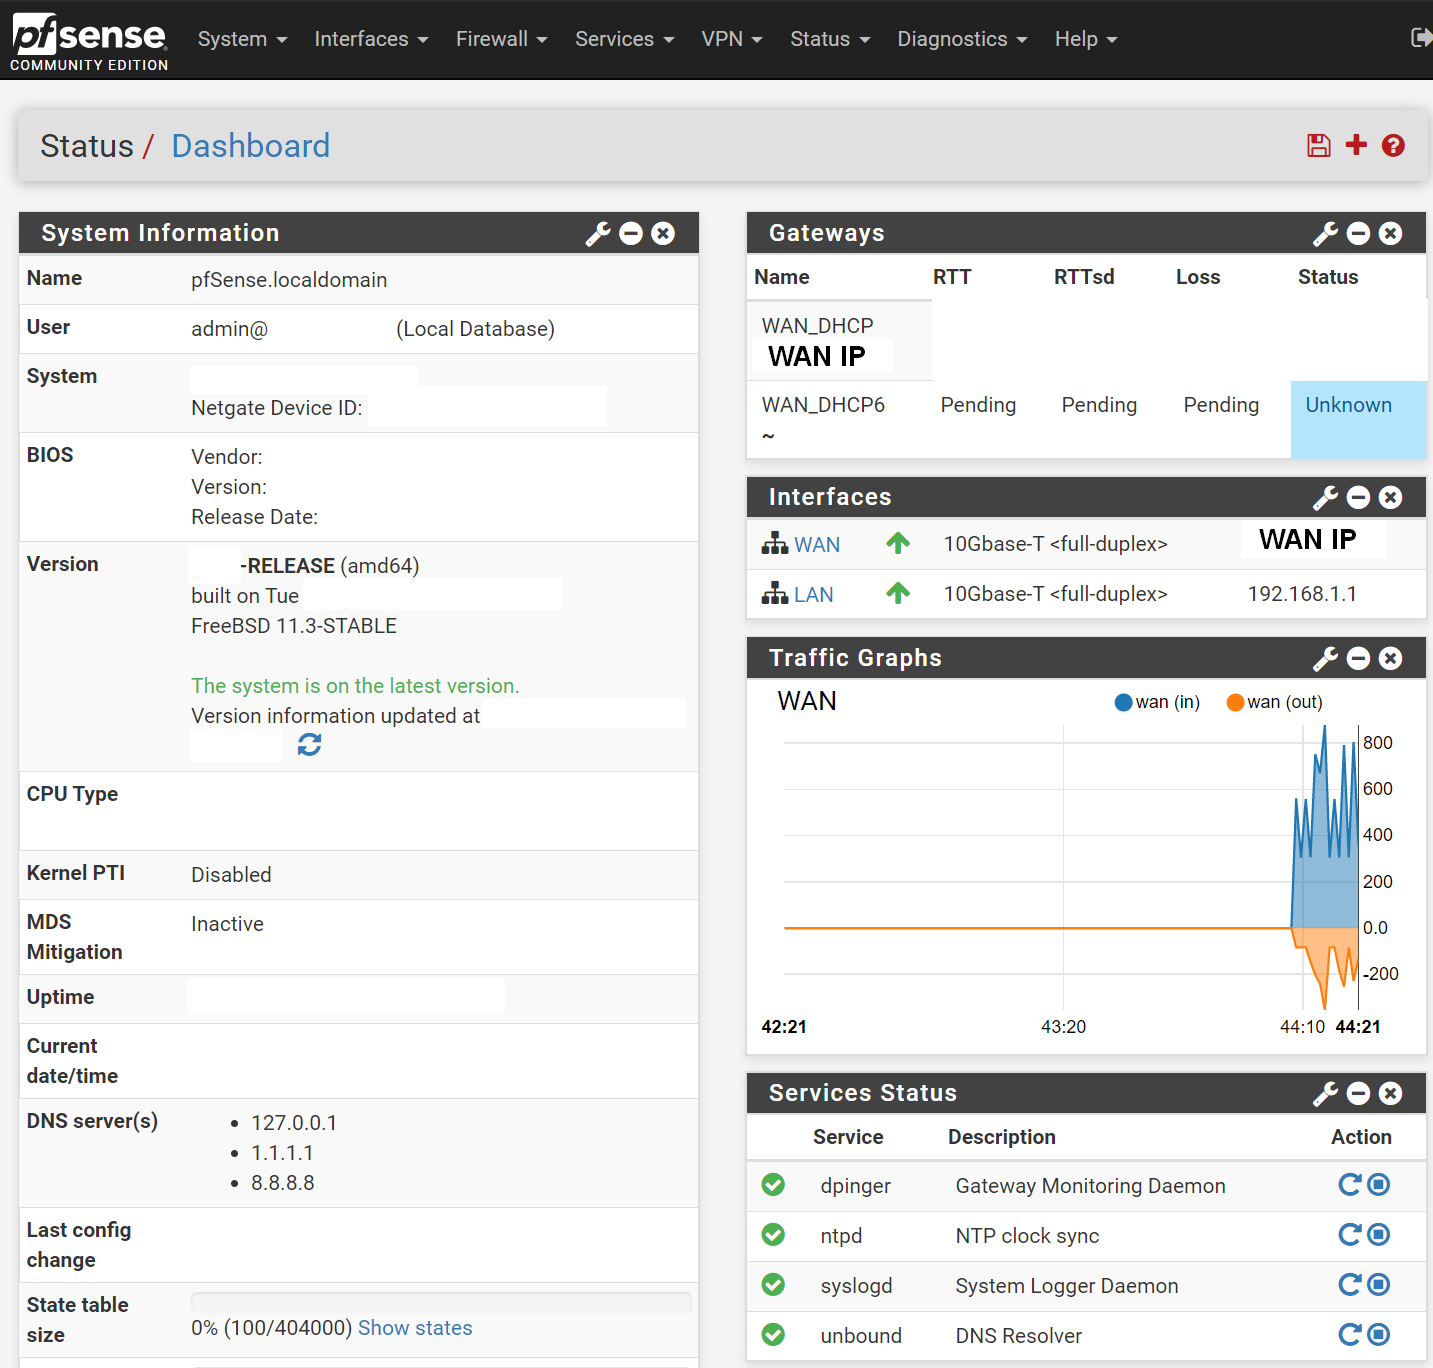
You'll first see 3 sections:
- System Information (useful to keep)
- Netgate Services and Support (to remove by hitting the X button on top right)
- Interfaces (useful to keep to show the WAN IP and LAN IP)
My first step of action is to re-configure the dashboard to my liking:
- On the top right of the screen, where it says Status / Dashboard, on the right-hand side, select + icon.
- Gateways (shows latency and packet loss on your WAN gateway)
- Traffic Graphs (shows live traffic usage on WAN)
- Service Status (shows whether services are running or not, useful for troubleshooting)
Final Result:
Tweak 2: Enable DHCP on LAN
Make sure your LAN has DHCP server running, so your devices on the network can get IP addresses.
- Go to Services, DHCP Server,
- Enable for LAN
- Save.

Tweak 3: Enable pinging of hostnames
By default, hostnames cannot be pinged on the LAN network. Let's make sure you can ping hostnames on your LAN network.
- Go to Services, DNS Resolver, General Settings,
- Enable Register DHCP leases in the DNS Resolver
- Enable Register DHCP static mappings in the DNS Resolver
- Save.

Tweak 4: Secure DNS queries (DNS over SSL/TLS)
By default, DNS queries between your firewall and public DNS servers are unsecure (over port 53). Make sure DNS queries will be secure (over port 853).
- Go to Services, DNS Resolver, General Settings,
- Enable Enable Forwarding Mode
- Enable Use SSL/TLS for outgoing DNS queries to forwarding servers
- Save.

Tweak 5: Force all rogue devices to go through Pfsense
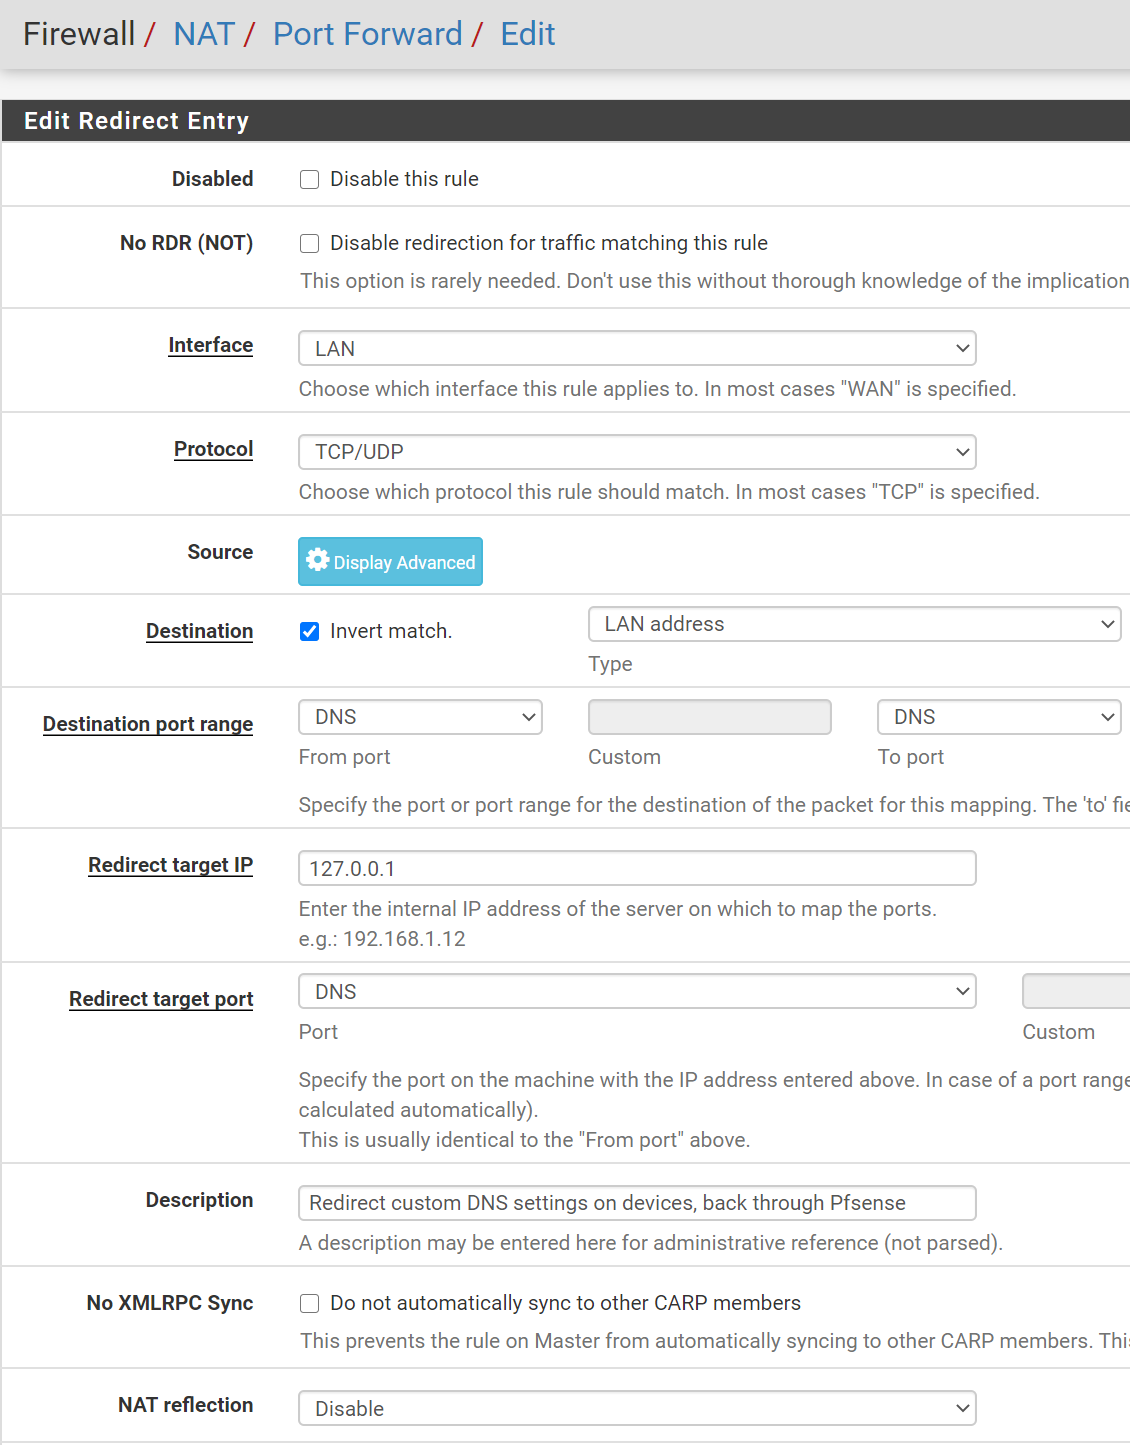
If a client decides to change his own DNS server, this will bypass Pfsense's predefined DNS servers. We can call these Rogue Devices. Let's fix that such that any custom DNS server will get redirected back to Pfsense.
- Firewall, NAT, Under Port Forward, Select Add
- Interface: LAN
- Protocol: TCP/UDP
- Destination:
- Enable Invert Match
- Type: LAN Address
- Destination Port Range:
- From 53 (DNS)
- To 53 (DNS)
- Redirect Target IP:
127.0.0.1(this is the loopback address) - Redirect Target Port: 53 (DNS)
- Description:
Redirect custom DNS settings on devices, back through Pfsense - NAT reflection: Select Disable
- Now, under Actions select Create a new NAT rule based on this one
- Keep the same settings, but change the port 853 (DNS over TLS)
- Enable both
Verify Tweak 5: How to verify that all clients are going through port 853 (DNS over TLS)?
- Pfsense, Diagnostics, pfTop
- Type into filter expression:
port 853 or port 53
- Sort by Destination Port
- Type into filter expression:
- Look at the Destination tab, and you'll see any clients that are talking to the public DNS servers.
- All devices should be reaching public DNS servers over port 853 (DNS over TLS) as intended.
Tweak #6: Change default Pfsense interface names
- By default, Pfsense assigns 2 interfaces, WAN and LAN.
- To change, go to Pfsense, Interfaces, WAN,
- Description: Change from
WANtoLAN1(because this is connected to 192.168.1.0/24 network)
- Description: Change from
- To change, go to Pfsense, Interfaces, LAN,
- Description: Change from
LANtoLAN2(because this is connected to 192.168.10.0/24 network)
- Description: Change from
Conclusion
