Setup An Encrypted Connection (SSL) For Pfsense

Default Pfsense configuration
 By default, Pfsense has 2 options of accessing the dashboard (http and https).
- If you use HTTP, then the traffic between your machine and pfsense can be sniffed by malicious actors on your network and they can steal your username/password, after you've logged into the pfsense dashboard.
- Not recommended to use this option!
- If you use HTTPS, then all traffic between your browser and Pfsense will be secure. So malicious actors cannot sniff your traffic and they can't steal your username/password when you log into pfsense dashboard.
- This option is always recommended!
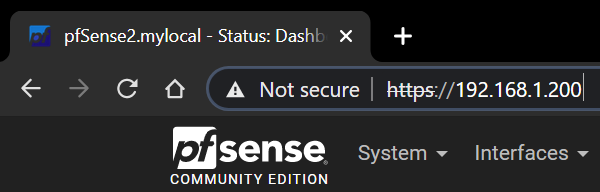
Once you set the option to HTTPS and go https://192.168.1.200 (my pfsense IP), it will say "Connection Not Secure". We'll fix this problem by following the guide below.
Importance of setting up SSL
In a proper HTTPS implementation, the site's certificate is signed by a third-party that the client system trusts. This establishes assurance to the client that the content is being delivered from the system that they expect, and there's nobody in between.
So by doing these steps, you guarantee that the server is authentic and that no malicious actors are in the middle your communication (called man-in-the-middle).
To fix this, we'll create a certificate in Pfsense and then import it into your browser, so that the browser understand the certificate and it can verify the encrypted connection between your browser and pfsense.
Step 1: Setting up Pfsense
note
I'm assuming you already know how to setup Pfsense. See my article on how to setup it up on bare hardware.
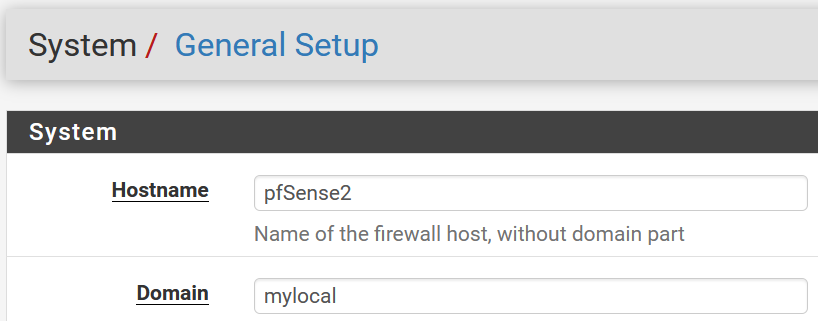
- System, General Setup:
- Hostname:
pfsense2(in my case) - Domain:
mylocal(in my case)
- Hostname:
Step 2: Create Internal CA
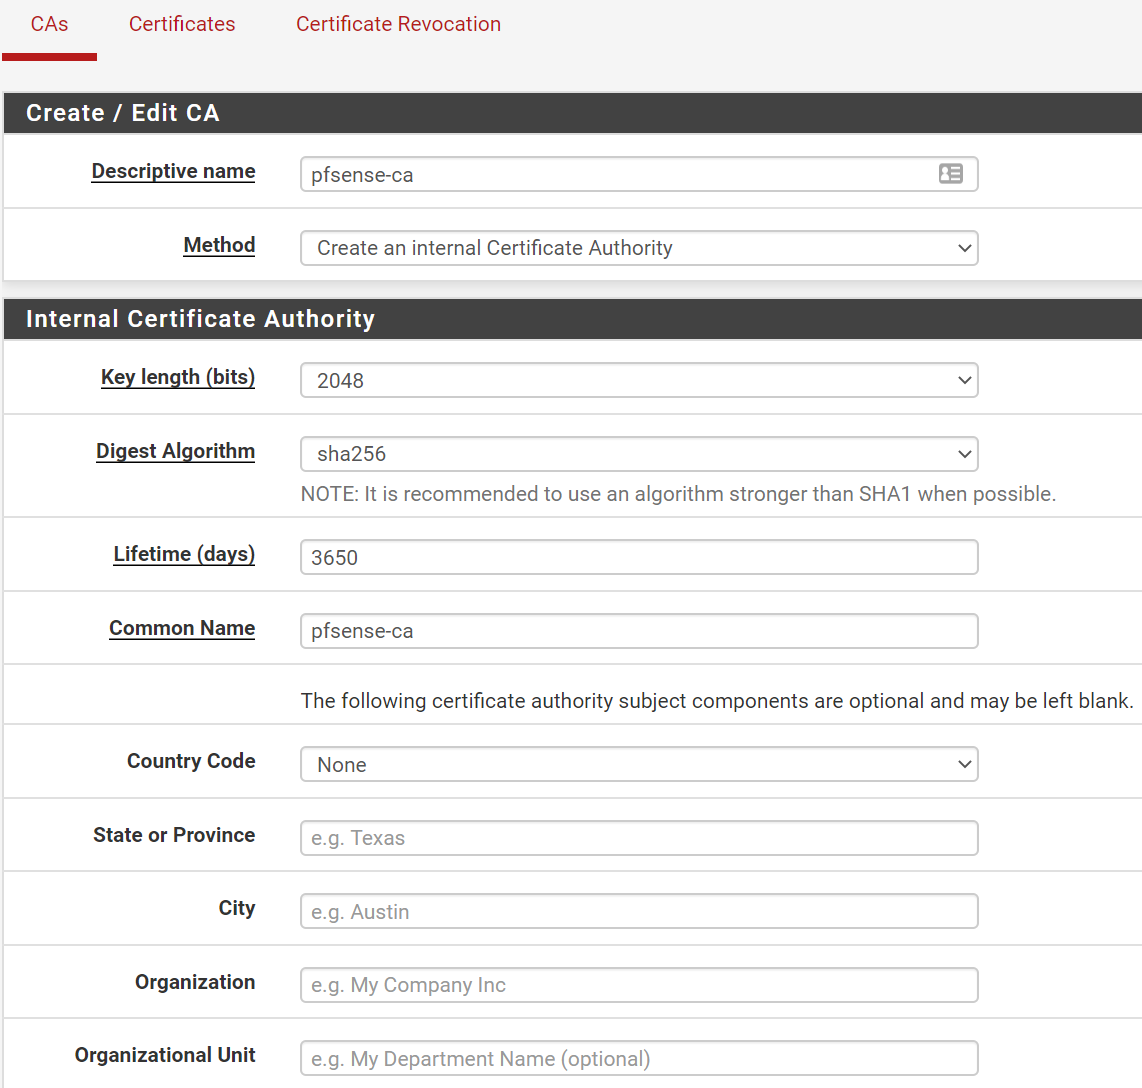
- System, Cert Manager, Section: 'CAs', Add
- SECTION: Create/Edit CA
- Descriptive name:
pfsense-ca(can be anything you want) - Method: Create an internal Certificate Authority
- Descriptive name:
- SECTION: Internal Certificate Authority
- Key length: 2048 (leave at default)
- Digest Algorithm: sha256 (leave at default)
- Lifetime (days):
3650(leave at default) - Common Name:
pfsense-ca
- SECTION: Create/Edit CA
Step 3: Create Intermediate CA
- System, Cert Manager, Section: 'CAs', Add
- SECTION: Create/Edit CA
- Descriptive name:
pfsense-sub-CA(can be anything you want) - Method: Create an intermediate Certificate Authority (NOTE: is intermediate, not internal)
- Descriptive name:
- SECTION: Internal Certificate Authority
- Singing Certificate Authority: pfsense-ca
- Key length: 2048 (leave at default)
- Digest Algorithm: sha256 (leave at default)
- Lifetime (days):
3650(leave at default) - Common Name:
pfsense-sub-CA
- SECTION: Create/Edit CA

Step 4: Create a new Certificate
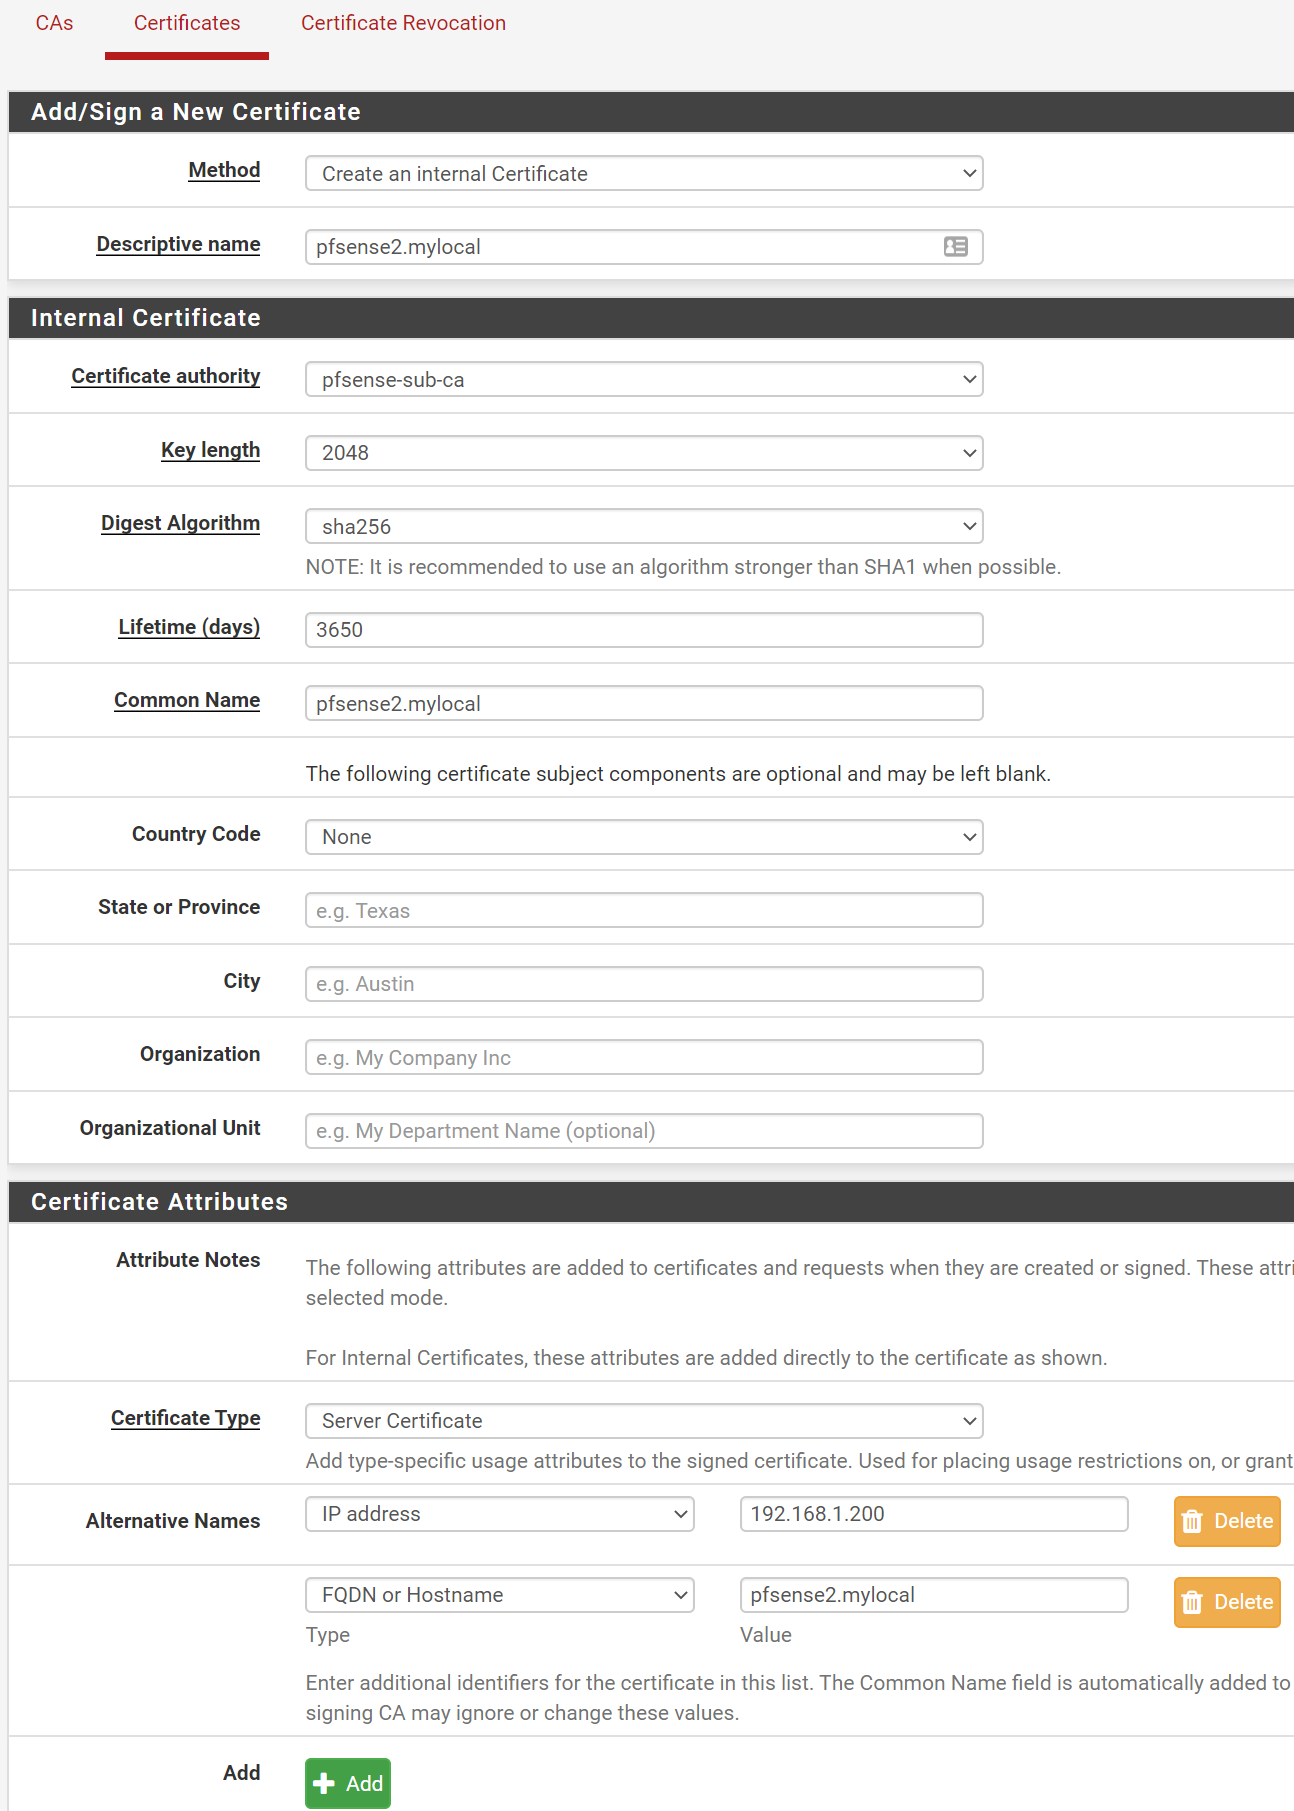
- System, Cert Manager, Section: 'Certificates', Select +Add/Sign
- Section Add/Sign a New Certificate
- Method: Create an internal certificate
- Descriptive name:
pfsense2.mylocal(this is my firewall's FQDN)
- Section Internal Certificate
- Certificate Authority: pfsense-sub-ca (our sub CA)
- Key length: 2048 (leave at default)
- Digest Algorithm: sha256 (leave at default)
- Lifetime (days):
3650(leave at default) - Common Name:
pfsense2.mylocal(this is my firewall's FQDN)
- Section Certificate Attributes
- Certificate Type: Server Certificate
- Alternative Names: IP Address then type
192.168.1.200(which is my Pfsense static IP) - Select Add button
- Alternative Names: FQDN or hostname then type
pfsense2.mylocal
- Section Add/Sign a New Certificate
Step 5: Export the CA
- System, Cert Manager, Section: 'CAs'
- Click on Star (2nd icon)
- This will export the CA
- Repeat for 2nd
- Click on Star (2nd icon)

Step 6-A: Import into Chrome
- For Chrome, we need to Import both Certificates.
- Type into URL:
chrome://settings/privacy
- Select Manage Certificates
- Select Trusted Root Certification Authorities tab, click on Import
- Select next
- Select browse
- Select pfsense-ca.crt (This is root-CA)
- Select next
- Select Place all certificates in the following store
- Trusted Root Certification Authorities
- Select next
- Select finish
- Press OK to dismiss
- Select Intermediate Authorities tab, click on Import
- Select next
- Select browse
- Select pfsense-sub-ca.crt (This is root-sub-CA)
- Select next
- Select Place all certificates in the following store
- Intermediate Certification Authorities
- Select next
- Select finish
- Press OK to dismiss
- Type into URL:
Step 6-B: Import into Firefox
- For Firefox
- Type into URL:
about:preferences#privacy
- Select View Certificates
- Under Authorities tab, click on Import
- Import pfsense-ca.crt (Only need to import Root-CA, not Root-sub-ca)
- Enable: Trust this CA to identify websites
- Enable: Trust this CA to identify email users
- Select OK
- Type into URL:
Step 7: Enable HTTPs for Pfsense Dashboard
- System, Advanced, under Under Access
- Change 'Protocol' from HTTP to HTTPS (SSL/TLS)
- Select 'SSL/TLS Certificate': pfsense2.mylocal

Step 8: Verify it's working
Type in either the FQDN or IP of your pfsense:
https://pfsense2.mylocalhttps://192.168.1.200
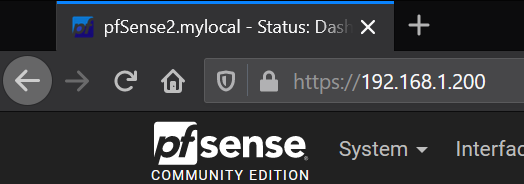
As you can see, it's secure!
What happens if your browser doesn't have the certificate?
What happens when a user tries to get to Pfsense without having these Certs installed in their browser?
- They can still access Pfsense website, but they'll see the Connection is Not Secure warning.
Conclusion