Setup OpenVPN Server on Pfsense


Overview
OpenVPN is the standard of choice for Virtual Private Network (VPN) today. It encrypts your data traveling on the internet, such that any malicious actors cannot look at the data and identify it's contents.
Let's setup OpenVPN server on Pfsense firewall, so that we can connect a client device on the road.
Limitation
note
- The following guide assumes that your VPN server IP won't change. If your service provider changes your public IP, you'll have to tweak the configuration file (for every client) with every new IP change.
- Alternatively, you could setup a Dynamic DNS for your VPN server, and even if the ISP changes your public IP, this won't affect your clients connecting to the VPN server. This is outside of the scope of this post.
VPN Definitions
- Server
- Any device where the VPN tunnel will be terminating to
- in my case...Pfsense firewall
- Client
- Any device that's going to be connecting to the Server
- in my case...iPhone, Macbook, and Windows PC
Install OpenVPN package on Pfsense
Pfsense, system, package manager, available packages, search openvpn, select install
Setup OpenVPN server
Pfsense, VPN, OpenVPN, select Wizards tab
We'll do a simple installation, using a local user that we'll created in Pfsense later on.
Step 1: Authentication
- Type of Server: Select Local User Account
- Next

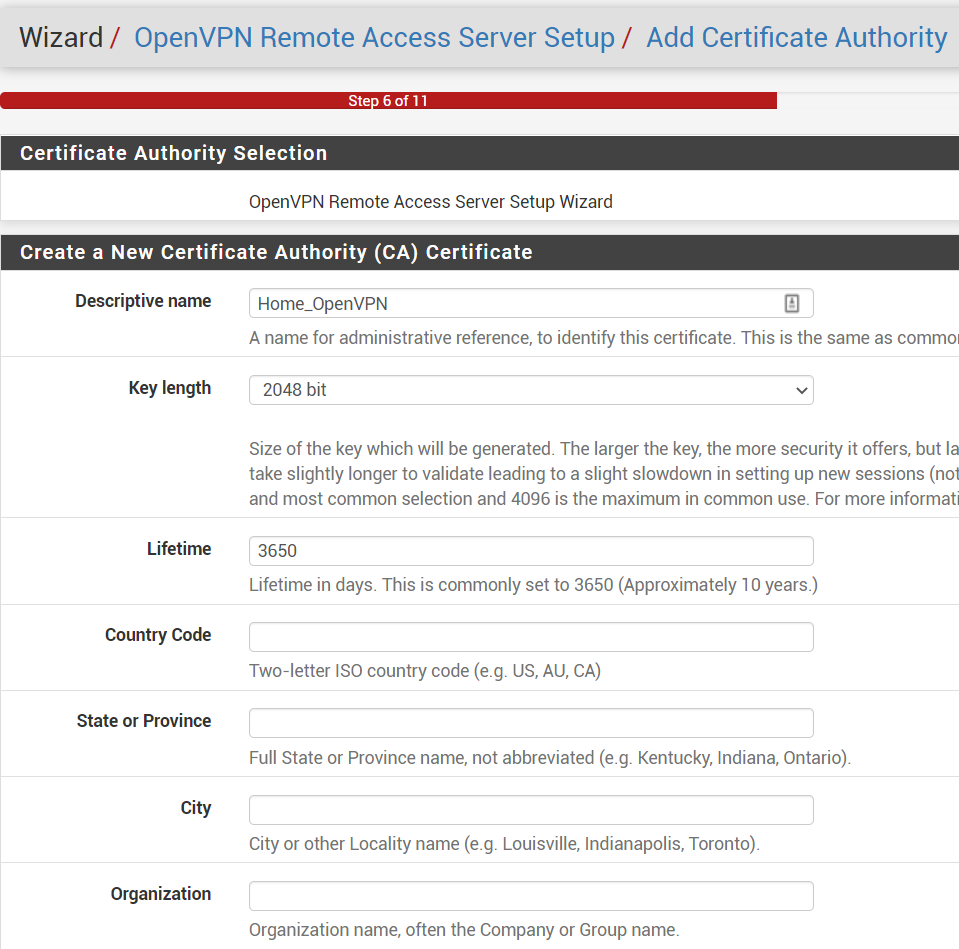
Step 2: Add Certificate Authority
- Descriptive Name:
Home_OpenVPN - Next
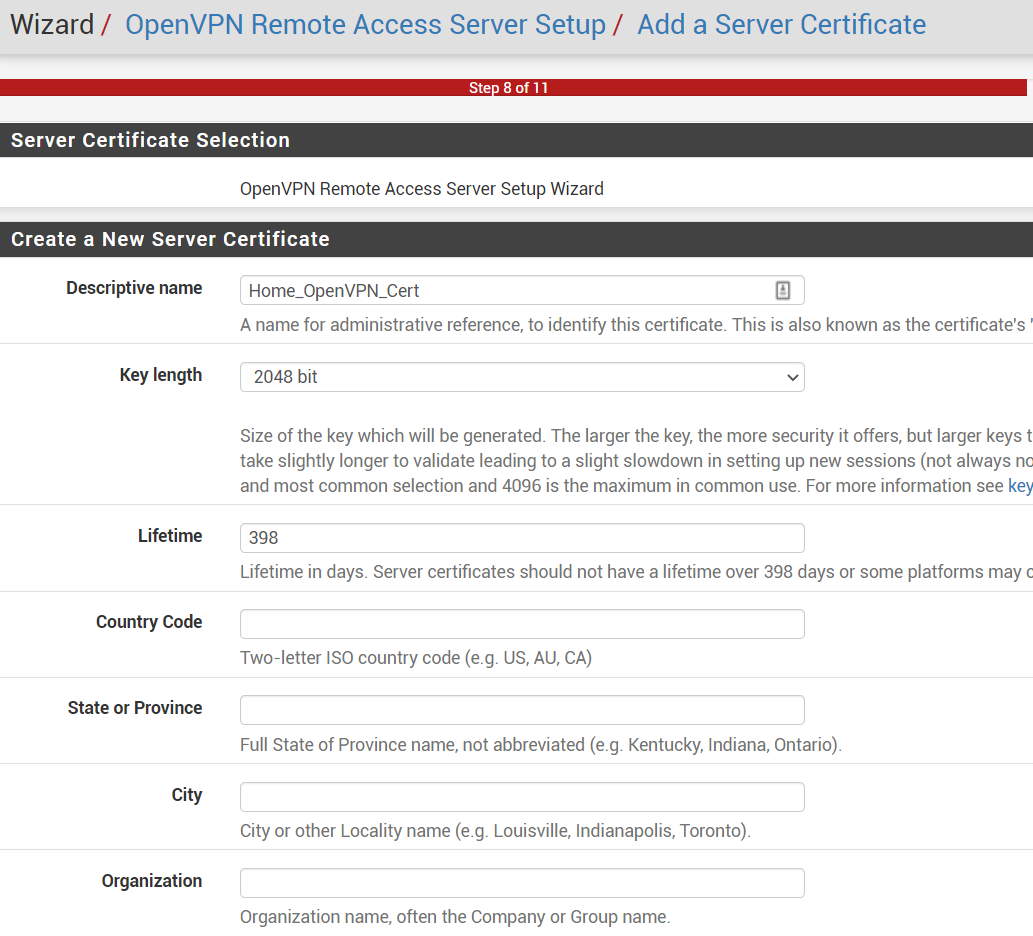
Step 3: Add Server Certificate
- Descriptive Name:
Home_OpenVPN_cert - Next
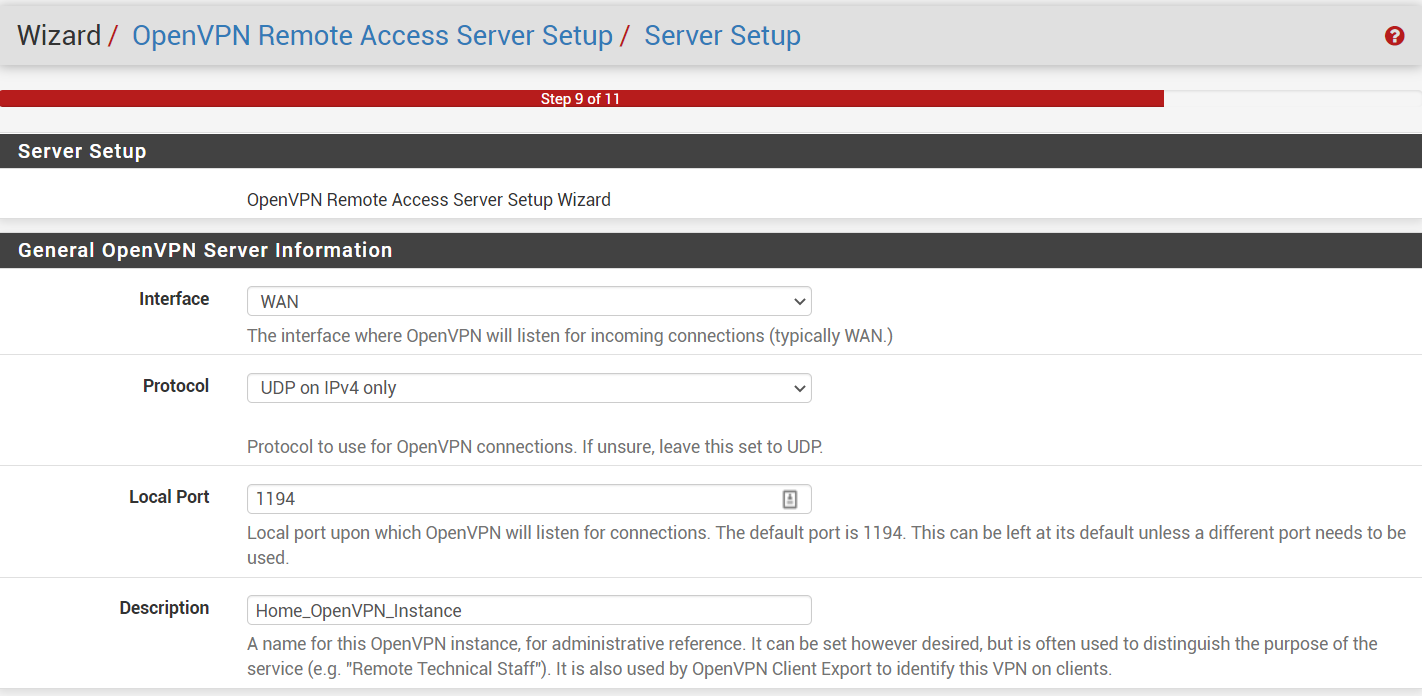
Step 4: Setup Server
- General OpenVPN Server Information:
- Local Port:
1194- By default, the OpenVPN server uses port
1194and the UDP protocol to accept client connections. If you need to use a different port because of restrictive network environments that your clients might be in, you can change the port option. If you are not hosting web content your OpenVPN server, port443is a popular choice since this is usually allowed through firewall rules.
- By default, the OpenVPN server uses port
- Description:
Home_OpenVPN_Instance
- Local Port:
- Cryptographic Settings:
- Hardware Crypto: Change from default
No Hardware Crypto Availableto your preference, if you have a hardware capable of doing this.
- Hardware Crypto: Change from default

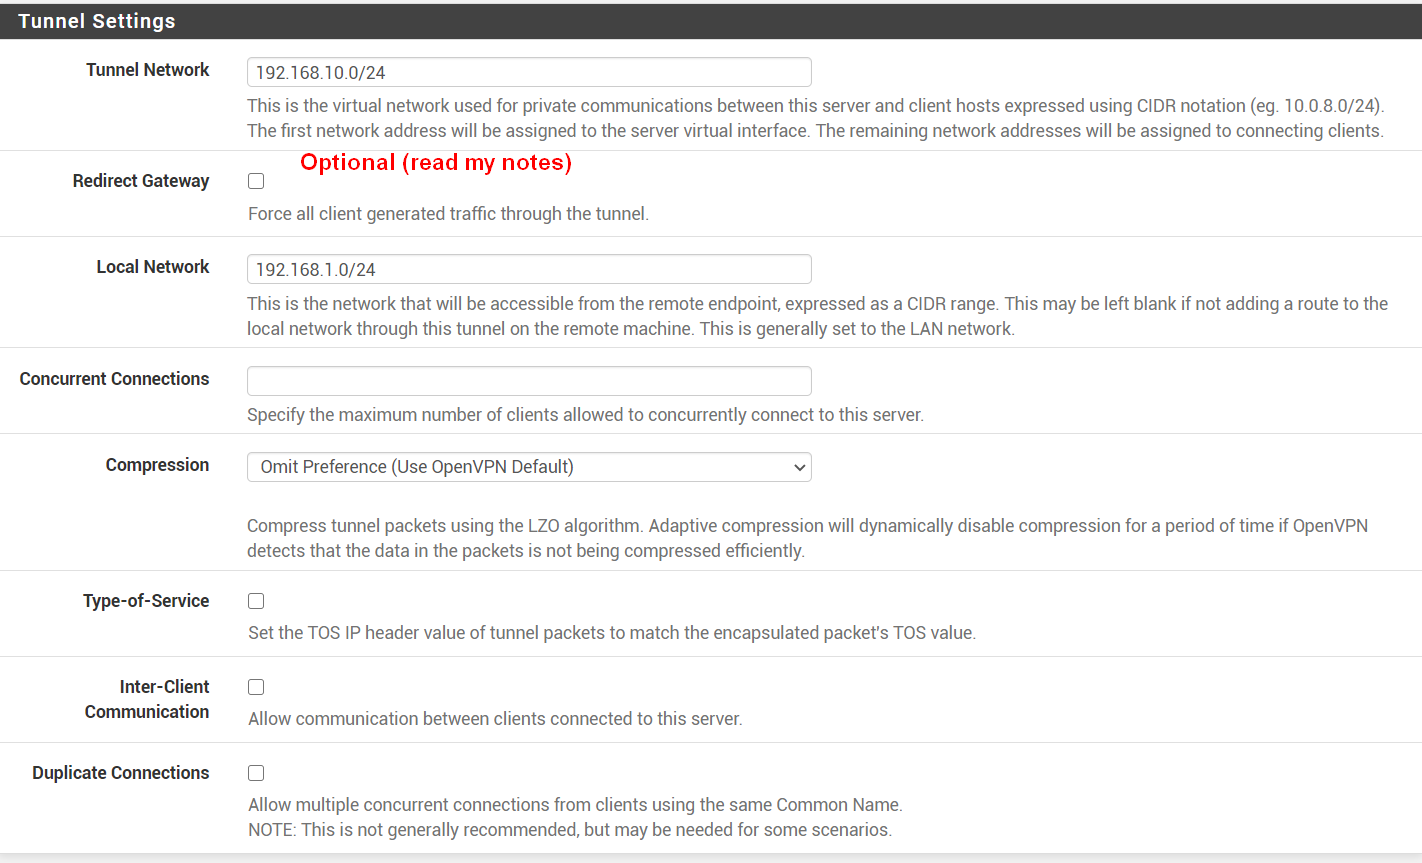
- Tunnel Settings:
- Tunnel Network:
192.168.10.0/24- Should be a new, unique network that does not exist anywhere in the current network or routing table.
- Redirect Gateway:
- Turn off if you want your client to reach the server's LAN IPs and servers, but not the actual website traffic.
- This is called split tunnel VPN.
- Use this when you need to access a server at home/work for example.
- Turn On if you want to have everything you're doing go out through the server's WAN.
- This is called full tunnel VPN.
- Use this where you don't trust the network, such as coffee shop or hotel.
- Turn off if you want your client to reach the server's LAN IPs and servers, but not the actual website traffic.
- Local Network:
192.168.1.0/24(if you wish to allow traffic from VPN to your local LAN network, enter it here.- If you don't want to give access to your LAN network, leave it blank.
- If you have multiple network, list them like
192.168.1.0/24, 192.168.2.0/24
- Concurrent Connections: - Leave a blank to allow unlimited number of clients to connect at once.
- If you have a specific requirement, you might need to restrict this to a certain number.
- Tunnel Network:
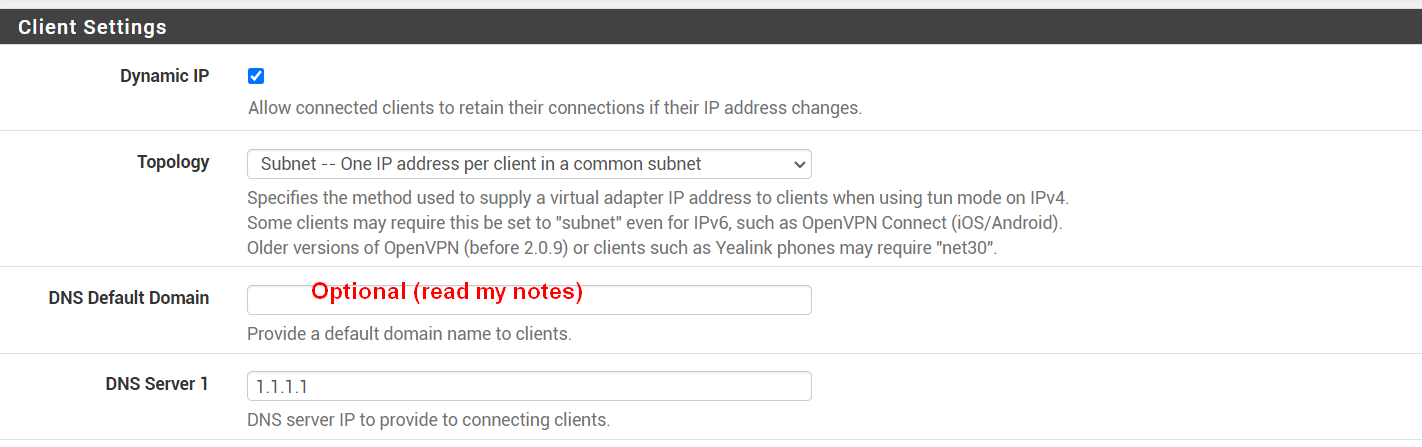
Client Settings:
DNS Default Domain:
- This is the domain.
- I used
mylocal(from Pfsense, system, general setup, domain) - If you enable this, the VPN clients that connect to your LAN, will be able to ping hostnames.
- If you don't enable this, the VPN clients that connect to your LAN won't be able to ping hostnames, but can ping IPs only.
DNS Server 1:
- Set to public DNS server if you wish to have an unfiltered DNS traffic.
1.1.1.1for Cloudflare8.8.8.8for Google9.9.9.9for Quad9
- Set to private DNS server if you wish to filter your DNS traffic through Pihole.
192.168.2.2(I used my Pihole DNS server)Private_IP(You could use an Active Directory DNS server)
- Set to public DNS server if you wish to have an unfiltered DNS traffic.
NetBIOS Options:
- If you want to have the ability for your client to access to Windows shares, enable this.
- If you don't want this, keep it disabled.
- To test this fully...
Next
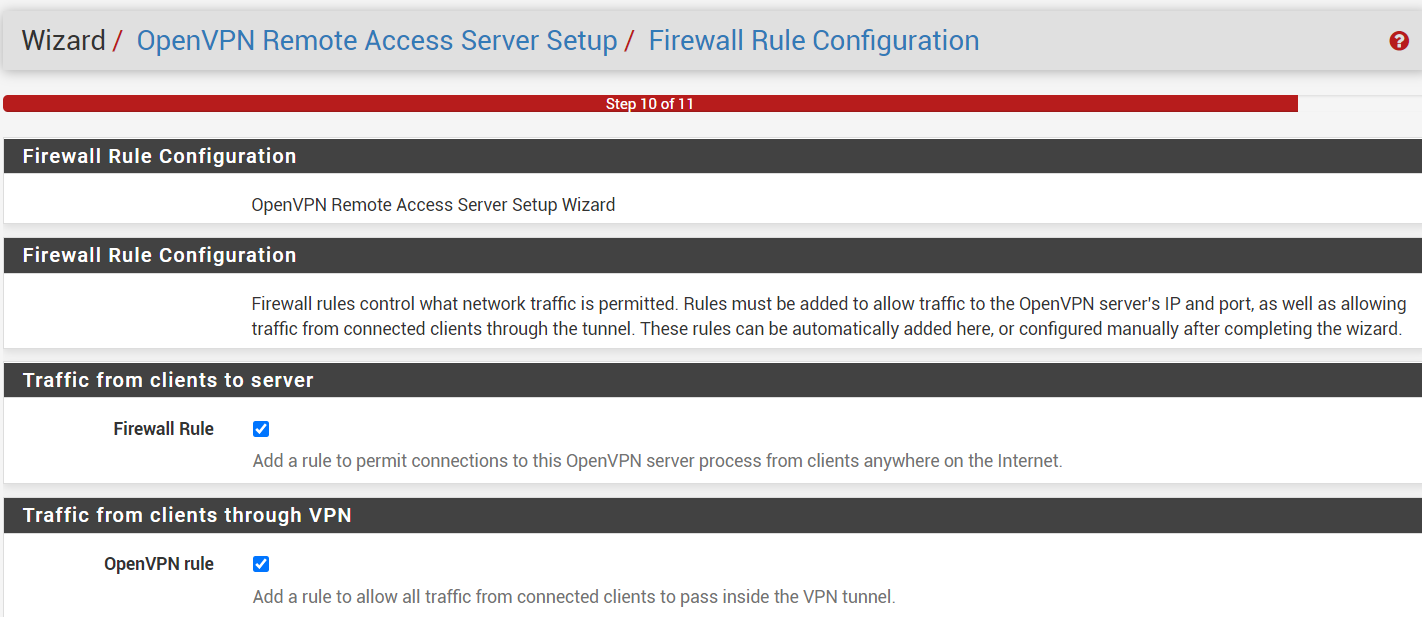
Step 5: Firewall Rules
If you're setting up OpenVPN for the first time (if you're setting up a 2nd VPN server, you won't need to enable these again)
- Enable Firewall Rule
- Permits connections to this OpenVPN server process from clients anywhere on the internet.
- Enable OpenVPN Rule
- Allows all traffic from connected clients to pass inside the VPN tunnel.
- Next
Step 6: Wizard Completed
- Next

Server Mode explained
The OpenVPN Server Mode allows selecting a choice between requiring Certificates, User Authentication, or both. The wizard defaults to Remote Access (SSL/TLS + User Auth). The possible values for this choice and their advantages are:
Remote Access (SSL/TLS + User Auth):
- Requires both certificates AND username/password
- Each user has a unique client configuration that includes their personal certificate and key.
- Most secure as there are multiple factors of authentication (TLS Key and Certificate that the user has, and the username/password they know)
Remote Access (SSL/TLS):
- Certificates only, no auth
- Each user has a unique client configuration that includes their personal certificate and key.
- Useful if clients should not be prompted to enter a username and password
- Less secure as it relies only on something the user has (TLS key and certificate)
Remote Access (User Auth):
- Authentication only, no certificates
- Useful if the clients should not have individual certificates
- Commonly used for external authentication (RADIUS, LDAP)
- All clients can use the same exported client configuration and/or software package
- Less secure as it relies on a shared TLS key plus only something the user knows (Username/password)
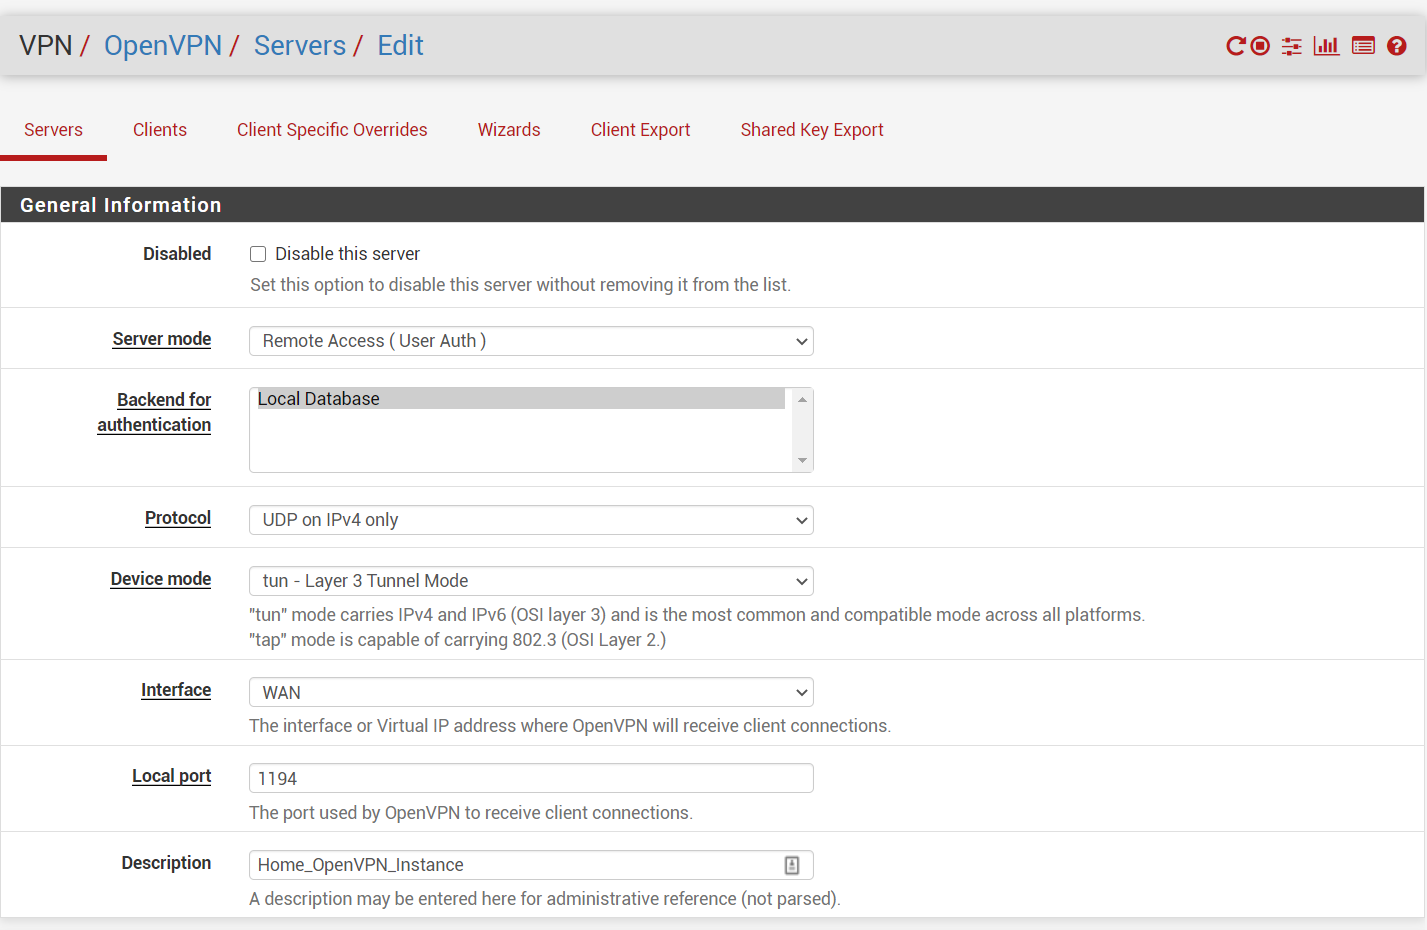
Step 7: Edit the Server
Pfsense, VPN, OpenVPN, select Servers tab, edit
- Select Remote Access (User Auth)
- For simplicity, I'll use this to demo.
- Your use case may be different.
Step 8: Add a User
- The reason we need to create a new account, is we don't want to use our admin account to a VPN user.
- Pfsense, System, User Manager, Select Add
- Username:
vpnuser - Password:
xxx(you'll need to use this password on the client later on, so copy it somewhere) (I suggest a randomly generated >50 characters and symbols) - OPTIONAL: If you selected Remote access (SSL/TLS) or Remote access (SSL/TLS + User Auth), then click on Add user certificate, name it.
- Save
- Username:

caution
It's important to setup a different user, for each client that you'll use to connect to OpenVPN server. Otherwise, if you use the same username with 2 clients, both will experience dropouts/reconnects every few seconds.
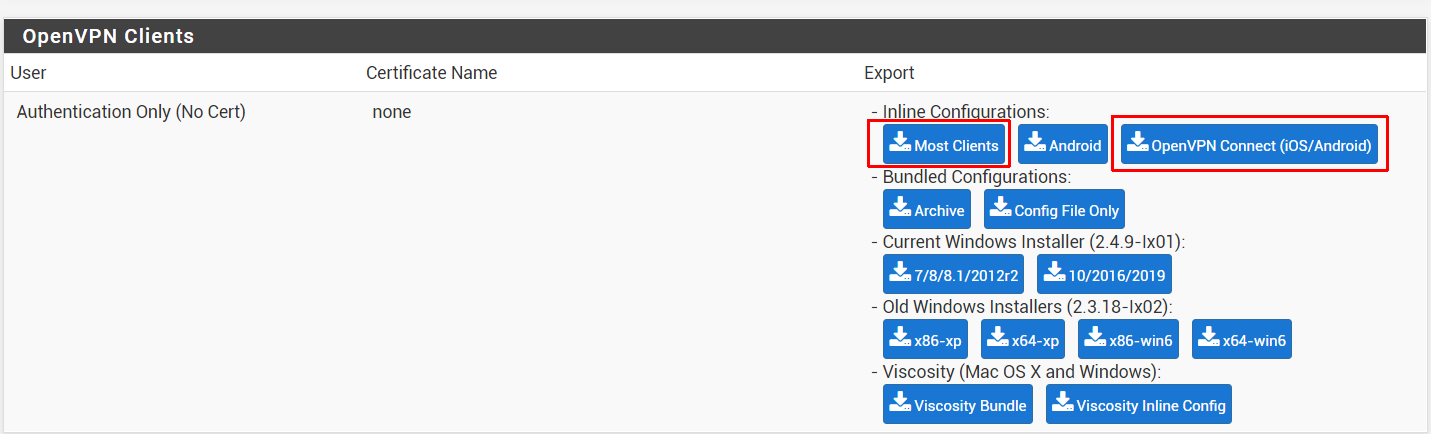
Step 9: Download the configuration file
- For Windows, Mac, or Linux
- Click on the Most Clients (under Inline configurations)
- For Google Android or Apple iOS
- Click on the OpenVPN Connect (under Inline configurations)
note
I didn't download the installation files (for Windows, Mac, etc) from this page, as these look outdated. Just install the latest version of OpenVPN installation file directly from the website.
Optional: View contents of this configuration file
For those who want to look at this configuration file, open the file.ovpn with a text editor.
I've blanked out:
- My public IP and replaced with
SERVER_PUBLIC_IP - 2 certificates, replaced with
aaaandbbb
Setup OpenVPN on Apple iOS or Android
- Download link for iOS.
- Download link for Android.
- Install and import the previously downloaded file (called pfSense-UDP4-1194-ios-config.opvn or similar)
Setup OpenVPN on MacOS or Windows or Linux
- Download link for MacOS or Windows or Linux.
- From Pfsense, VPN, OpenVPN, Client Export, I selected the Most Clients (under Inline configurations), which will download name.opvn
- Import this .ovpn file into OpenVPN.
- Enter the username
vpnuserand password you setup in step 8 above.
Testing to see if your client connected to OpenVPN server
- From your client:
- Disable OpenVPN, open a browser and go to dnsleaktest.com
- The site will return the IP address assigned by your internet service provider and as you appear to the rest of the world. To check your DNS settings through the same website, click on Extended Test and it will tell you which DNS servers you are using.
- Enable OpenVPN, open a browser and go to dnsleaktest.com
- A completely different IP address (that of your VPN server) should now appear, and this is how you appear to the world. Again, DNSLeakTest’s Extended Test will check your DNS settings and confirm you are now using the DNS resolvers pushed by your VPN.
- Disable OpenVPN, open a browser and go to dnsleaktest.com
Optional: Add widget to Pfsense dashboard
- Pfsense, Dashboard, Click on plus icon, click on OpenVPN, drag it into place, click on save icon.

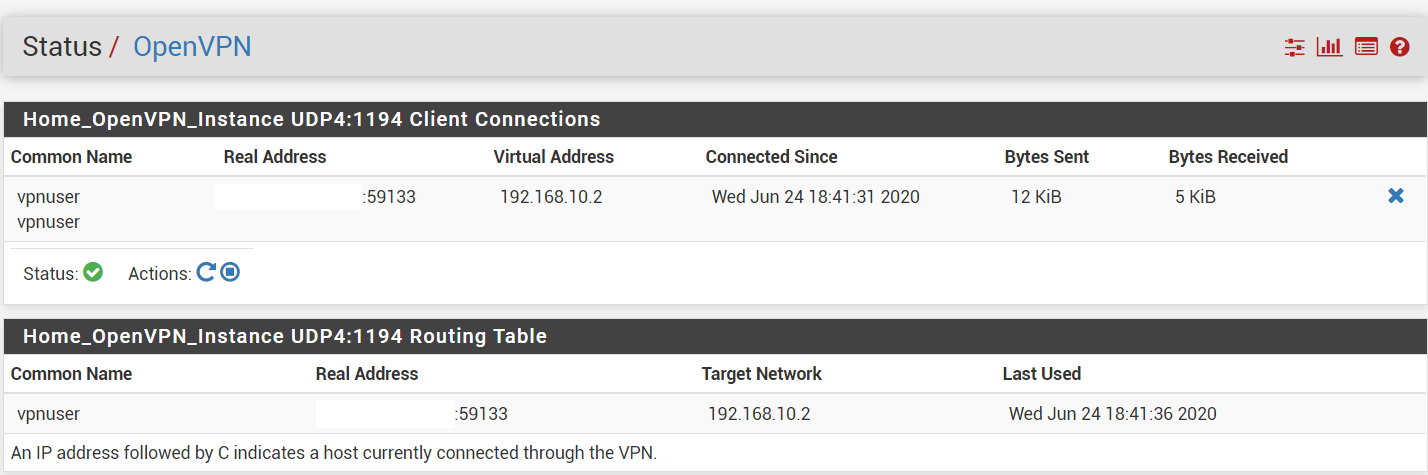
- Connect a client to OpenVPN server, and as soon as you do, you'll see the client come up in Pfsense dashboard. It will show the public IP from the client device and the IP
192.168.10.2.

- You can also see additional information from Pfsense, Status, OpenVPN.
Test #1: OpenVPN over ISP's Fiber Optic Cable
Tests done with speedtest.net:
- Home Fiber (over LAN, No VPN)
- Ping: 3 ms
- Download: 177 mbps
- Upload: 177 mbps
- Work Fiber (over LAN, No VPN)
- Ping: 2 ms
- Download: 511 mbps
- Upload: 510 mbps
- Using Work Desktop computer (via ethernet), connected to home's WAN using OpenVPN
- Ping: 3 ms
- Download: 107 mbps
- Upload: 100 mbps
Conclusion:
- At home, I have 3 ms ping. At work, I have 2 ms ping. When I connected to my Home's connection over OpenVPN from work, I'm getting 2 ms ping. That's incredible!
Test #2: OpenVPN over Cellular Provider 1 LTE Connection
note
Take the tests with a grain of salt, as cellular LTE connection varies a lot.
Tests done with speedtest.net:
- On iPhone, using LTE with provider 1, without VPN
- Ping 20 ms
- Download 27 mbps
- Upload 7 mbps
- On iPhone, Using LTE with provider 1, with OpenVPN, connected to Home (which has a Fiber optic connection, with ping of 3 ms and 177 mbps down/up)
- Ping 77 ms
- Download 40 mbps
- Upload 10 mbps
Conclusion:
- The importance of this test is NOT the speed or latency, but simply the difference between the non-VPN and VPN test.
- Latency went up 285% when OpenVPN was turned on.
Test #3: OpenVPN over Cellular Provider 2 LTE Connection
note
Take the tests with a grain of salt, as cellular LTE connection varies a lot.
Tests done with speedtest.net:
- On iPhone, using LTE with provider 2 , without VPN
- Ping 29 ms
- Download 30 mbps
- Upload 1 mbps
- On iPhone, Using LTE with provider 2, with OpenVPN, connected to Home (which has a Fiber optic connection, with ping of 3 ms and 177 mbps down/up)
- Ping 56 ms
- Download 25 mbps
- Upload 2 mbps
Conclusion:
- The importance of this test is NOT the speed or latency, but simply the difference between the non-VPN and VPN test.
- Latency went up 93% when OpenVPN was turned on.
Optional: How to make your OpenVPN more reliable
Remember, when I said that running OpenVPN over port 1194 UDP might be blocked by some firewalls? Well, we can run a 2nd instance of OpenVPN over port 443 TCP as a backup, in case the first instance get's blocked for whatever reason.
How to do that?
Run Wizard again, and change the following:
- Protocol, instead of UDP on IPv4 only use TCP on IPv4 only
- Local Port, instead of
1194use443 - Description, instead of
Home_OpenVPN_InstanceuseHome_OpenVPN_Instance_2 - Tunnel Network:
192.168.11.0/24(instead of192.168.10.0/24like I used for first instance) (this makes it easy to see when you're being routed via port443 TCP) - Firewall Rule, enable this.
- OpenVPN rule, disable this. (since it will match your previously created rule, thereby creating a duplicate entry for no reason)
Finish
When you go to Pfsense, VPN, OpenVPN, you'll see the 2 instances.

- Now, you'll have to repeat the Client Export process:
- This time, select the Remote Access Server as Home_OpenVPN_Instance_2 TCP4:443
- Import the configuration file to each client again
- Enable OpenVPN on the client and verify the connection.
Optional: How to tweak OpenVPN for Performance
I see no reason for myself to further tweak the performance of OpenVPN, but if you're interested, read the website.
Requirement for OpenVPN to work
The Pfsense certificate that OpenVPN uses must not be expired, otherwise the tunnel won't initiate and you'll get an error from the client. Something like "Peer certificate verification failure"
Conclusion
OpenVPN works beautifully!