Setup Pfsense On Bare Hardware

Download Pfsense
- Go to Pfsense.org
- For Architecture: AMD64 (64-bit)
- For Installer: USB Memstick Installer
- For Console:
- VGA (Choose this if your hardware will have a monitor, keyboard attached)
- Serial (Preferred choice)(Choose this if your hardware will not have a monitor, keyboard attached)
- For Mirror: Any location
- Select Download button
- This will download pfSense-CE-memstick-x.x.x-RELEASE-amd64.img.gz (approx. 400mb in size).
Install Pfsense on USB
- Insert at least 1GB USB (used only for installation, and you won't need it after)
- Download balenaEtcher (free)(for windows, mac, linux)
- Install and run it
- Select Flash from file
- Browse to location of pfSense-CE-memstick-x.x.x-RELEASE-amd64.img.gz, select it
- Insert USB flash drive and select it.
- Select Flash
- Now you can install Pfsense on any hardware with this bootable USB
Pfsense minimum requirements
- CPU 600 MHz or faster
- RAM 512 MB or more
- 4 GB or larger disk drive (SSD recommended over HD)
Network Diagram
This is the network diagram of the setup I'm using.
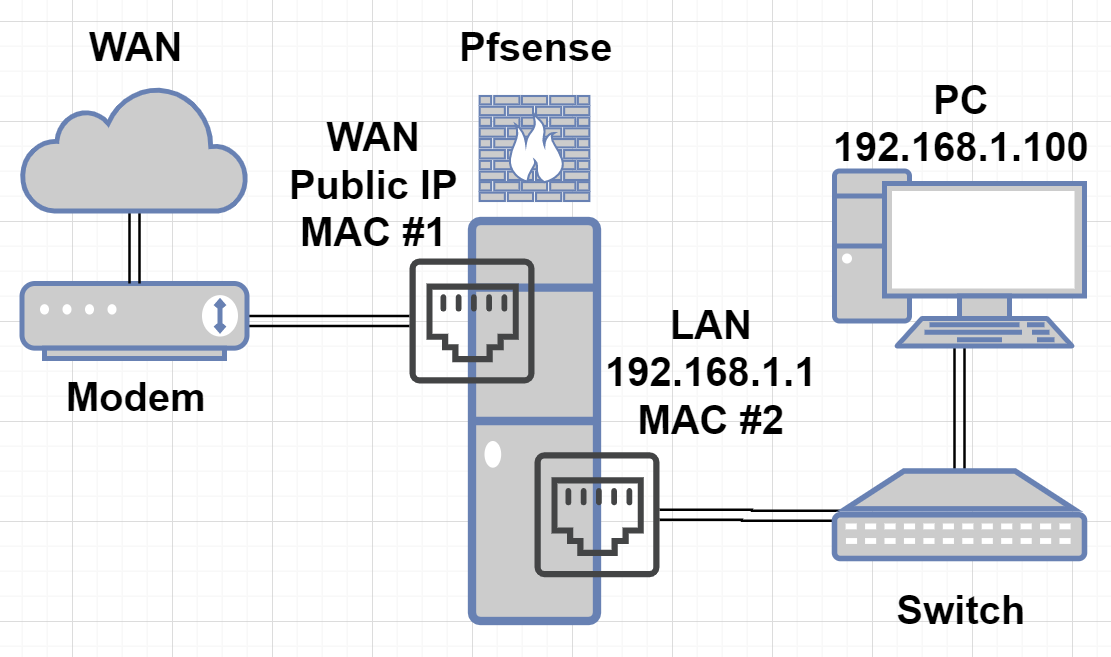
- Pfsense Static IP: 192.168.1.1
- PC on network to access Pfsense, IP: 192.168.1.100 (doesnt matter what this IP is)
- MAC No.1 is the motherboard NIC
- MAC No.2 is the Intel PCI-E NIC that was added to this machine
Start pfsense virtual machine
- Power on the pfsense virtual machine
- Start the installation and wait for it to get to the main screen

- Select Accept the license

- Select Install option
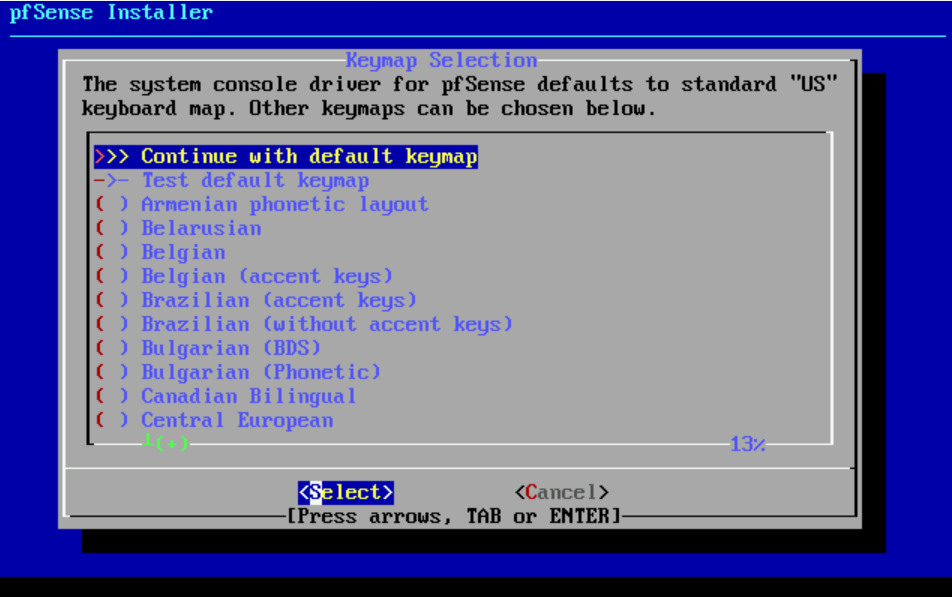
- Select Continue with default keymap
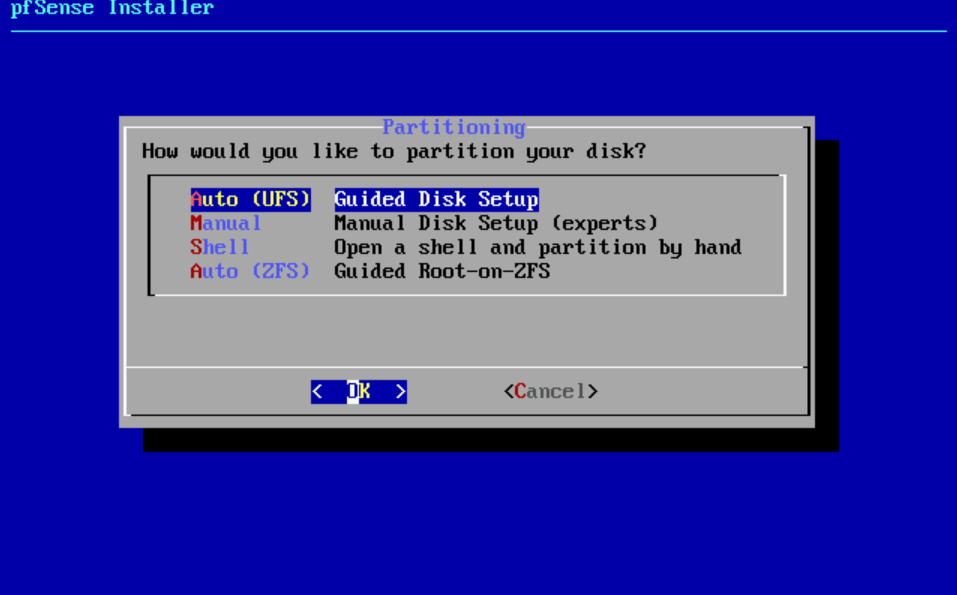
- Select Auto (ZFS)

- Select Install
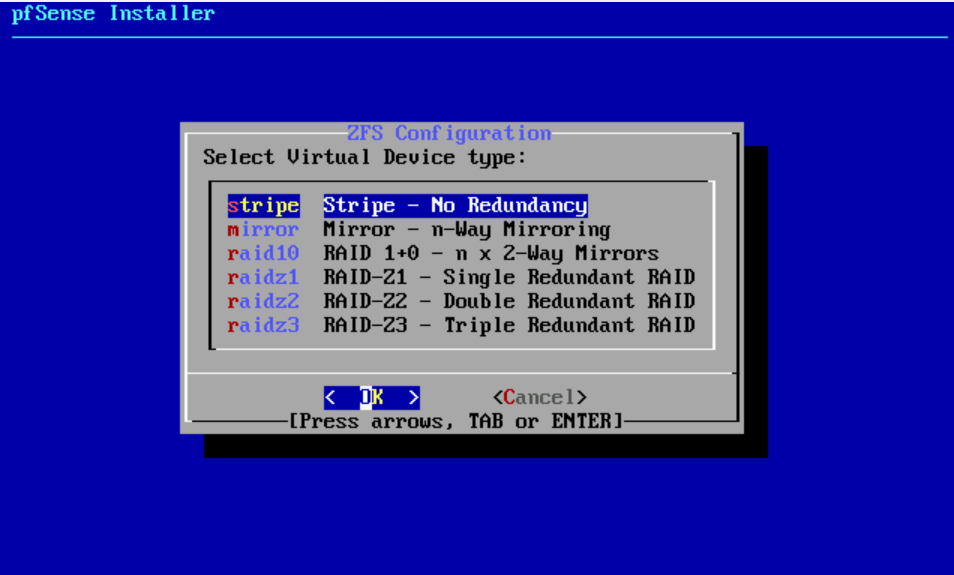
- Select stripe no redundancy

- Select spacebar to select that hard disk, enter to OK
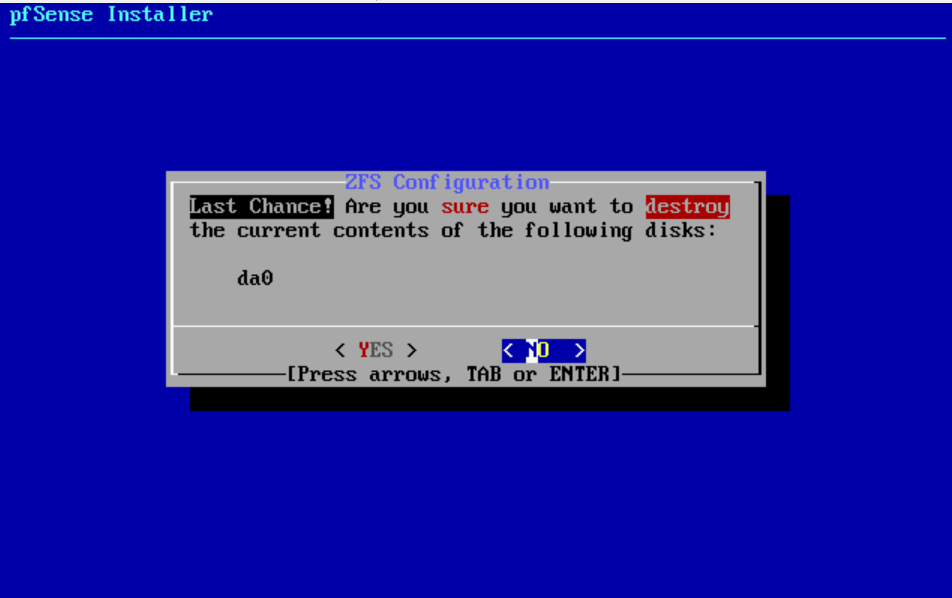
- Are you sure you want to destroy the current contents of the following disks: da0? yes
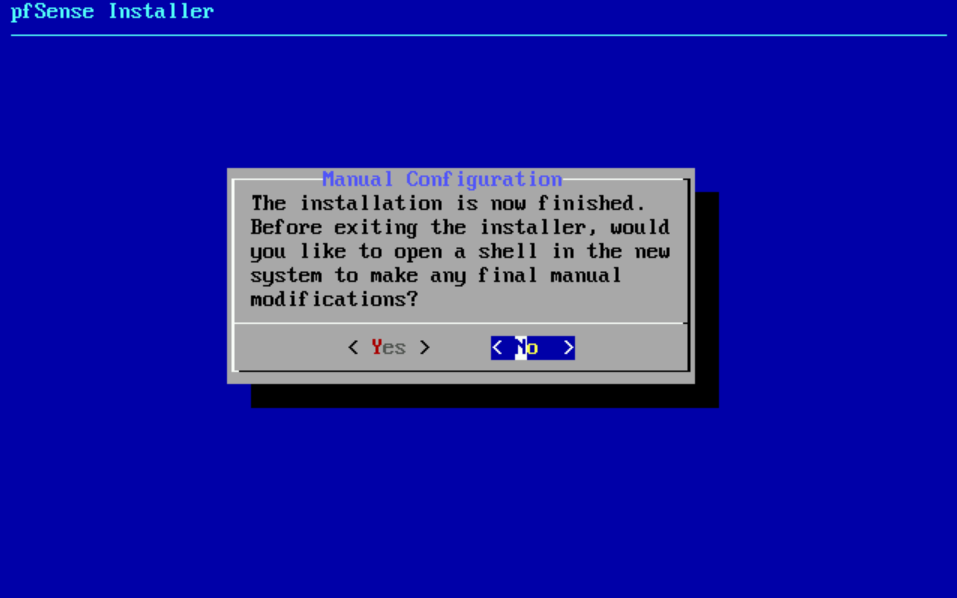
- Select No to do manual configuration.
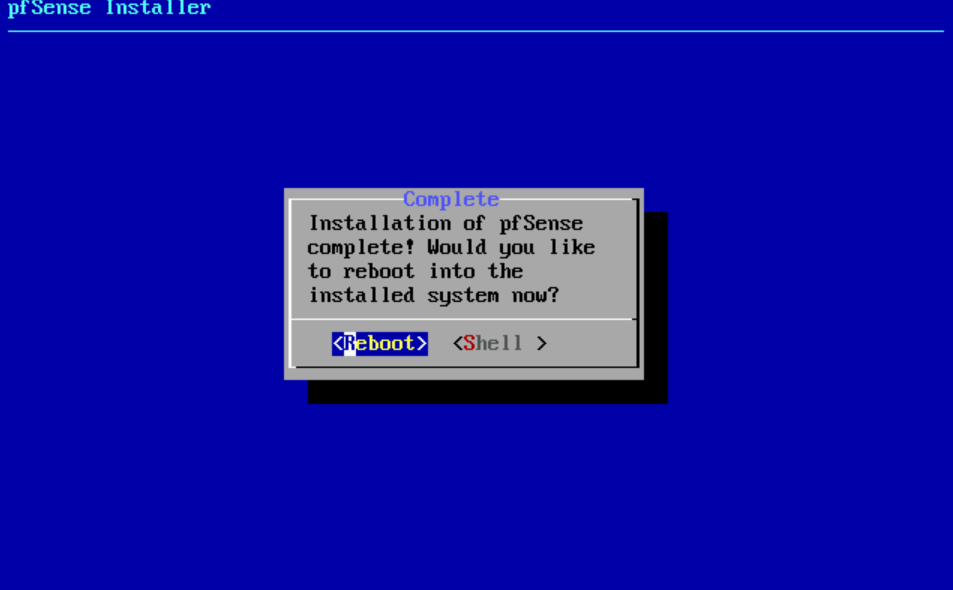
- Select Reboot
Once it reboots, you'll see:
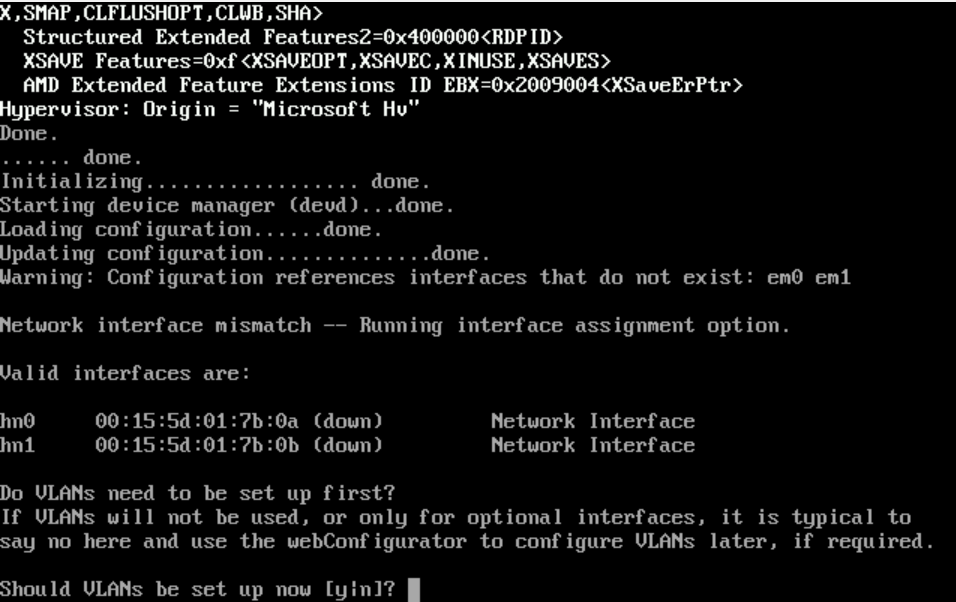
- Type
n(if you're not using VLANs, just type 'n' for no)
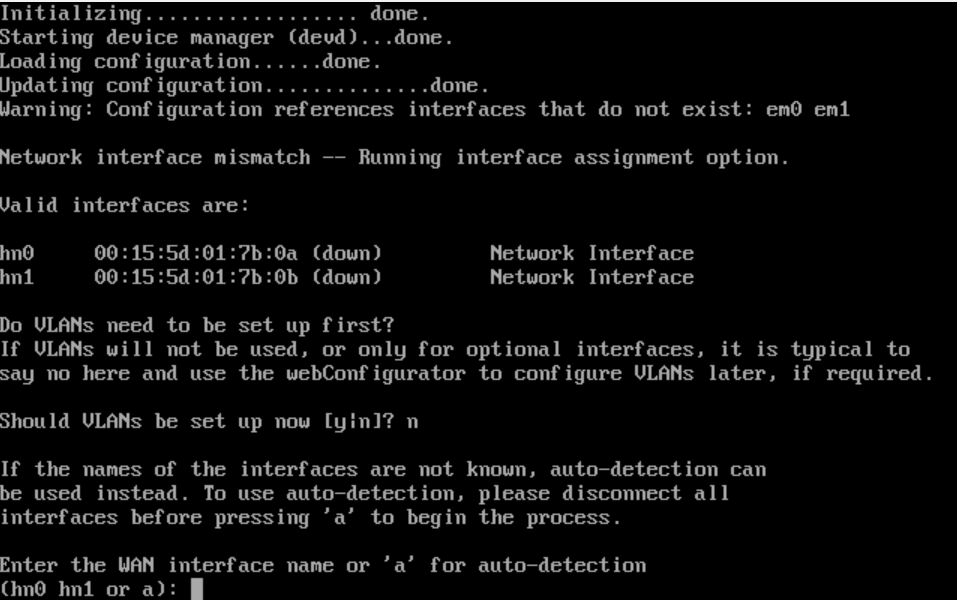
- Figuring out MAC addresses:
- As you can see, pfsense calls the MAC address 00:15:5d:01:7b:0a => hn0
- As you can see, pfsense calls the MAC address 00:15:5d:01:7b:0b => hn1
- Now, match the MAC No.1 and MAC No.2 you saw to either hn0 or hn1 (in pfsense)
- Enter either
hn0orhn1for the WAN address

- Figuring out MAC addresses:
- Enter either
hn0orhn1for the LAN address
- Enter either

- Do you want to proceed?
y
Once it's complete, you'll see:
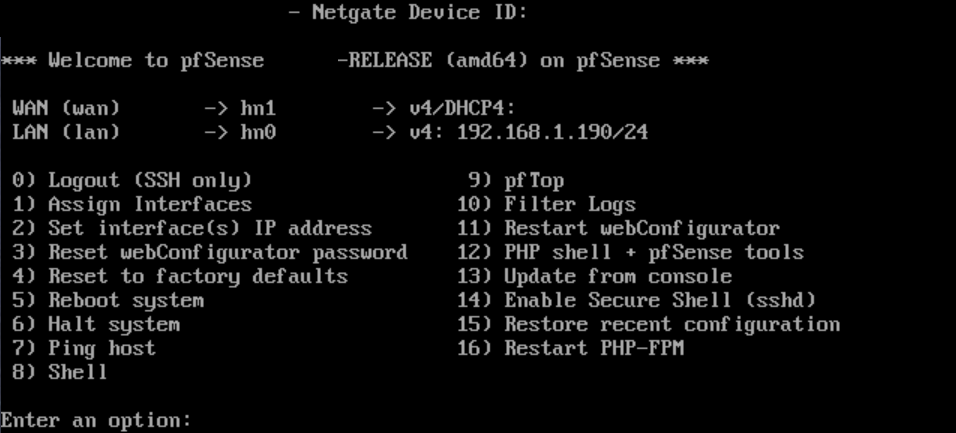
- You can see 2 things immediately:
- WAN IP: should be a public one, if everything worked properly
- LAN IP: this is important, as this IP is how you'll reach pfsense dashboard
note
If you mixed up the WAN/LAN, you can re-assign using option 1) on prompt or later on in dashboard!
Log into Pfsense Dashboard
- Type in the Pfsense LAN IP, from your local network, in my case, it was
192.168.1.190(this is temporary and I'll changed it to192.168.1.1later) - You get a certificate error, proceed

- Default username / password:
admin/pfsense
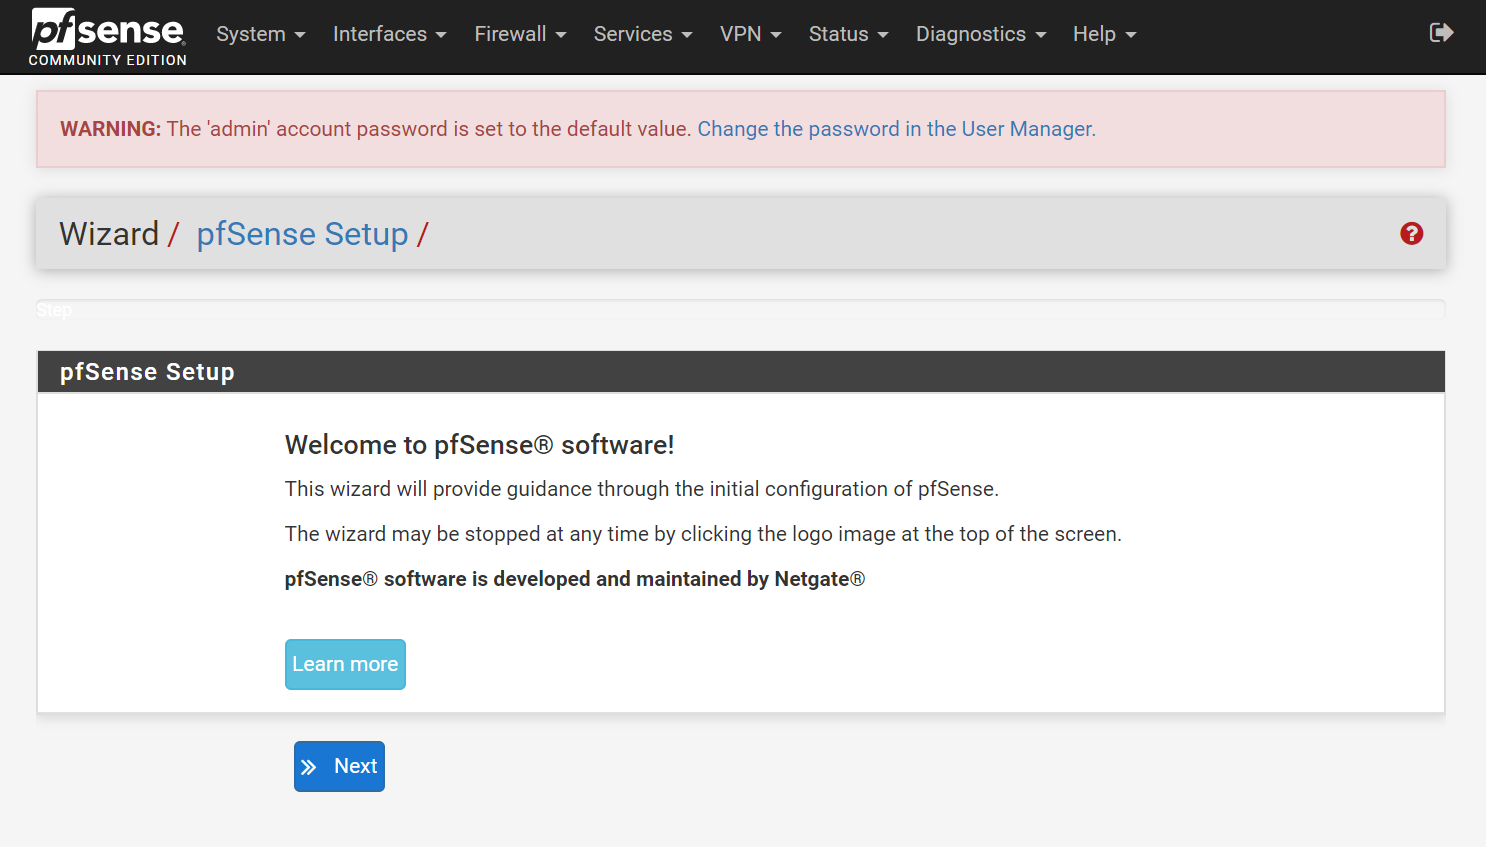
- Select Next
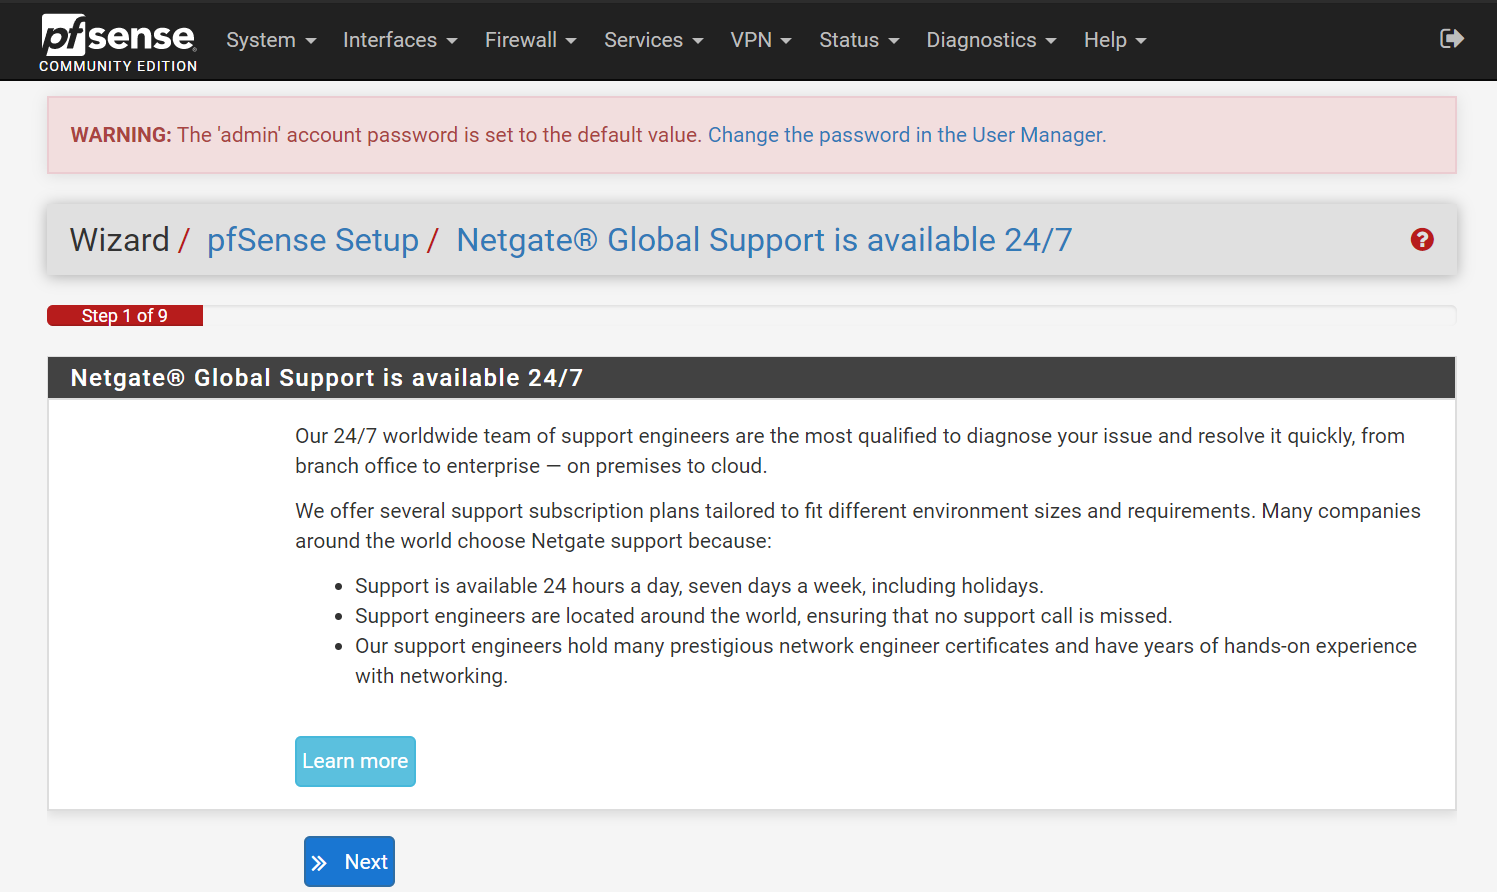
- Step 1 (Netgate support):
- Select Next
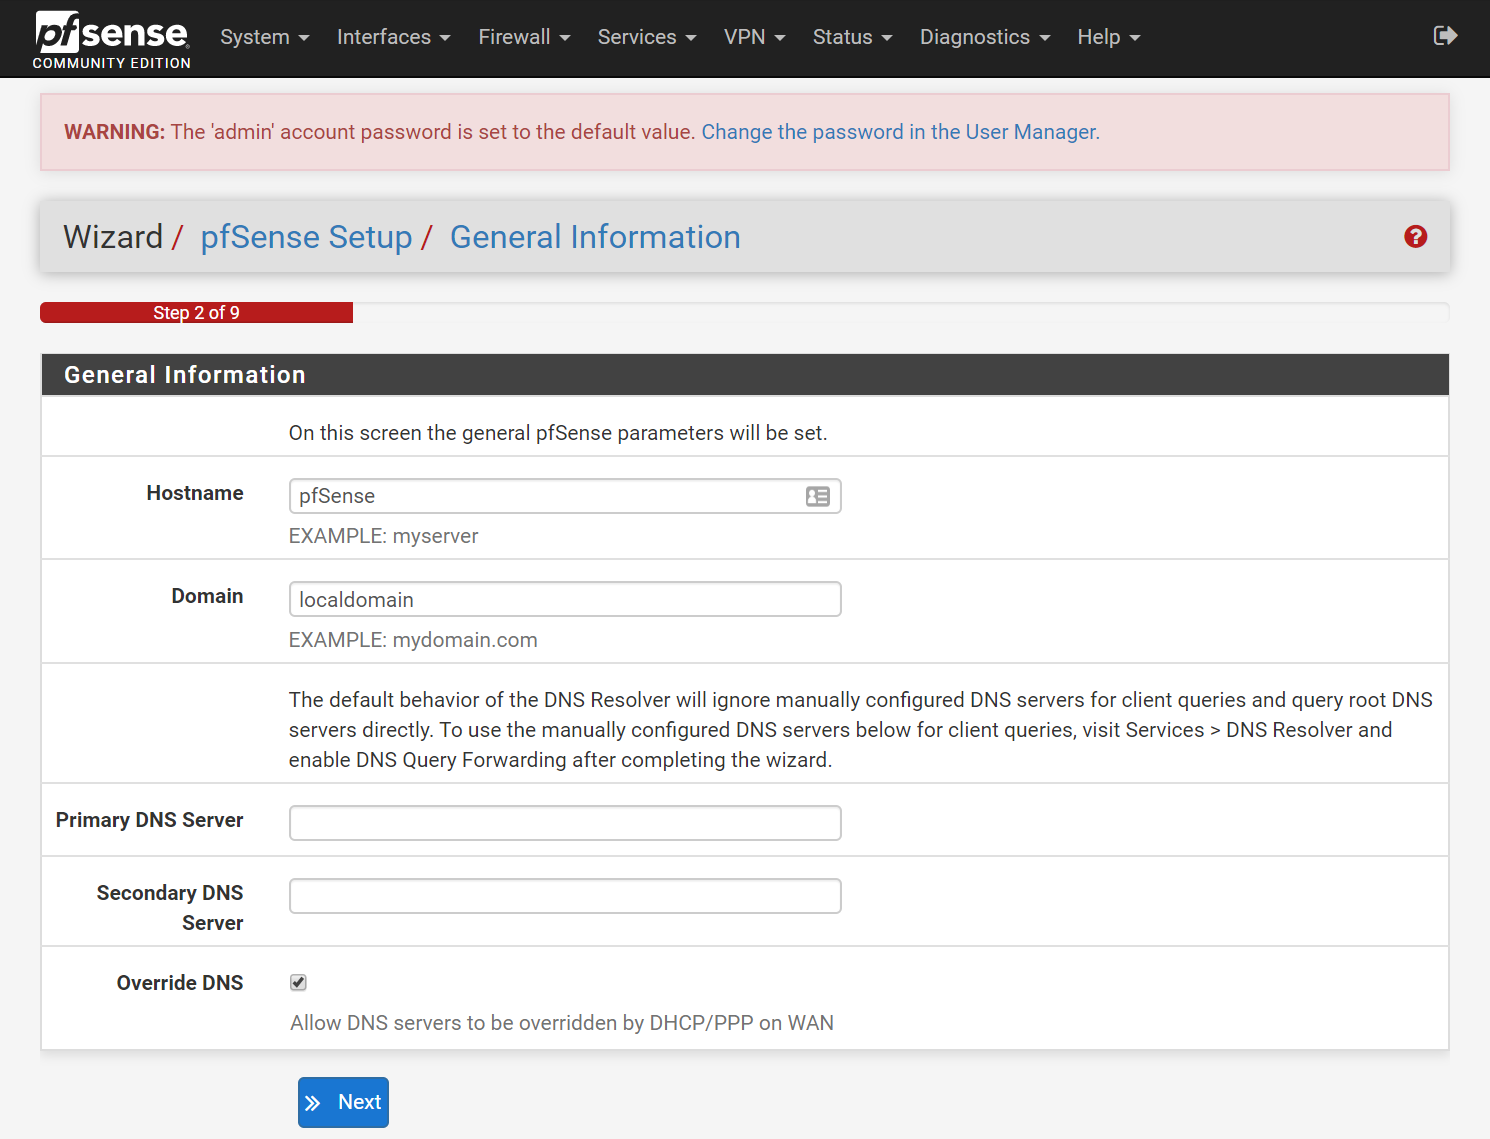
- Step 2 (General Information):
- Hostname:
pfsense(default) - Domain:
localdomain(default) - Primary DNS:
1.1.1.1(My recommendation for Cloudflare's Public DNS server) - Secondary DNS:
8.8.8.8(My recommendation for Google's Public DNS server) - Disable Override DNS (My recommendation as your ISP's DNS server is ALWAYS slower than either Cloudflare or Google. Plus, do you really want to send your DNS traffic to your ISP? Not me!)
- Hostname:

- Step 3 (Time Server Information):
- Time server hostname: ___ (My recommendation is to leave this NTP server as default, unless you trust some other NTP server more)
- Timezone: ___ (My recommendation is to change to your timezone, otherwise, your logs will be confusing!)
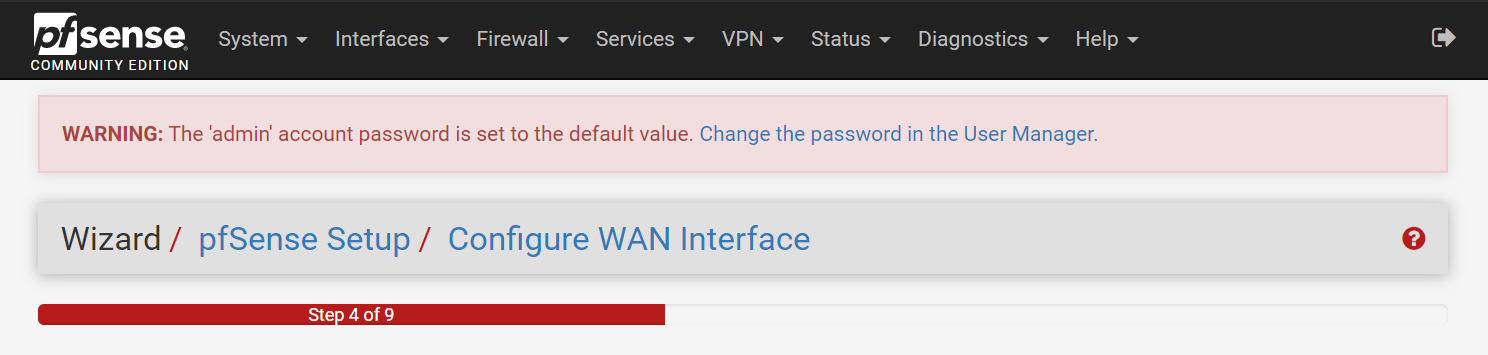
- Step 4 (Configure Wan Interface):
- For WAN configuration, my recommendation is to leave everything on default, with DHCP for WAN (unless you have a good reason otherwise).
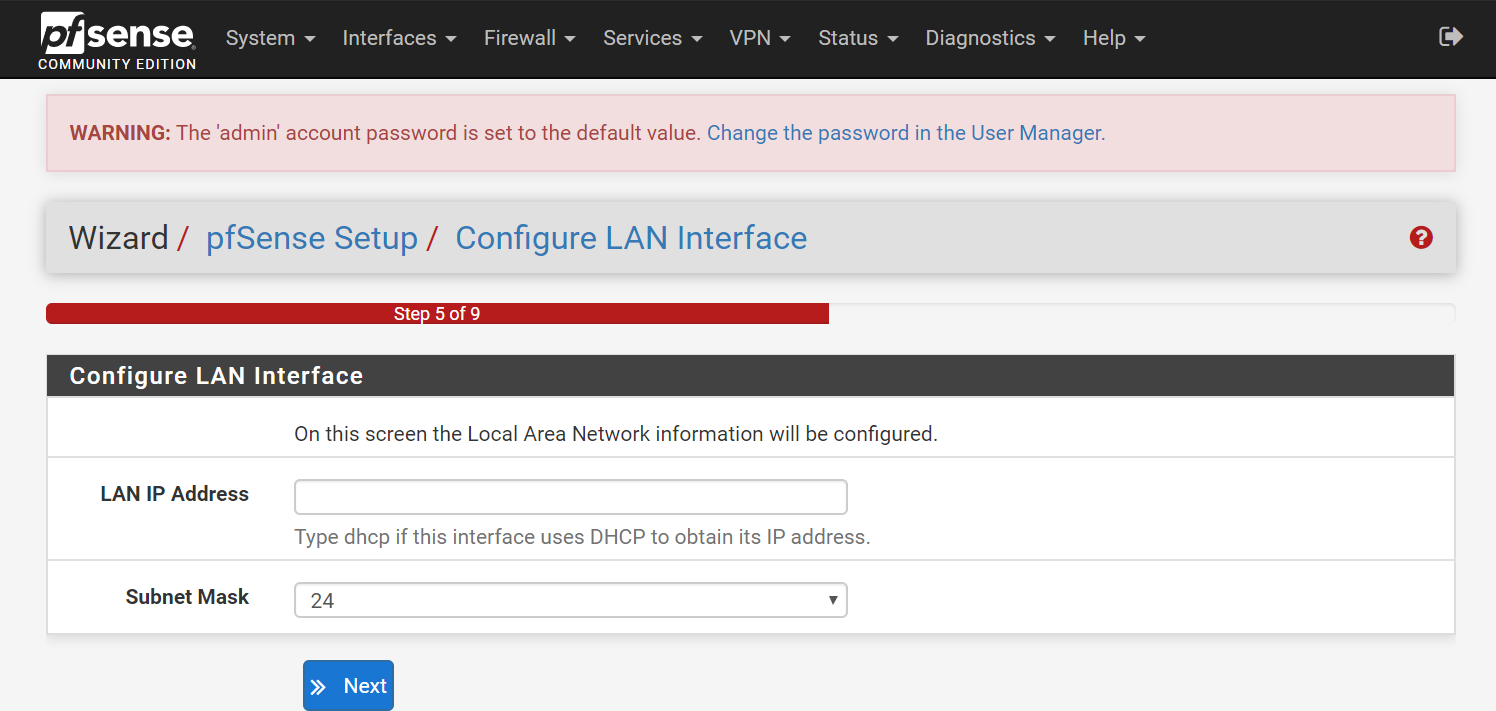
- Step 5 (Configure LAN Interface):
- LAN IP:
192.168.1.1 - Subnet: 24 (leave on default, if you're not sure)
- LAN IP:
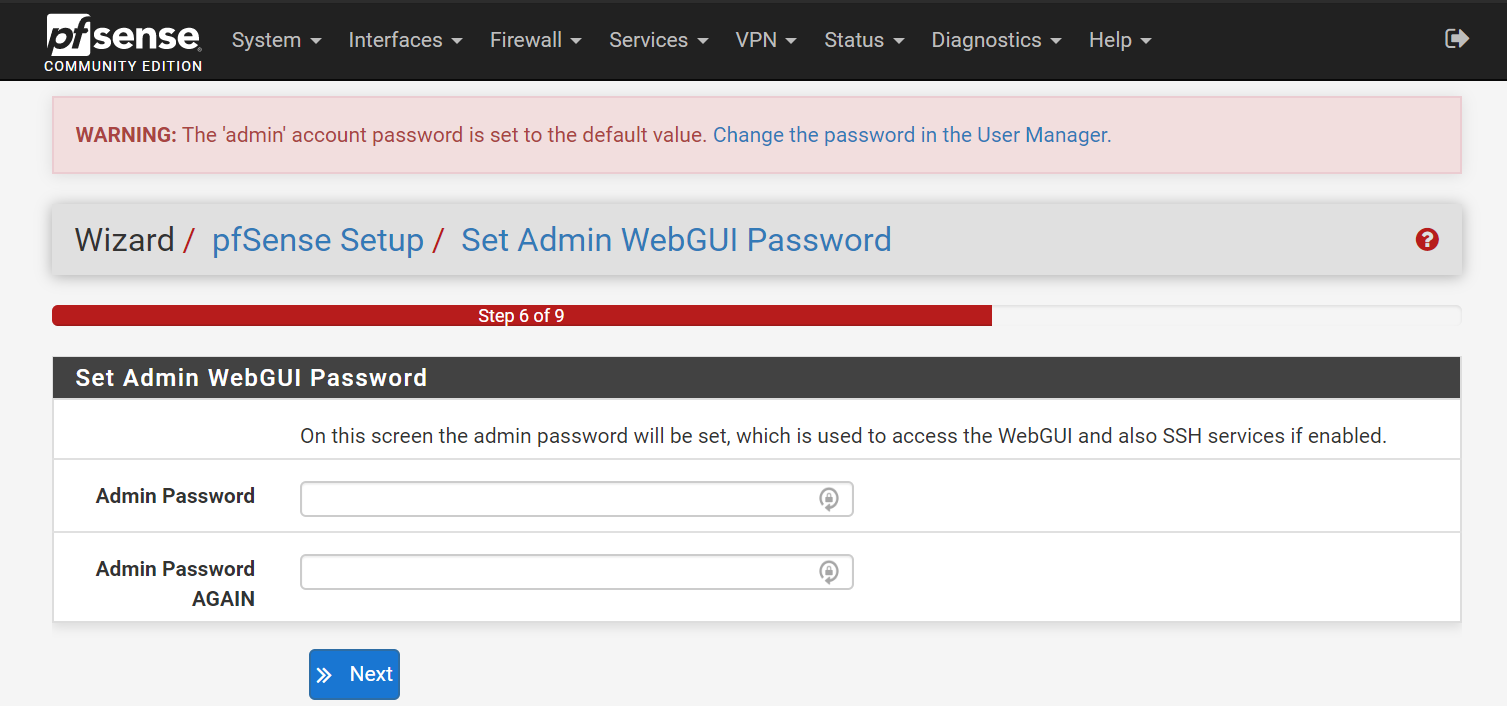
- Step 6 (Set admin webui password):
- Change the Default Password
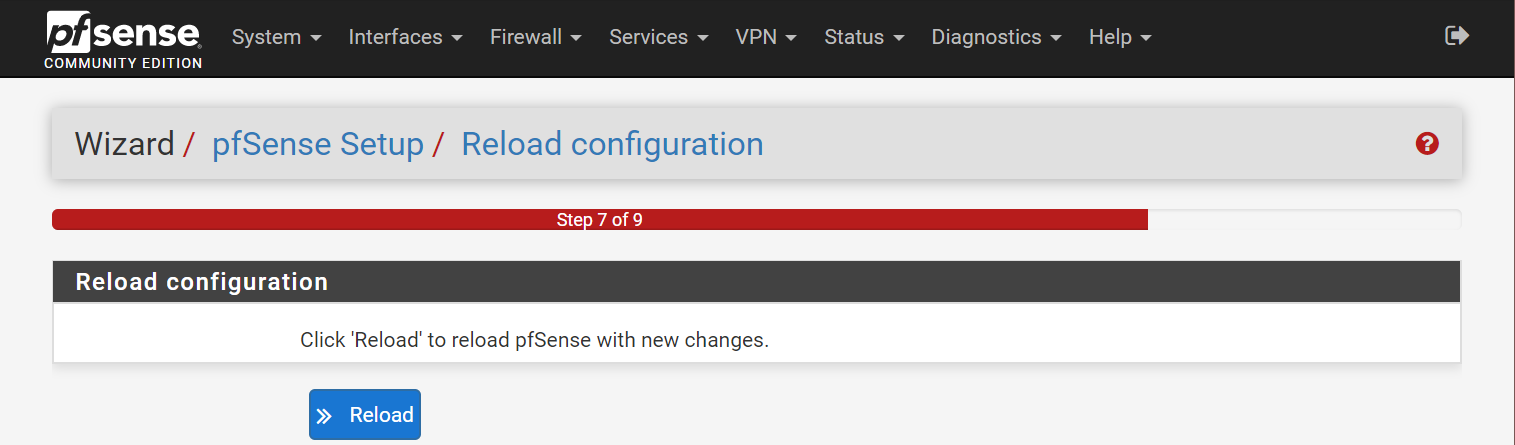
- Step 7 (Reload configuration):
- Select Reload
note
If you changed the LAN IP, you might need to input the new IP in the browser URL, in order to get back into dashboard.
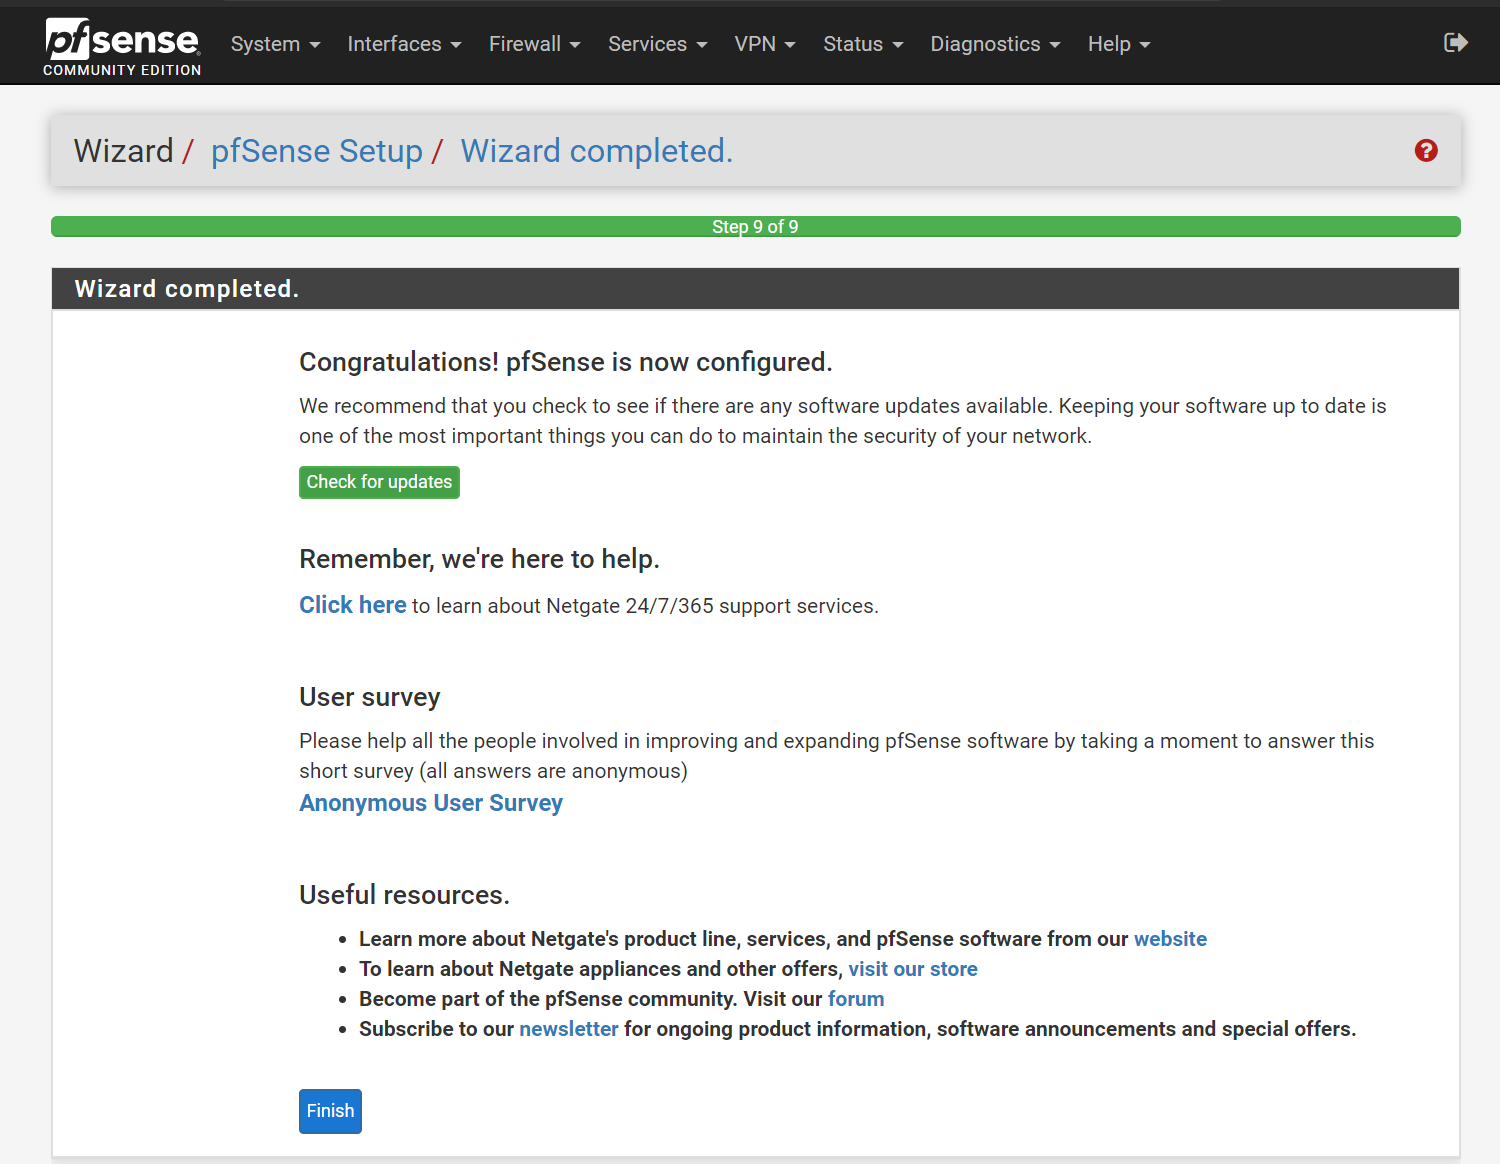
- Step 9 (Wizard Complete):
- Select Finish
- Select Accept (the user agreement)
You've successfully finished the installation of pfsense. Now you can configure any settings you want.
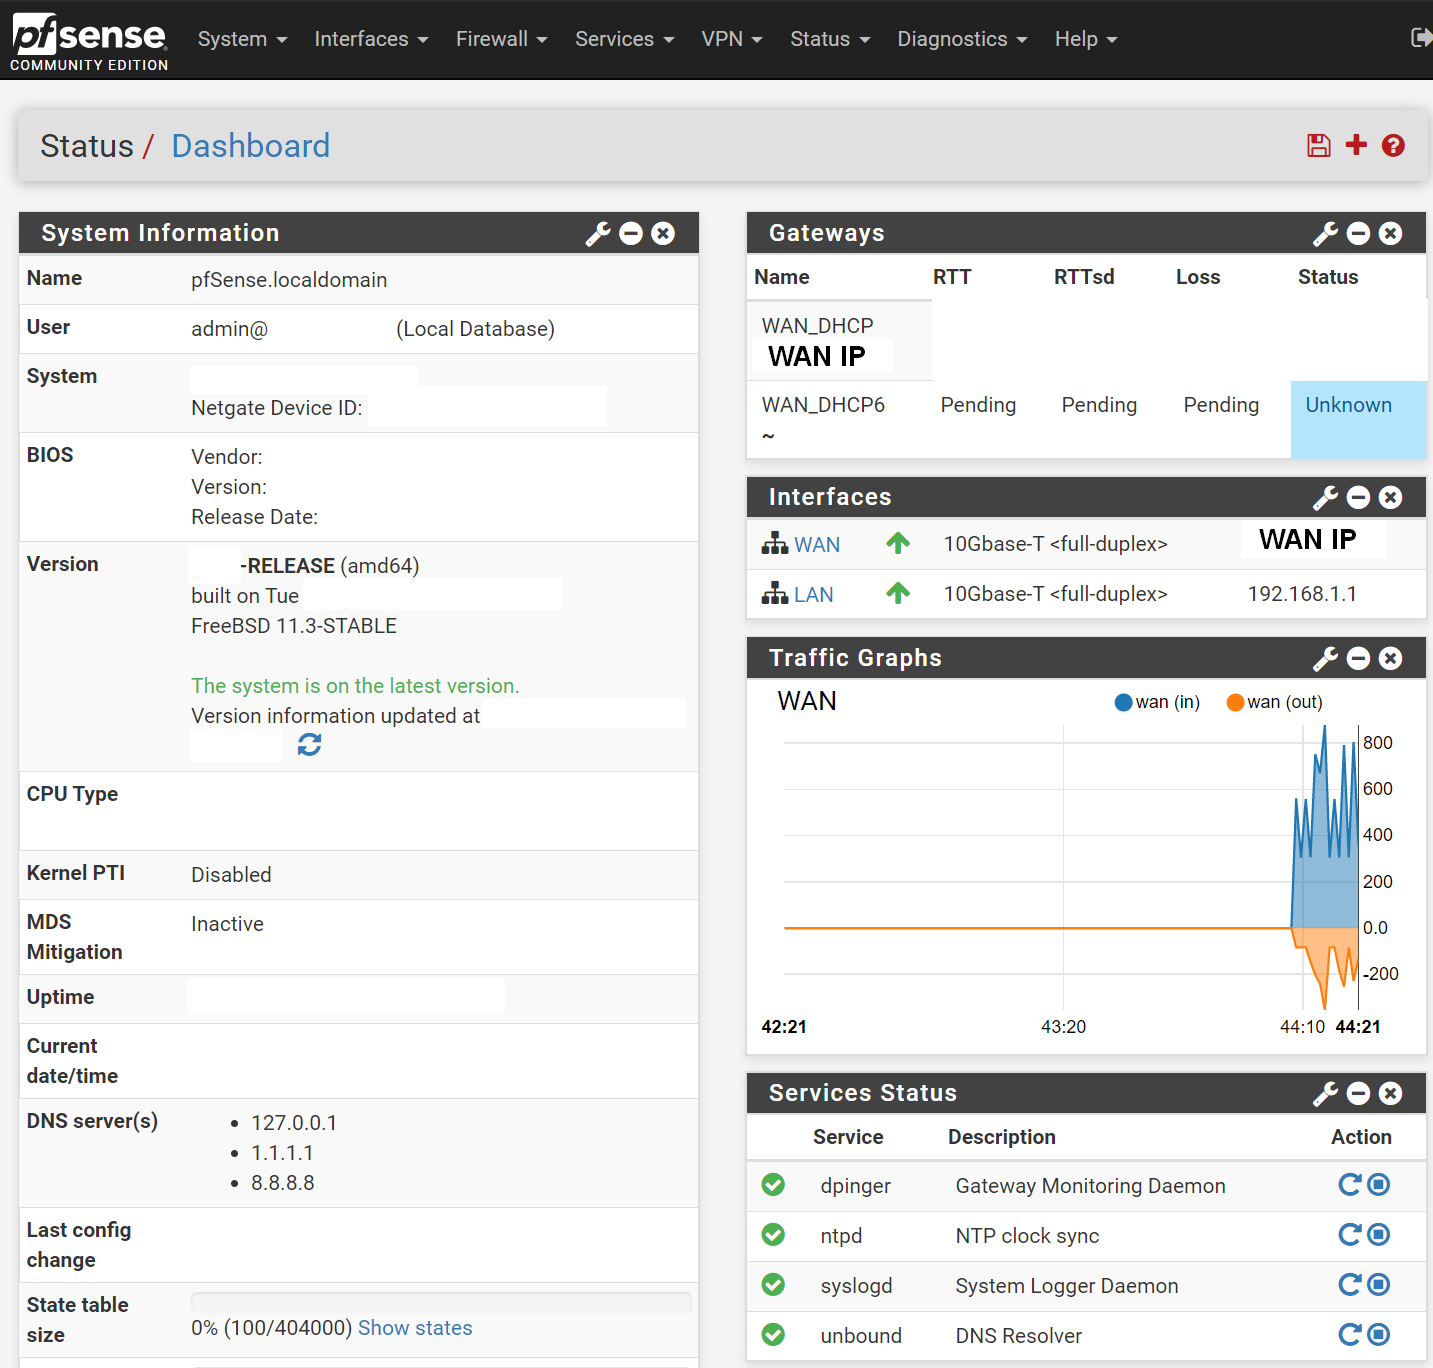
Tweak 1: Reconfigure the look of your dashboard
You'll first see 3 sections:
- System Information (useful to keep)
- Netgate Services and Support (to remove by hitting the X button on top right)
- Interfaces (useful to keep to show the WAN IP and LAN IP)
My first step of action is to re-configure the dashboard to my liking:
- On the top right of the screen, where it says Status / Dashboard, on the right-hand side, select + icon.
- Gateways (shows latency and packet loss on your WAN gateway)
- Traffic Graphs (shows live traffic usage on WAN)
- Service Status (shows whether services are running or not, useful for troubleshooting)
Final Result:
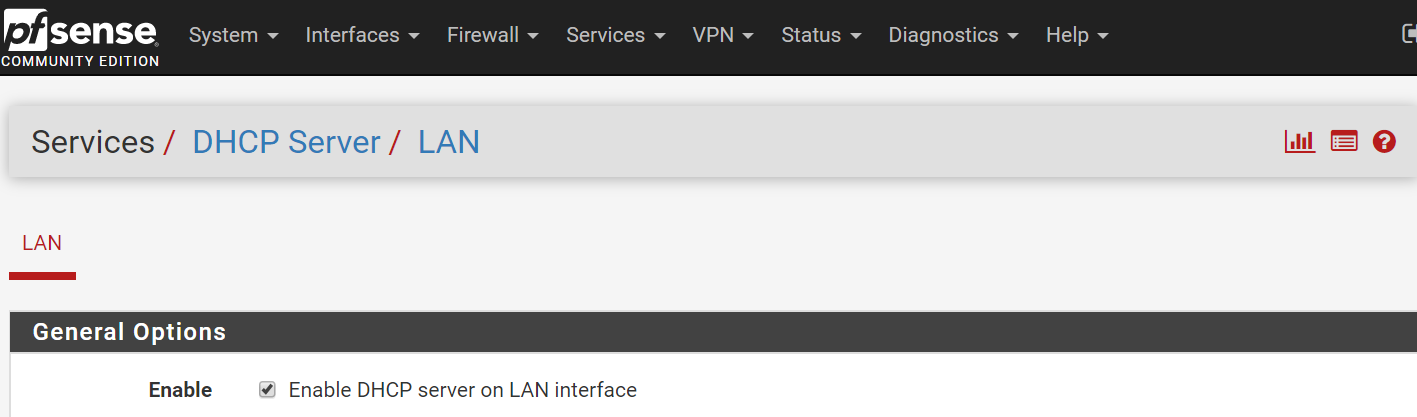
Tweak 2: Enable DHCP on LAN
Make sure your LAN has DHCP server running, so your devices on the network can get IP addresses.
- Go to Services, DHCP Server,
- Enable LAN
- Save.
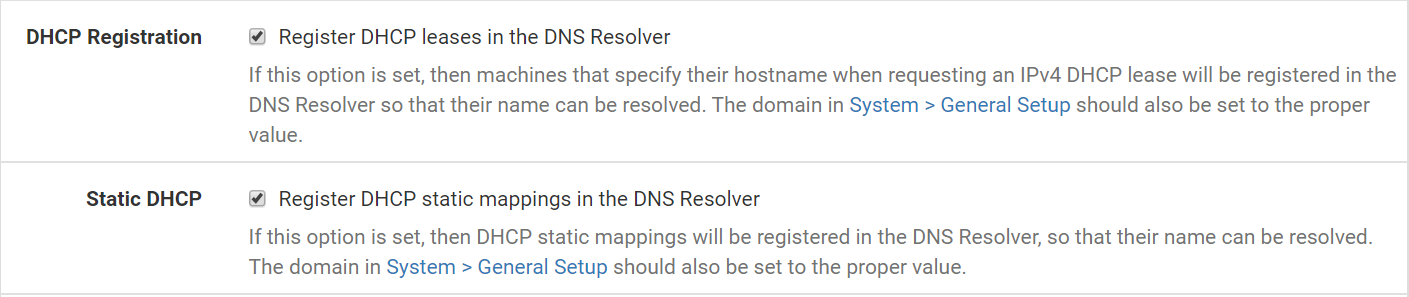
Tweak 3: Enable pinging of hostnames
By default, hostnames cannot be pinged on the LAN network. Let's make sure you can ping hostnames on your LAN network.
- Go to Services, DNS Resolver, General Settings,
- Enable Register DHCP leases in the DNS Resolver
- Enable Register DHCP static mappings in the DNS Resolver
- Save.
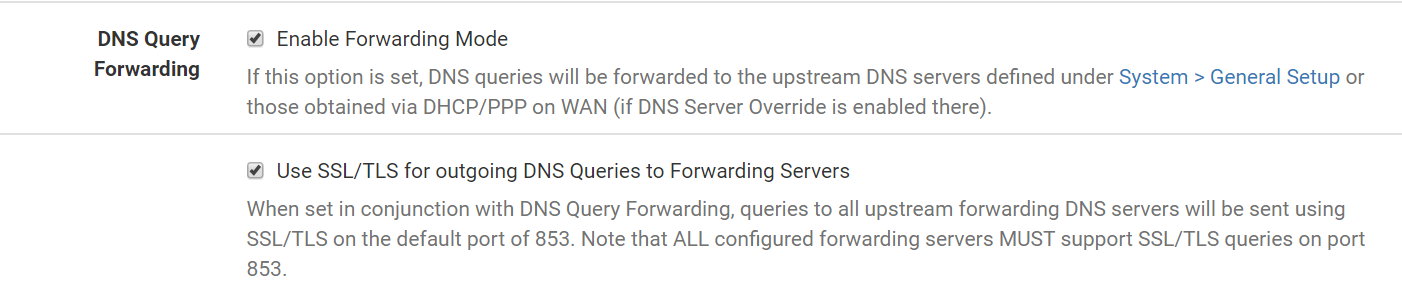
Tweak 4: Secure DNS queries (DNS over SSL/TLS)
By default, DNS queries between your firewall and public DNS servers are unsecure (over port 53). Make sure DNS queries will be secure (over port 853).
- Go to Services, DNS Resolver, General Settings,
- Enable Enable Forwarding Mode
- Enable Use SSL/TLS for outgoing DNS queries to forwarding servers
- Save.
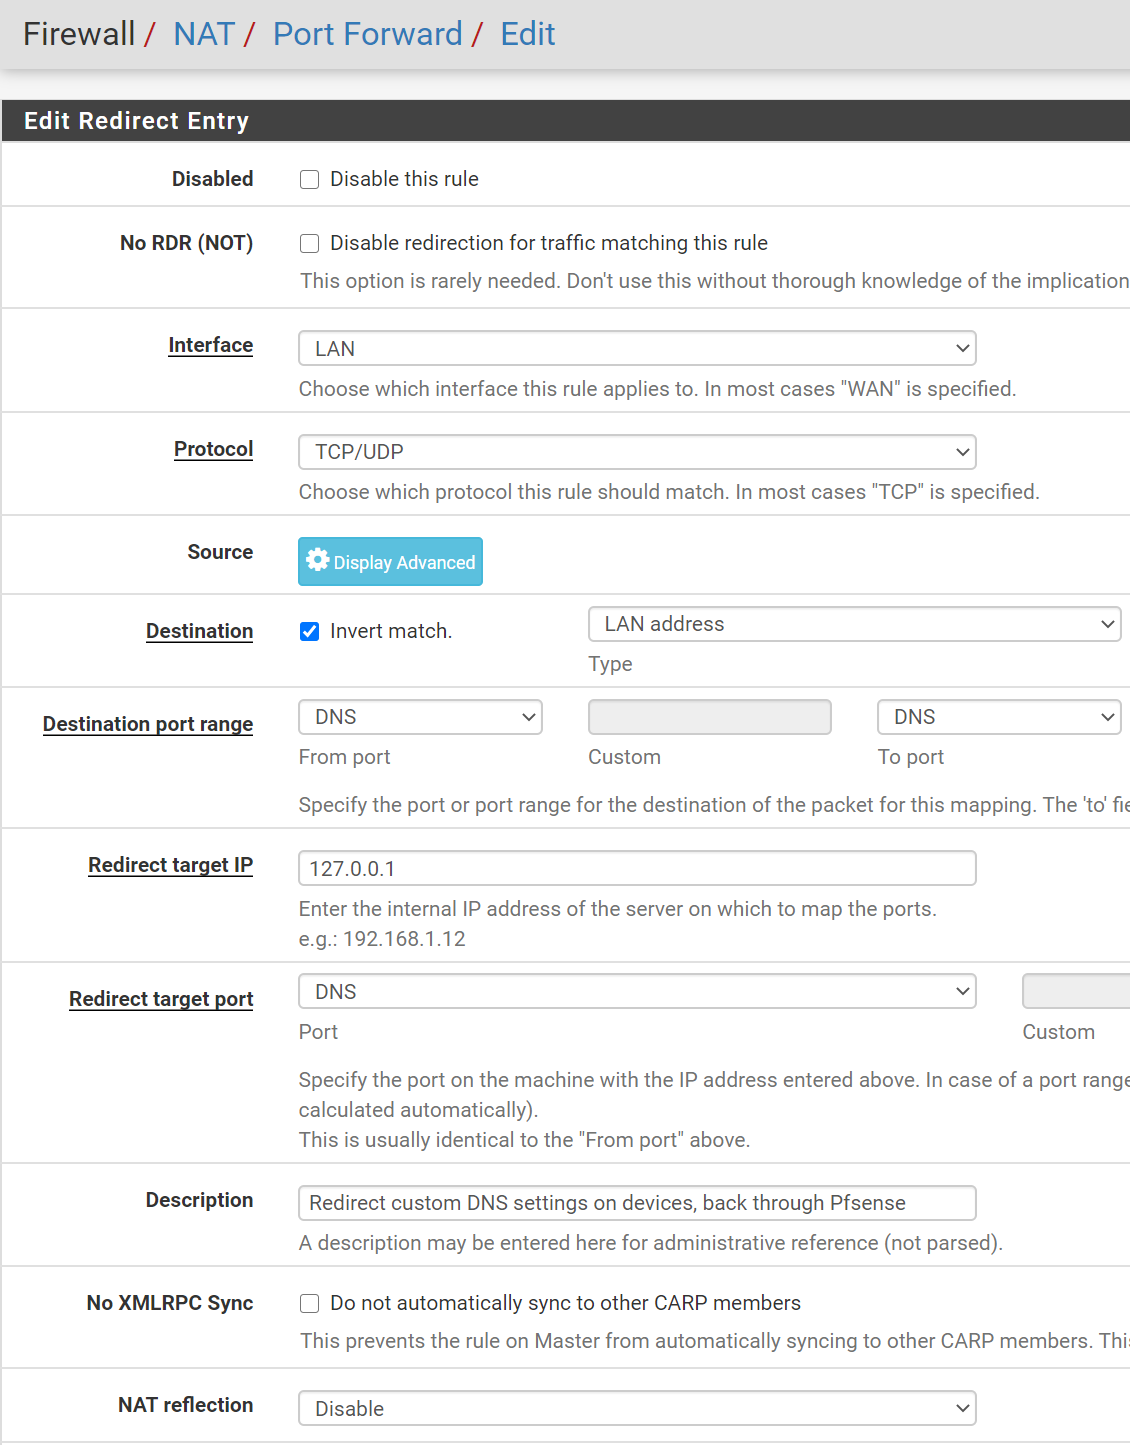
Tweak 5: Force all rogue devices to go through Pfsense
If a client decides to change his own DNS server, this will bypass Pfsense's predefined DNS servers. We can call these Rogue Devices. Let's fix that such that any custom DNS server will get redirected back to Pfsense.
- Firewall, NAT, Under Port Forward, Select Add
- Interface: LAN
- Protocol: TCP/UDP
- Destination:
- Enable Invert Match
- Type: LAN Address
- Destination Port Range:
- From 53 (DNS)
- To 53 (DNS)
- Redirect Target IP:
127.0.0.1(this is the loopback address) - Redirect Target Port: 53 (DNS)
- Description:
Redirect custom DNS settings on devices, back through Pfsense - NAT reflection: Select Disable
- Now, under Actions select Create a new NAT rule based on this one
- Keep the same settings, but change the port 853 (DNS over TLS)
- Enable both
Verify Tweak 5: How to verify that all clients are going through port 853 (DNS over TLS)?
- Pfsense, Diagnostics, pfTop
- Type into filter expression:
port 853 or port 53
- Sort by Destination Port
- Type into filter expression:
- Look at the Destination tab, and you'll see any clients that are talking to the public DNS servers.
- All devices should be reaching public DNS servers over port 853 (DNS over TLS) as intended.
Conclusion