Setup WireGuard VPN Server on Pfsense


Overview
OpenVPN is the standard of choice for VPN technology.
However, a new VPN technology, called WireGuard, is promising to shake things up.
What makes WireGuard better than OpenVPN?
- Much more secure (latest standards only, as opposed to OpenVPN which uses several standards)
- Much less bloated code (4,000 lines of code) vs OpenVPN (100,000 lines of code), which makes audits and maintenance much easier.
- Much faster than other VPN tunnels. Source
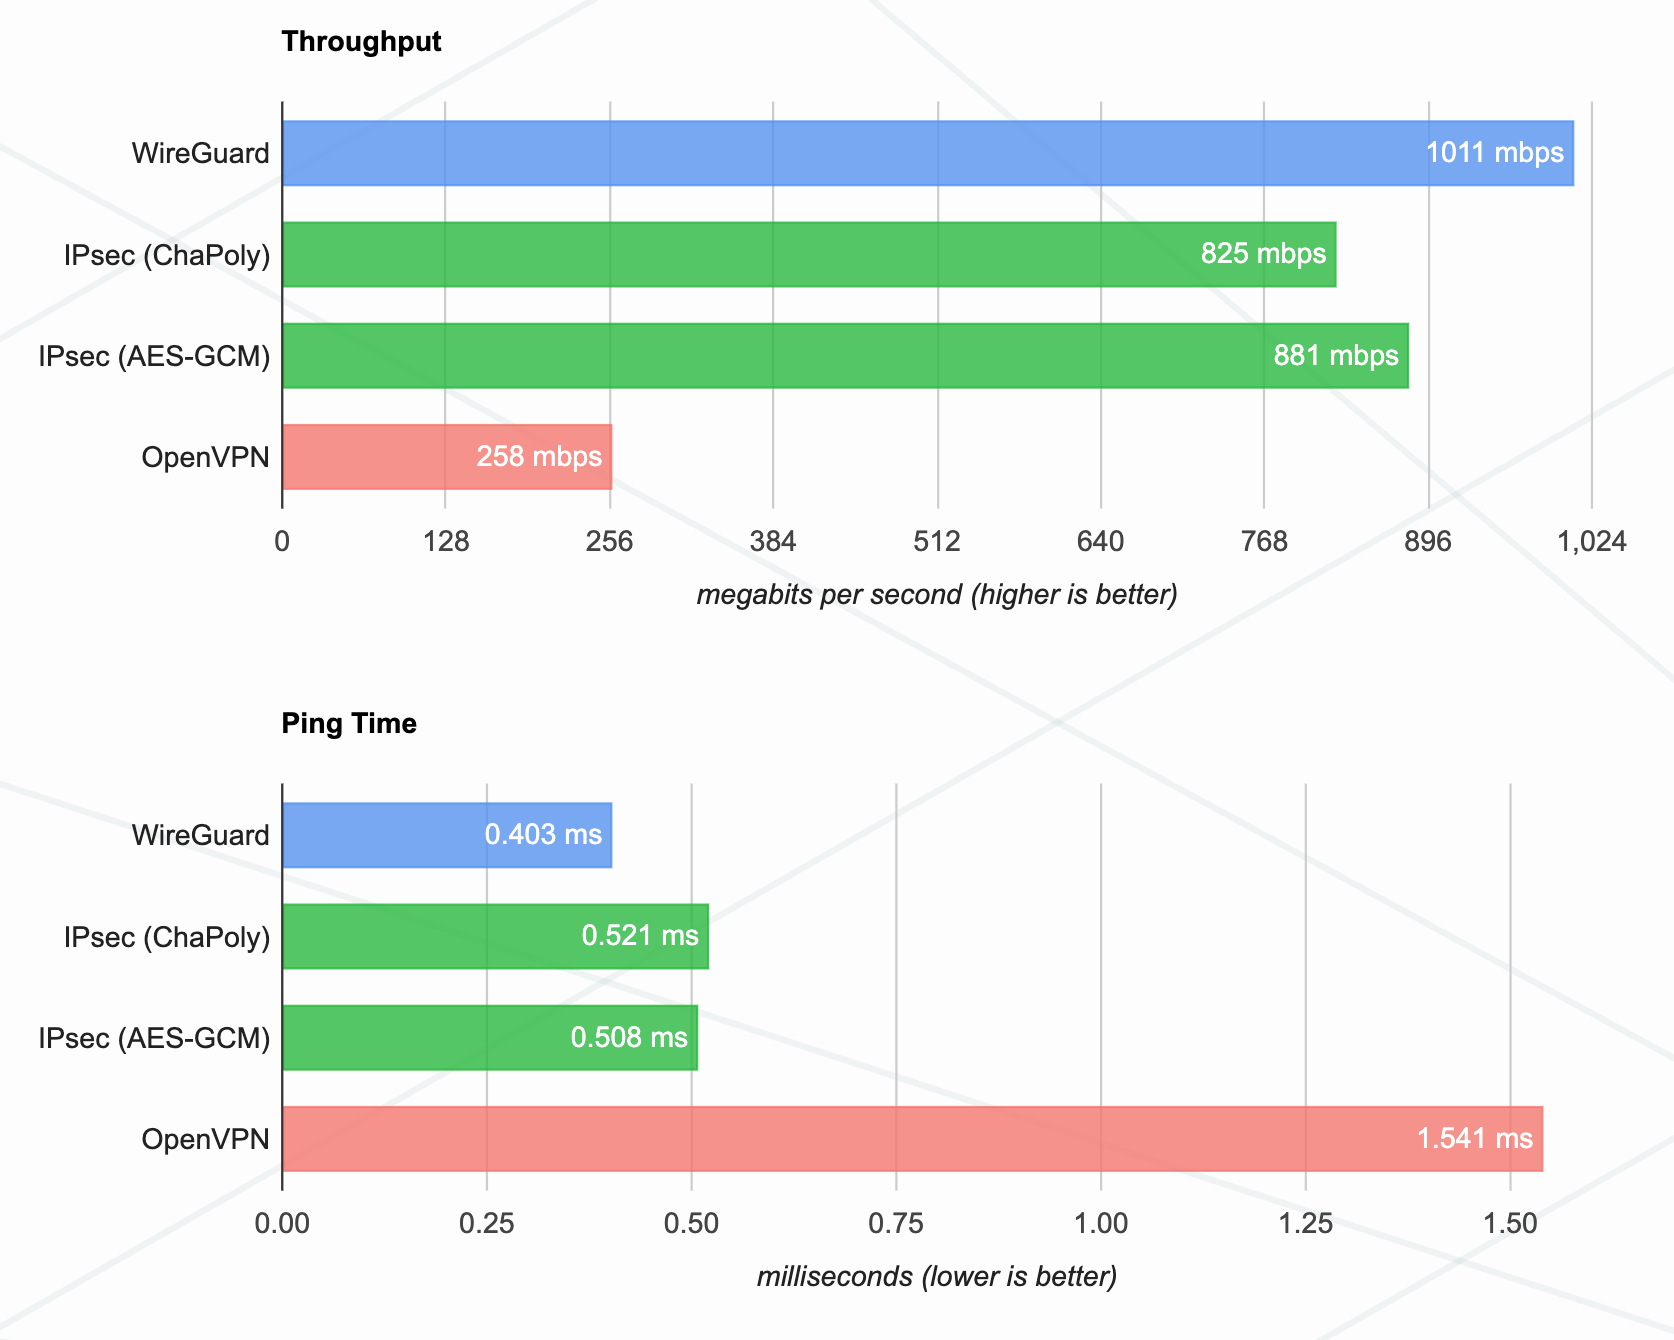
- As you can see from the photo:
- Throughput was 291% faster on WireGuard than on OpenVPN.
- Ping was 282% faster on WireGuard than on OpenVPN.
Limitation
note
- The following guide assumes that your VPN server IP won't change. If your service provider changes your public IP, you'll have to tweak the configuration file (for every client) with every new IP change.
- Alternatively, you could setup a Dynamic DNS for your VPN server, and even if the ISP changes your public IP, this won't affect your clients connecting to the VPN server. This is outside of the scope of this post.
VPN Definitions
- Server
- Any device where the VPN tunnel will be terminating to
- in my case...Pfsense firewall
- Client or Peer
- Any device that's going to be connecting to the Server
- in my case...iPhone, Macbook, and Windows PC
Pfsense Version
For this guide, I'm using Pfsense 2.6.0-release, this is based on FreeBSD 12.3-STABLE.
Setting up Wireguard on Pfsense
Install Wireguard Package on Pfsense
- Pfsense, system, package manager, available packages, search 'wireguard'
- I installed Wireguard 0.1.6_1
If you want to see the changelog, see github page.
Enable Wireguard on pfSense
- Pfsense, vpn, wireguard, settings, enable "enable"
Configure Tunnels
- Pfsense, vpn, tunnels, create tunnel
- description: remote access
- listen port: 51820
- interface keys, click on 'generate', which will generate a private key and a public key
- private key: aaaaaaaaaaaaaaaaaaaaaaaaaaaaaaaaa= (this is a secret key that must not be shared)
- public key: bbbbbbbbbbbbbbbbbbbbbbbbbbbbbbbbb= (you need to copy this and later paste into each client, such as iphone and macbook)
- interface addresses:
10.0.0.1/24(important) (must be .1 at the end) - save
- apply changes
Configure Rules
- pfsense, firewall, Rules,
- under "WAN" tab, click 'add to bottom'
- action: pass (default)
- interface: wan (default)
- protocol: udp (must change)
- source; any (default)
- destination: any (default)
- destination: port 51820 (must set)
- description: "Allow Wireguard Remote Access"
- save
- apply
- under 'Wireguard" tab, click 'add to bottom'
- protocol: any (was tcp by default)
- source: network and ip:
10.0.0.0(important)(must be .0 at the end) and /24 - description: "Allow Wireguard Remote Access 2"
Configure NAT
- pfsense, firewall, NAT, outbound tab
- change from "automatic outbound NAT" to "hybrid outbound NAT"
- click "add to bottom"
- address family: ipv4 (already default)
- source:
10.0.0.0/24(important) - save
- apply
Configure first peer (iphone) on pfsense
- pfsense, vpn, wireguard, peers, click "add peer"
- tunnel: select
tun_wg0 - description: iphone
- dynamic endpoint: dynamic
- keep alive: 30
- public key:
- we don't know this key yet...but you'll do this from your client device (iphone), then paste into this field
- allowed IPs:
/32for IPV4 (on iphone, under addresses:10.0.0.2/32(notice the .2 name)(since pfsense is already 10.0.0.1)
- tunnel: select
Configure WireGuard on iphone
- Install Wireguard for iPhone
- Open it
- Create a new tunnel
- Name:
wireguard_home - Click 'Generate Keypair' (which will generate a public and private key)
- Copy public key, and you'll paste that back into "pfsense, vpn, wireguard, peers, click "add peer""
- Addresses: 10.0.0.2/24
- Listen Port: (leave at automatic)
- MTU: (leave at automatic)
- DNS Servers:
- use either public (1.1.1.1) or I used my pihole (192.168.2.2) in order to filter all of wireguard's VPN traffic through it
- Under tab Peer (which is your pfsense)
- Public key: paste key from pfsense, vpn, wireguard, tunnels, public key
- Preshared key: (leave blank)
- Endpoint:
PUBLIC_IP_OF_YOUR_HOUSE:51820 - AllowedIPs:
0.0.0.0/0, 192.168.1.0/24- To allow all web traffic, you must add
0.0.0.0/0 - If you want to access any local machine on the
192.168.1.0/24network (say to access your pfsense located on 192.168.1.1), then you need to add this subnet to the allowed IPs
- To allow all web traffic, you must add
- Save
Configure second peer (macbook) on pfsense
- pfsense, vpn, wireguard, peers, click "add peer"
- tunnel: select
tun_wg0 - description: macbook
- dynamic endpoint: dynamic
- keep alive: 30
- public key:
- we don't know this key yet...but you'll do this from your client device (macbook), then paste into this field
- allowed IPs:
/32for IPV4 (on iphone, under addresses:10.0.0.2/32(notice the .2 name)(since pfsense is already 10.0.0.1)
- tunnel: select
Configure WireGuard on macbook
MacOS Step 1: Install Mac OS
Wireguard has an official app for Mac OS. Open on MacOS
MacOS Step 2: Setup MacOS Client
- Open Wireguard, Select Add emptry tunnel
- You'll see the automatically generated client public and private keys.

- Copy the public key,
ccccccccccccccccccccccccccccccccccccccccccc=- which you'll need to paste into pfsense (where it says public key for that peer)
- Paste in the following code after the
PrivateKey:
So the full code looks like this:
[Interface]:
- PrivateKey =
ffffffffffffffffffffffffffffffffffffffffffff=(this was auto-generated) - Address =
10.0.0.3/24(I used for my macbook, since I've already used10.0.0.2/24for my iPhone) - DNS =
1.1.1.1(I chose a public IP of Cloudflare to make it easy) (you could use a local DNS server like Pihole as well. see my notes at the end of this article)- note: if you forget to include this DNS line, websites might not be routable
[Peer]:
- PublicKey =
ccccccccccccccccccccccccccccccccccccccccccc=(which is my Pfsense server's public key) - AllowedIPs =
- To allow all web traffic, you must add
0.0.0.0/0 - If you want to access any local machine on the
192.168.1.0/24network (say to access your pfsense located on 192.168.1.1), then you need to add this subnet to the allowed IPs
- To allow all web traffic, you must add
- Endpoint =
Your_Home_Public_IP:51820(your home's public IP and port51820we setup previously)
MacOS Step 3: Setup Peer in Pfsense
- pfsense>VPN>WireGuard>Peers>Add
- Paste into public key the public key from step 2.
ccccccccccccccccccccccccccccccccccccccccccc=
- Name it:
My_Macbook(or whatever else helps you identify the device) - Allowed IPs:
10.0.0.3/24 - Save
- Paste into public key the public key from step 2.
MacOS Step 4: Restart WireGuard Service on Pfsense
caution
I've experienced a problem when I added a new client (called peer) to Pfsense Wireguard Server, and when I connected the VPN tunnel from the client. The VPN tunnel connected, but none of the websites were working.
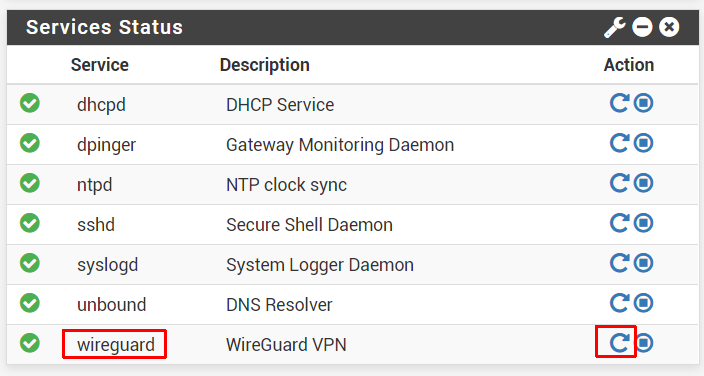
The fix? Go to pfsense, dashboard, click on restart (clock-wise arrow) on Wireguard to restart it.
How to ping machine's over the PN
- You can ping IPs with no issues (like 192.168.1.1)
- To ping hostnames, ping
pfsense.mylocal(which is the FQDN)(since hostname ispfsenseand domain ismylocal)
UPDATE:
- I've read reports online that suggest the following setup:
- Client must use
/32subnet (but not/24subnet). - Server must use
/24subnet.
- Client must use
- I've tested with client/server using
/24(as per my article) and with new proposed setup of client/32and server/24...and they both worked!
Conclusion
WireGuard VPN is awesome!